Let's face it, photo editing isn't everyone's forte—yet getting photos right is a key part of being able to present products well and turn them into sales.
We've previously covered the inkFrog image editor as an overview, but we thought it might be useful to provide some visual illustrations to help users that aren't familiar with common photo editing terms.
Here are some examples of what each of the most commonly-used inkFrog photo editing tools actually does.
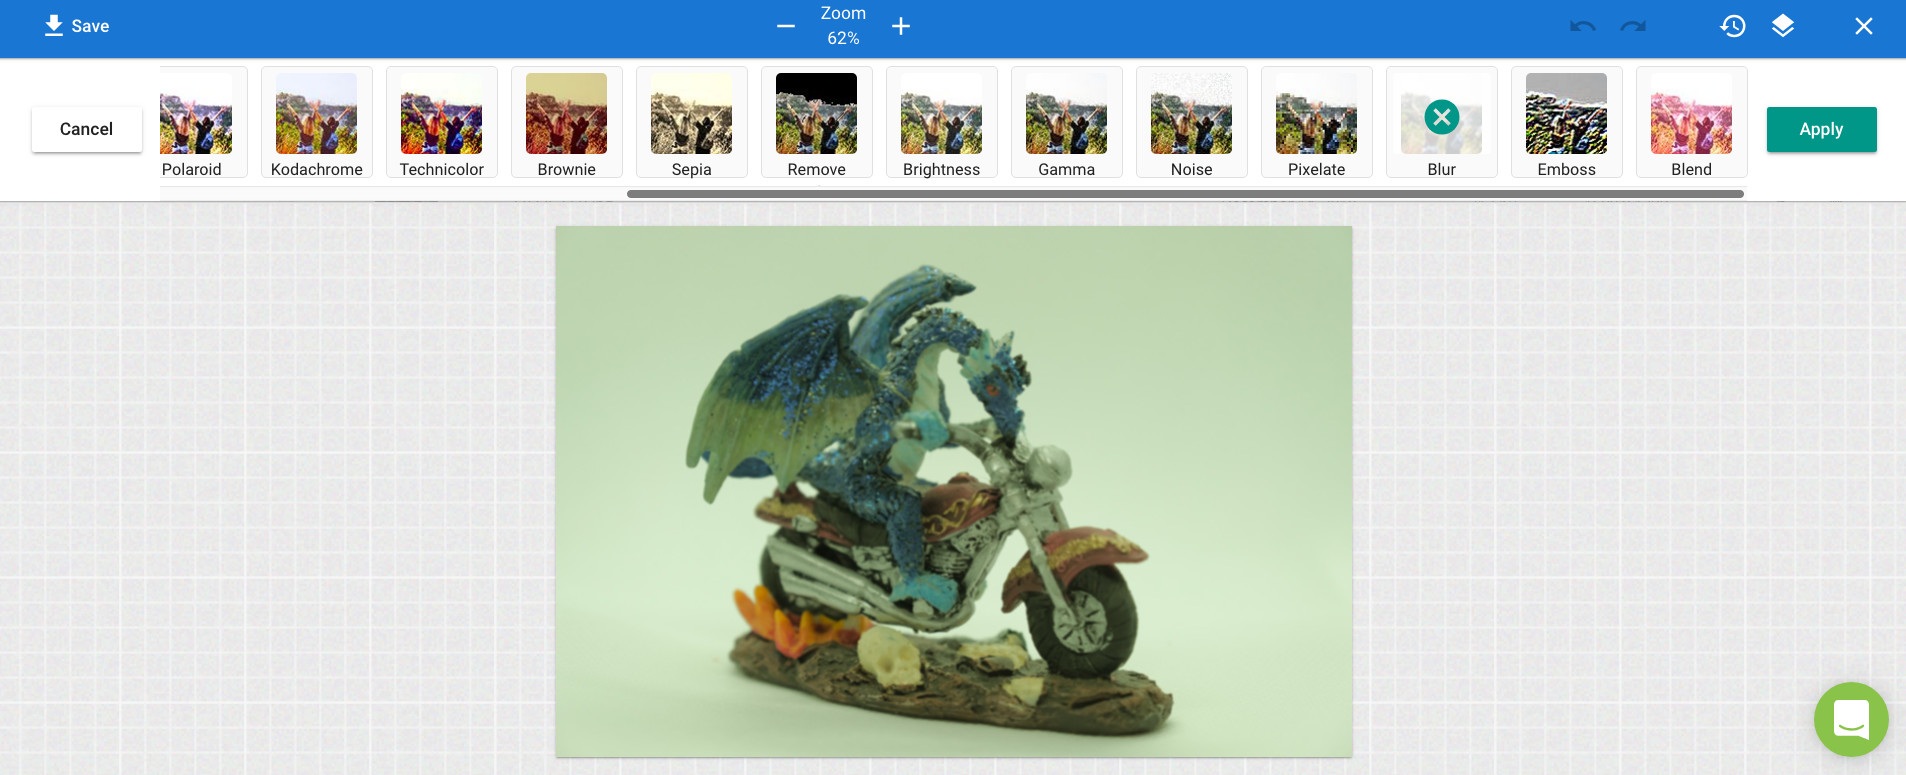
Our Original Image
Let's start with a basic product image. In real life, we'd set out to get the camera's exposure, white balance, and other basic settings a bit more bang-on than this before taking the photos—but for illustration purposes, this image will do just fine.
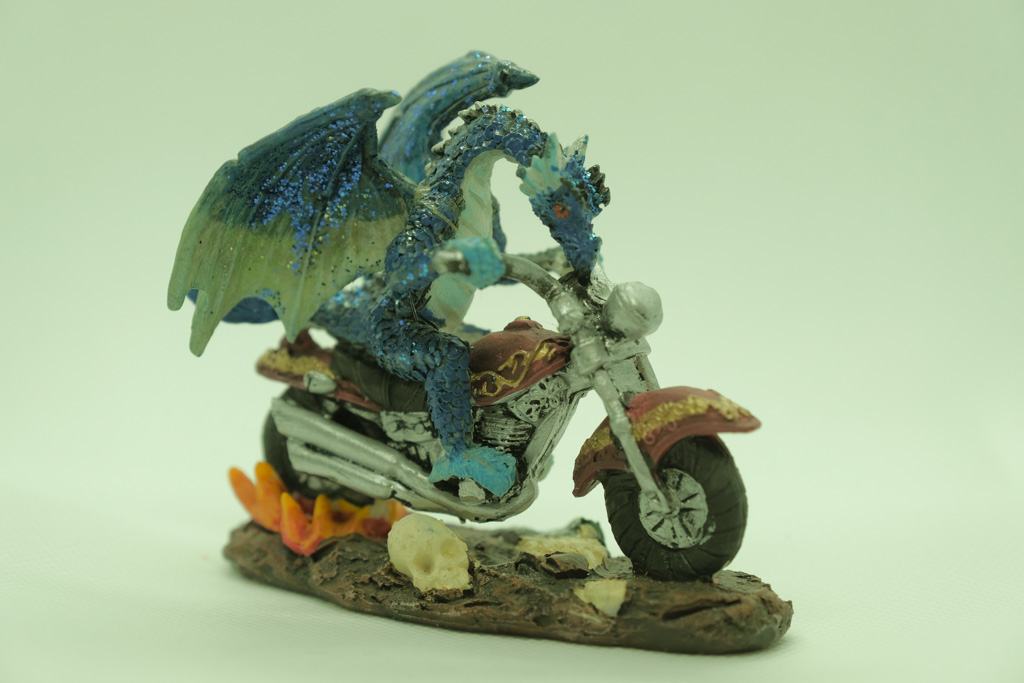
Here we go!
The Editor View
Immediately after opening the editor, you'll see the image you've opted to edit along with a toolbar that leads to the other features we'll be talking about below.
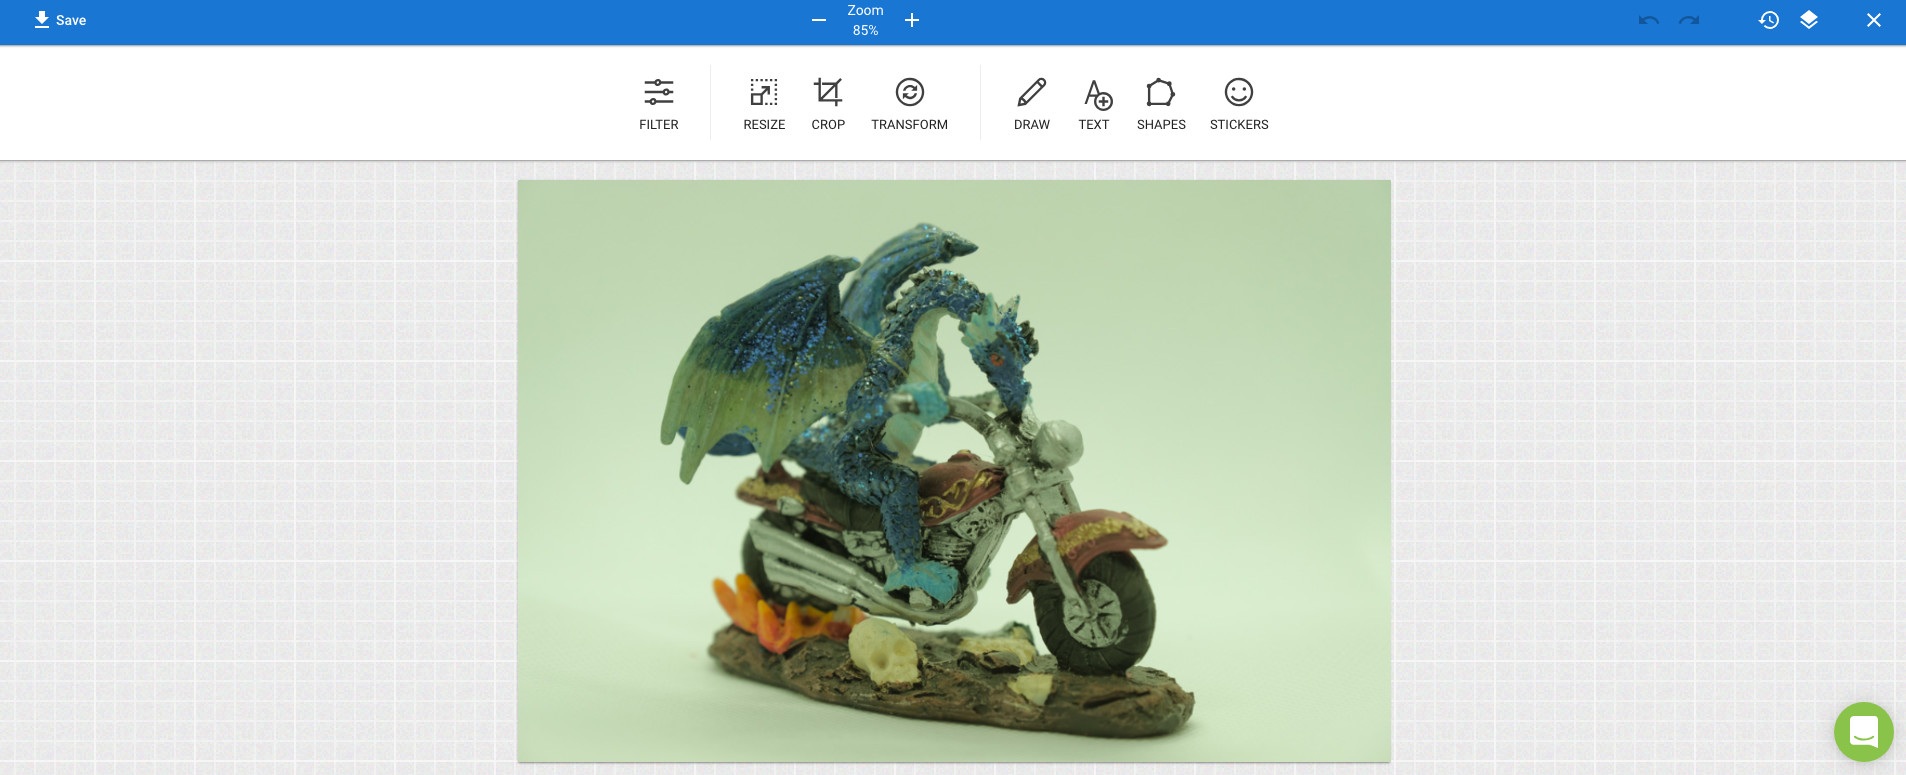
From left to right, the options available to you in the default view are:
Filter
Resize
Crop
Transform
Draw
Text
Shapes
Stickers
Because the "Filter" option leads to a number of additional tools, we're going to start by illustrating the others first, starting with "Resize."
Resize
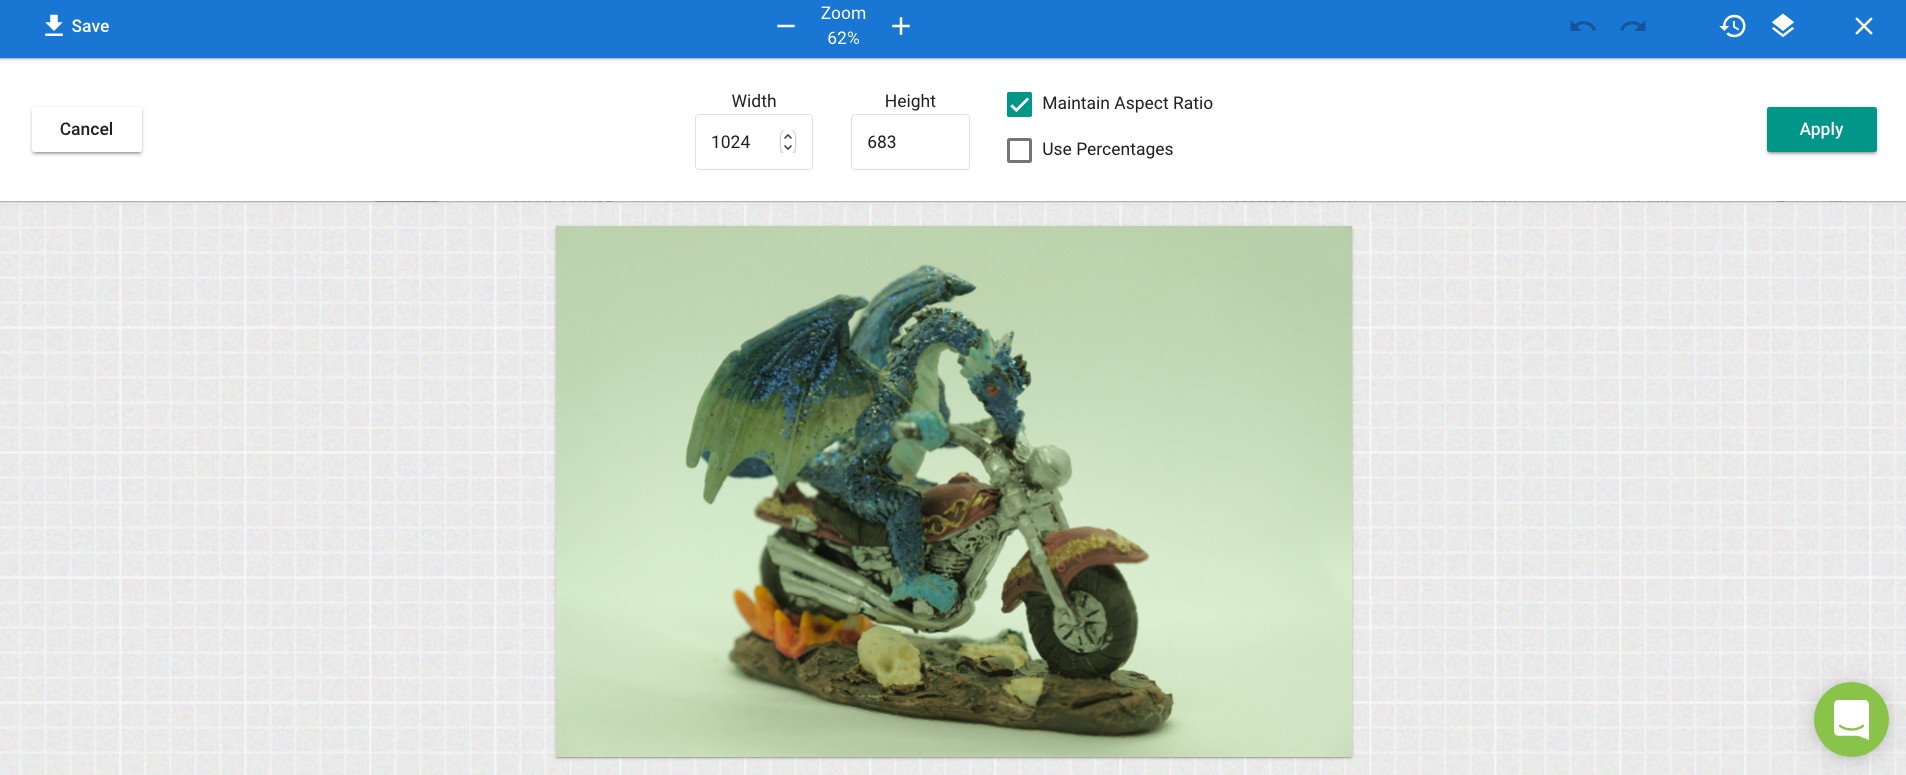
Use the "RESIZE" tool to change the size of your image. Note that this may not change the size at which eBay displays your image, but it will change the amount of information that your image contains, for example to enable faster loading.
Crop
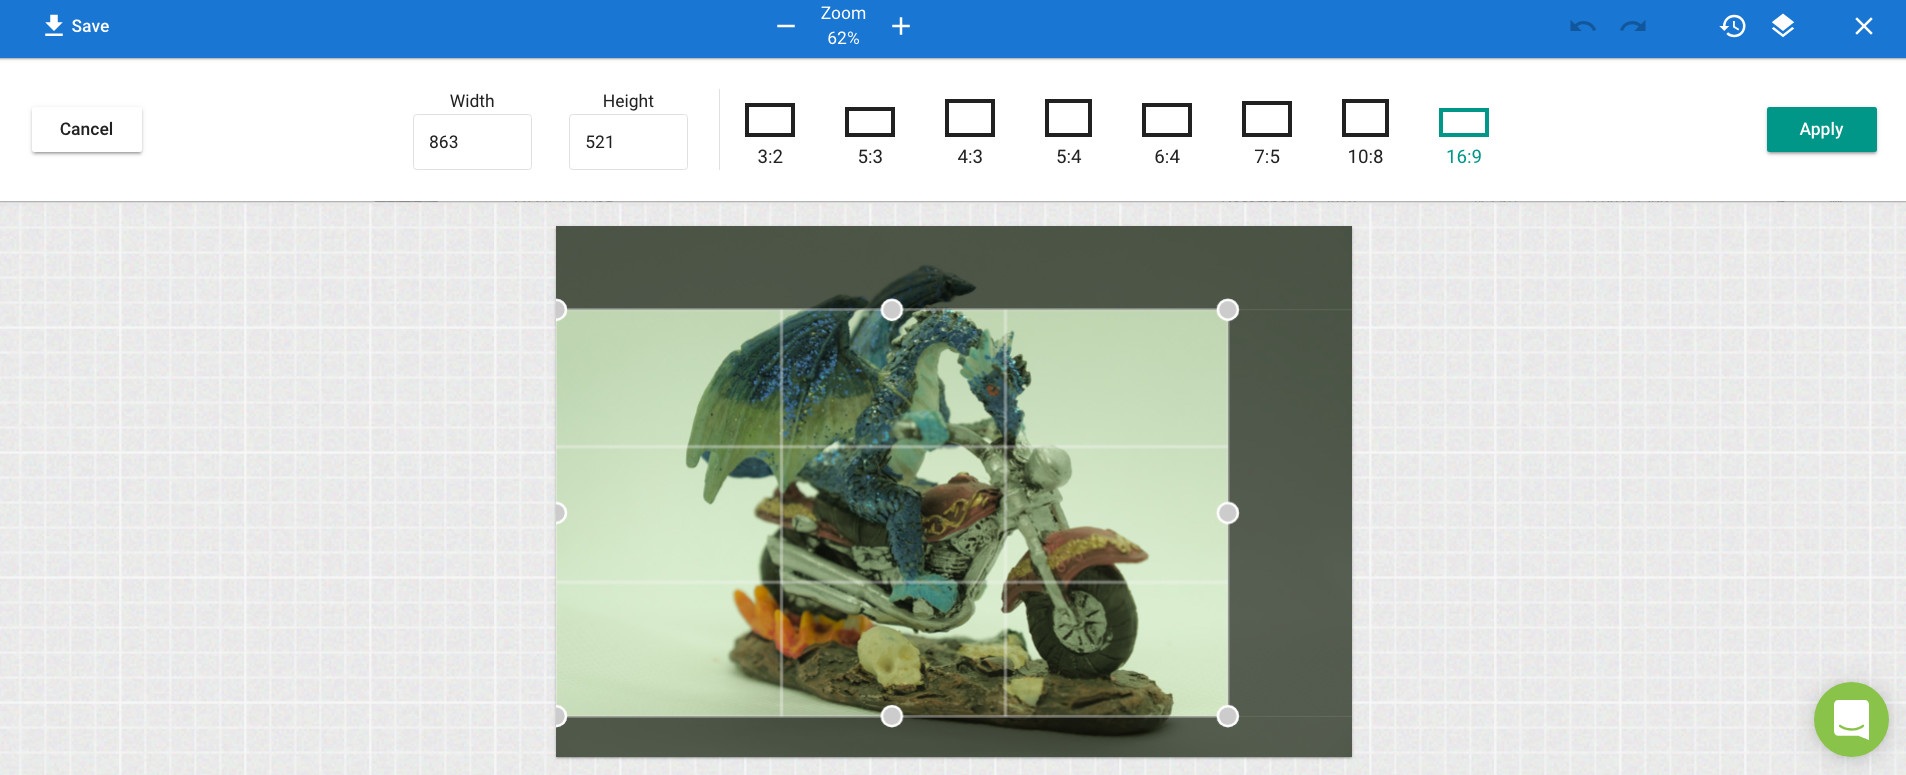
Use the "CROP" tool to remove edges of your image that are unnecessary. Think of it as a way of "trimming" your image.
Note the availability of a number of common sets of image dimensions across the top row. Click on any of these to automatically trim your image to a particular rectangular shape.
Transform
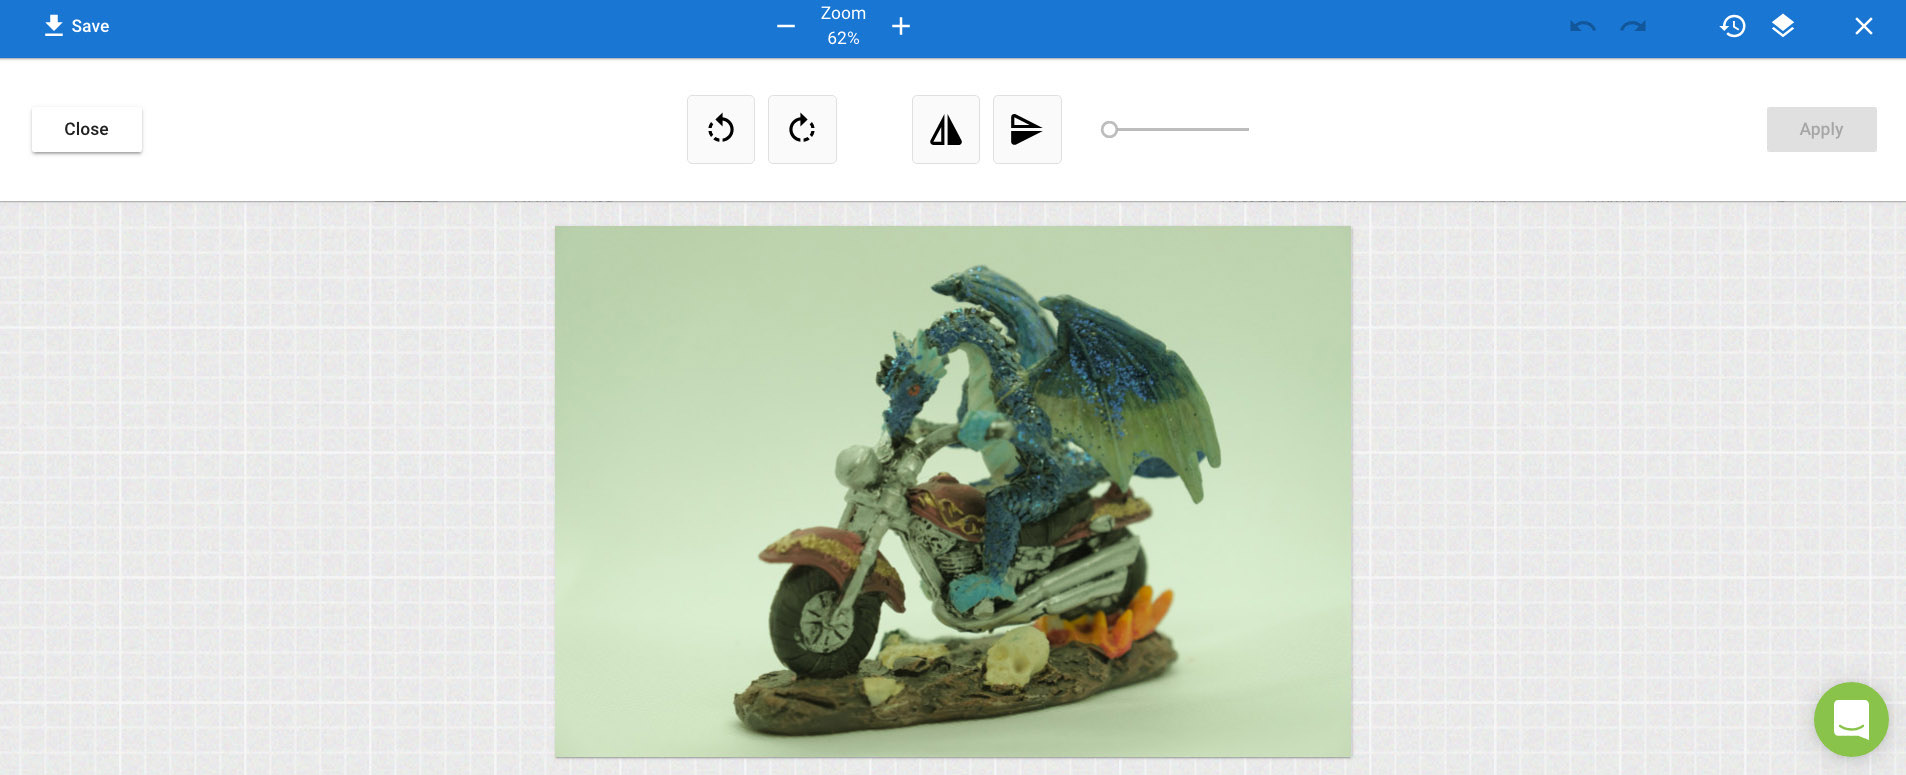
Use the "TRANSFORM" tool to flip or rotate your image. The two circled arrow icons will rotate your image by 90 degrees in either direction. The two other buttons flip your image horizontally or vertically.
Use the slider to rotate your image arbitrarily to any angle.
Draw
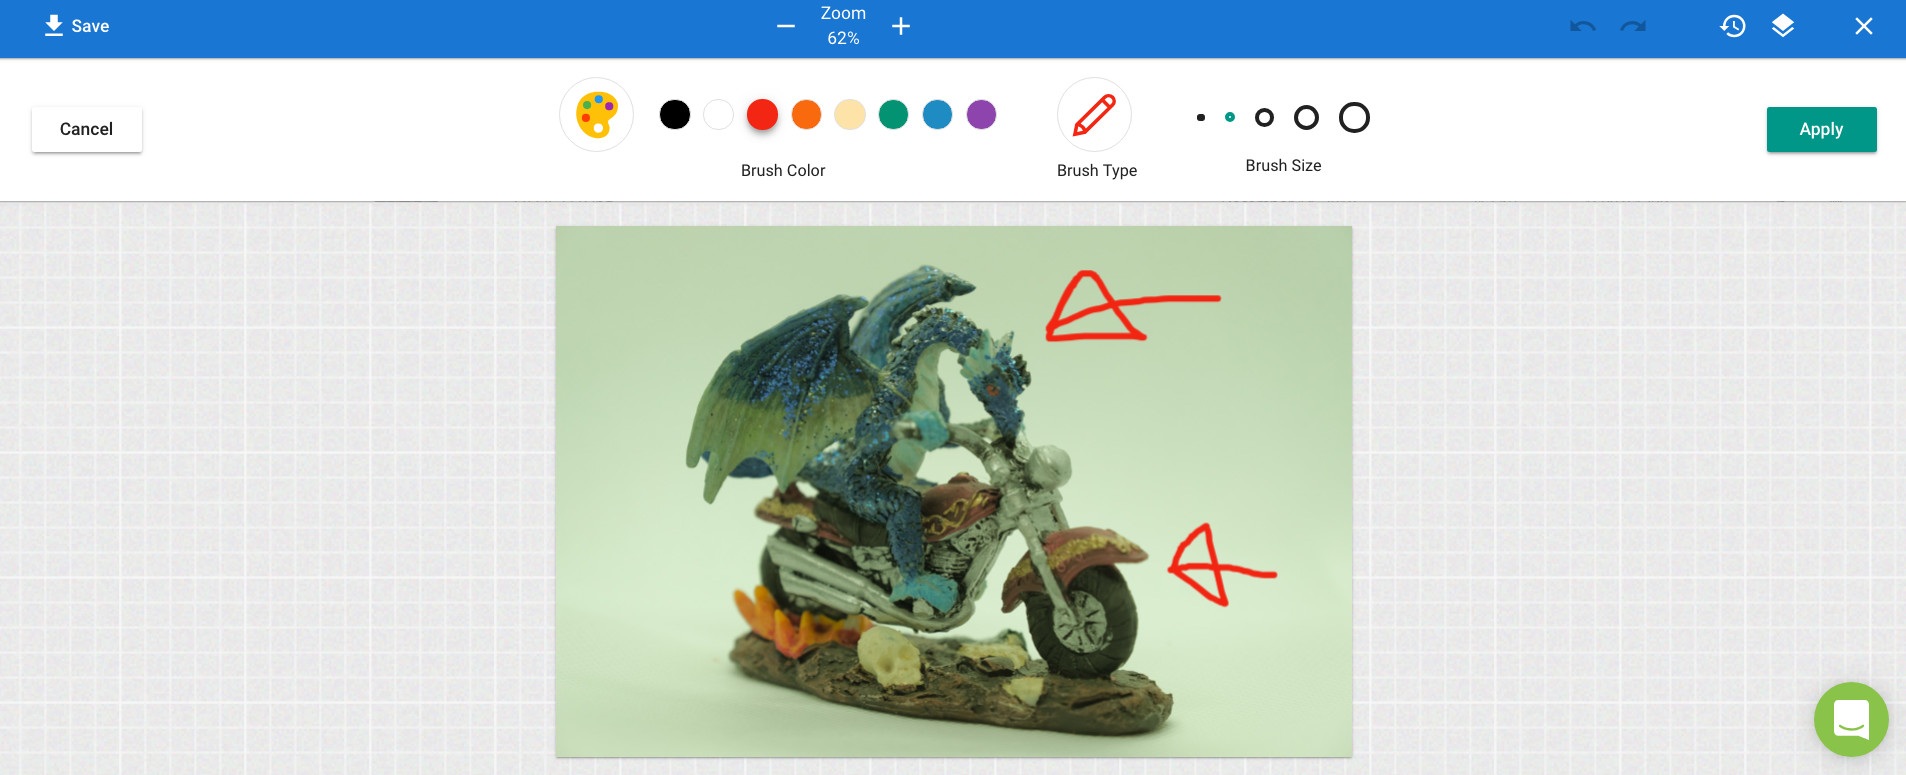
Use the "DRAW" tool to draw freehand on your image, for example to call out or circle important things for shoppers to notice.
Text
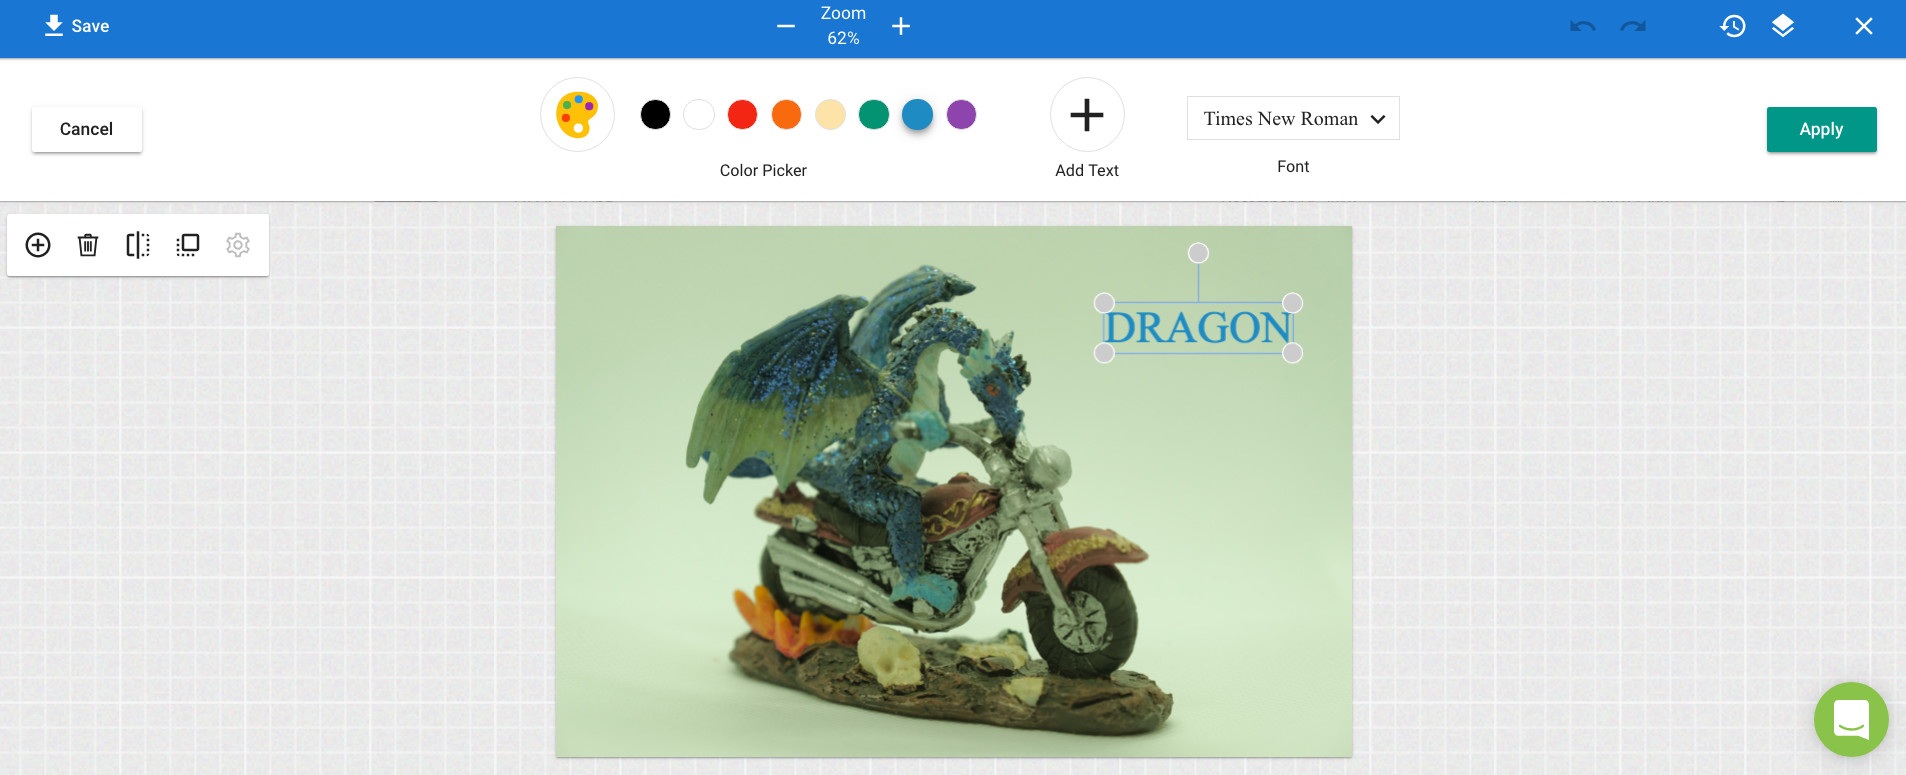
Use the "TEXT" tool to add typed text to your image. Remember not to use this to add contact information for your business, as this runs against eBay rules and can result in suspension.
Shapes
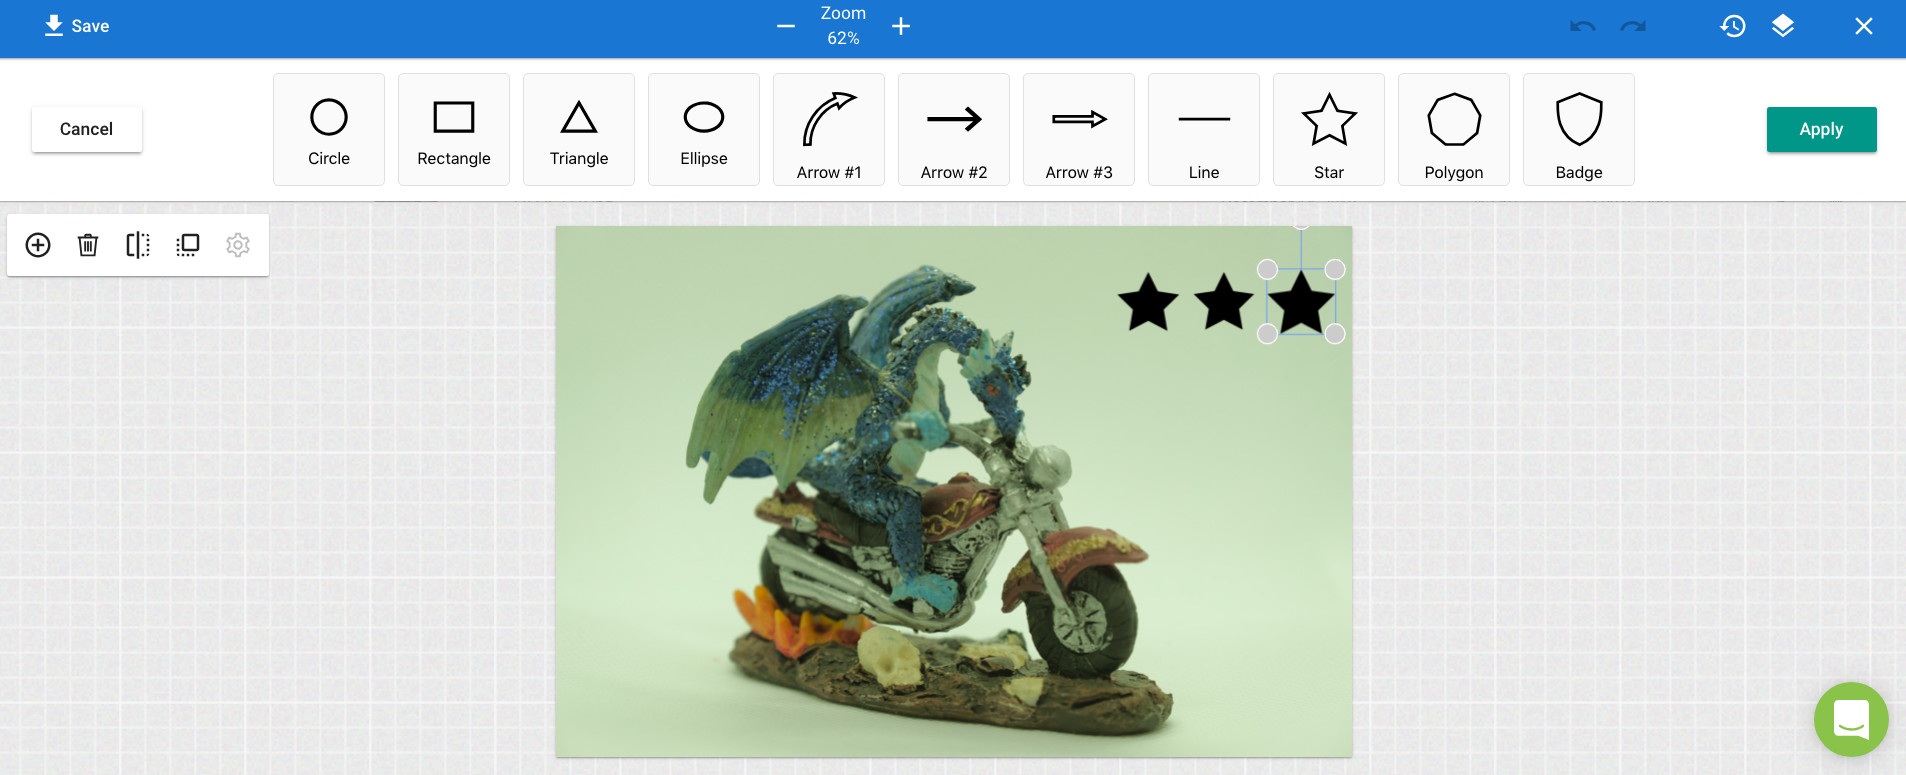
Use the "SHAPES" tool to add pre-defined shapes to your image. Click on a shape icon to add the shape, then click on the shape in your image to resize it or drag it to a new position.
Stickers
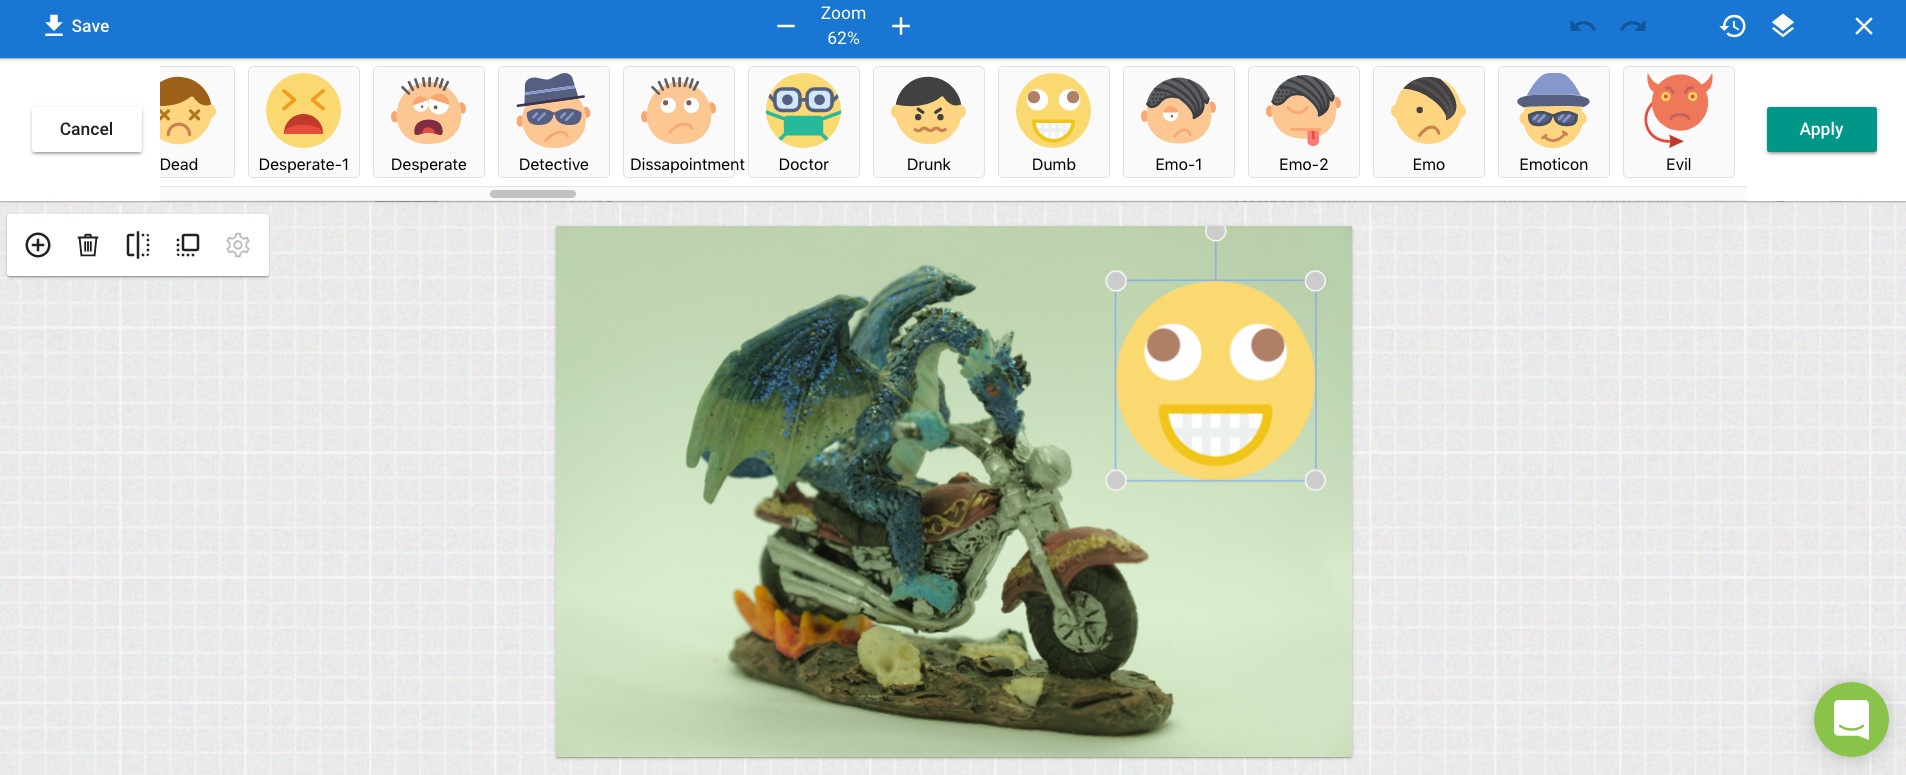
Use the "STICKERS" tool to add stickers to your image from a very large pre-defined set of clip art and emoticons.
Filter (18 Additional Tools)
Clicking on "Filter" opens a new menu containing 18 additional tools that affect your image's colors, brightness, sharpness, or other visual characteristics. Here are illustrations of how each of them affects your images, along with a brief explanation in each case.
| FILTER → GRAYSCALE |
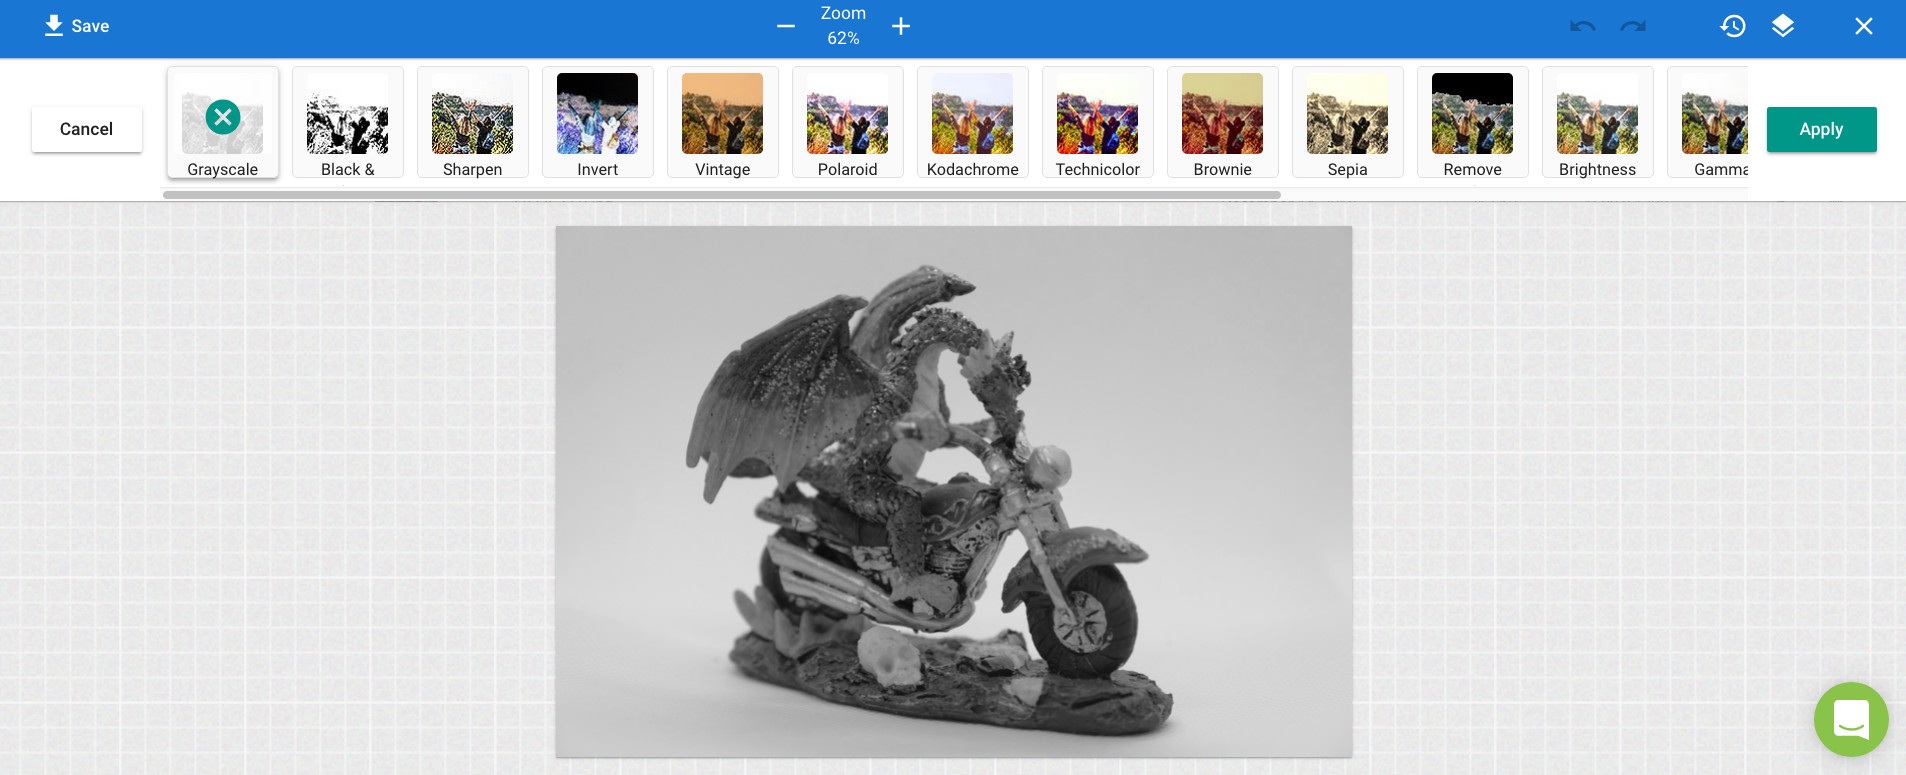
Use the "Grayscale" tool to remove all color information from your image, rendering it only in shades of gray.
| FILTER → BLACK & WHITE |
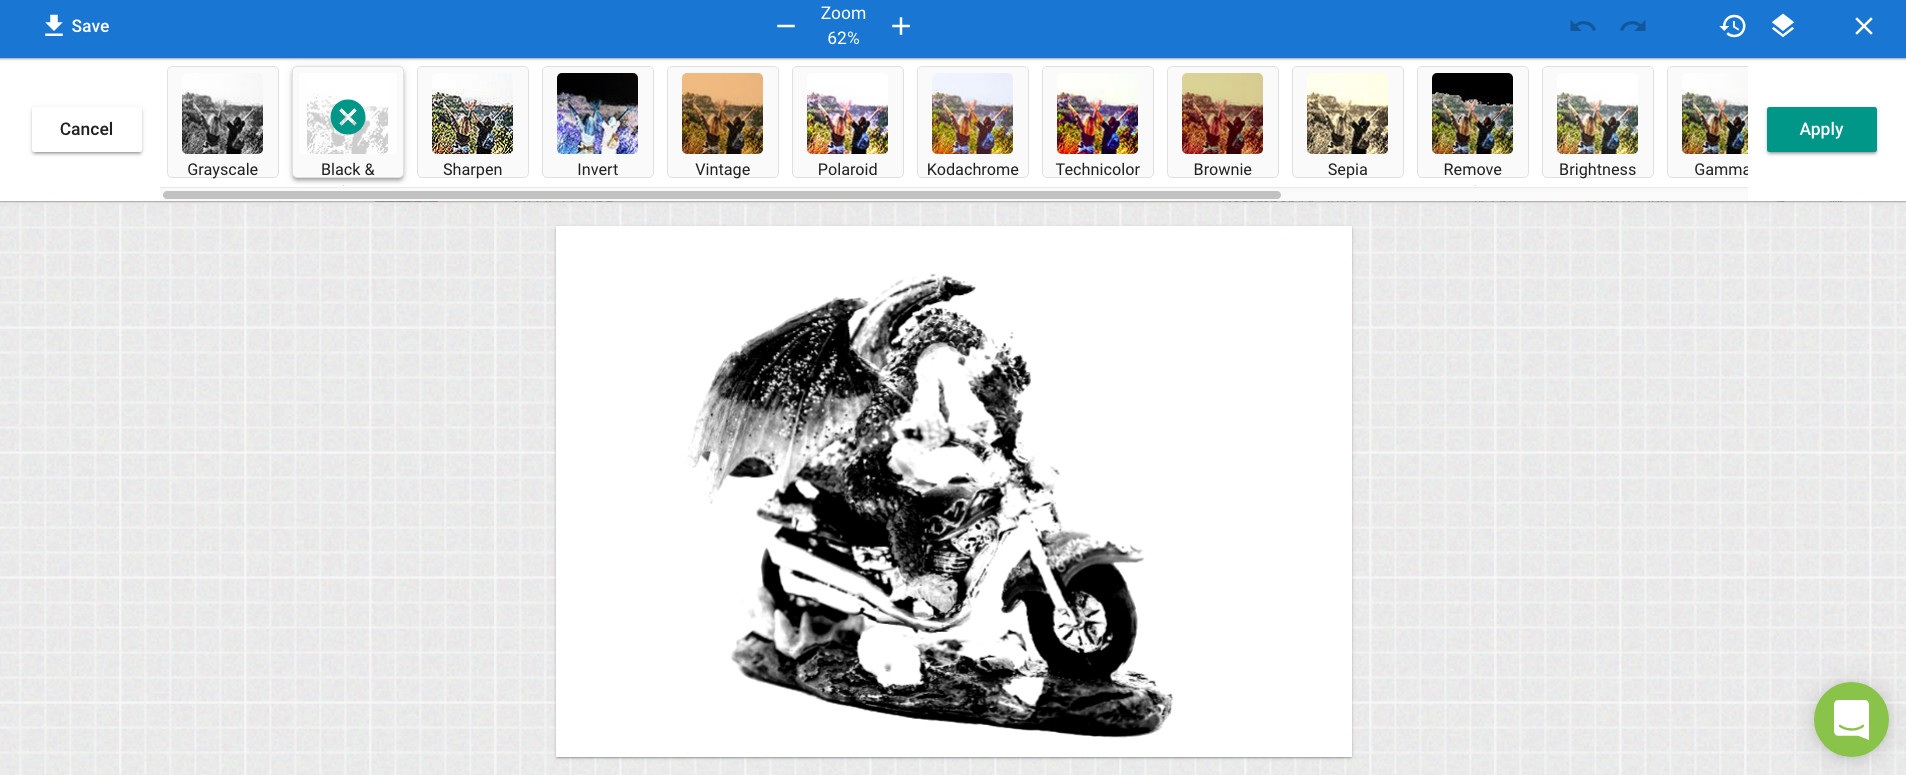
Use the "Black & White" tool to reduce your image to a true black and white image—only two colors, black and white, no shades of gray.
| FILTER → SHARPEN |
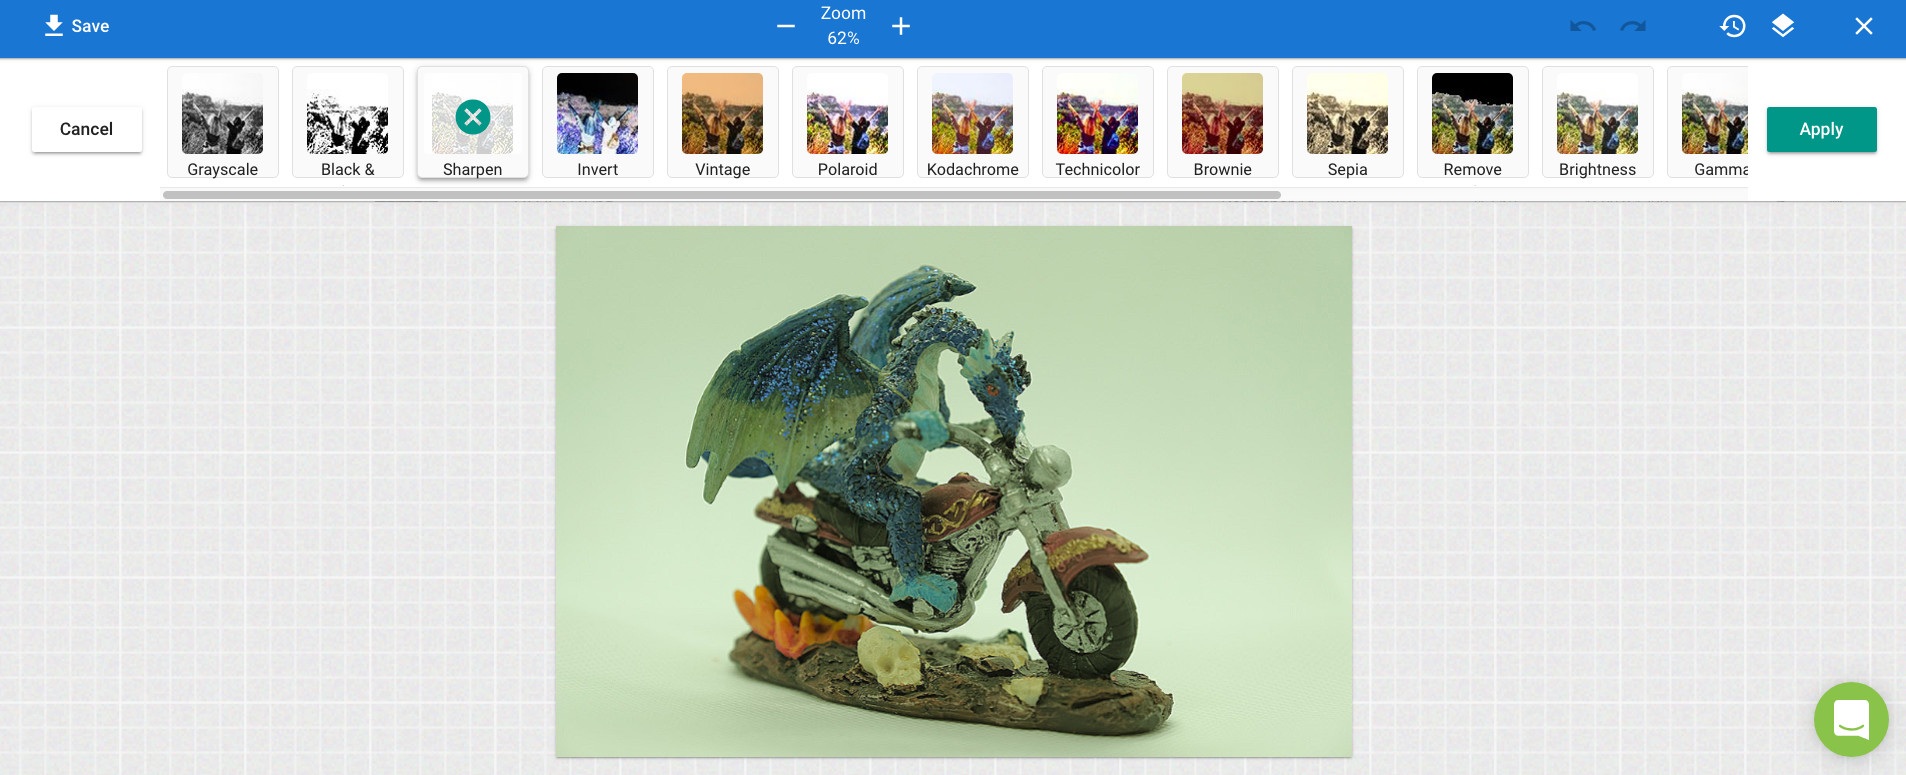
Use the "Sharpen" tool to automatically sharpen the edges of objects in your image, to enhance clarity and visibility.
| FILTER → INVERT |
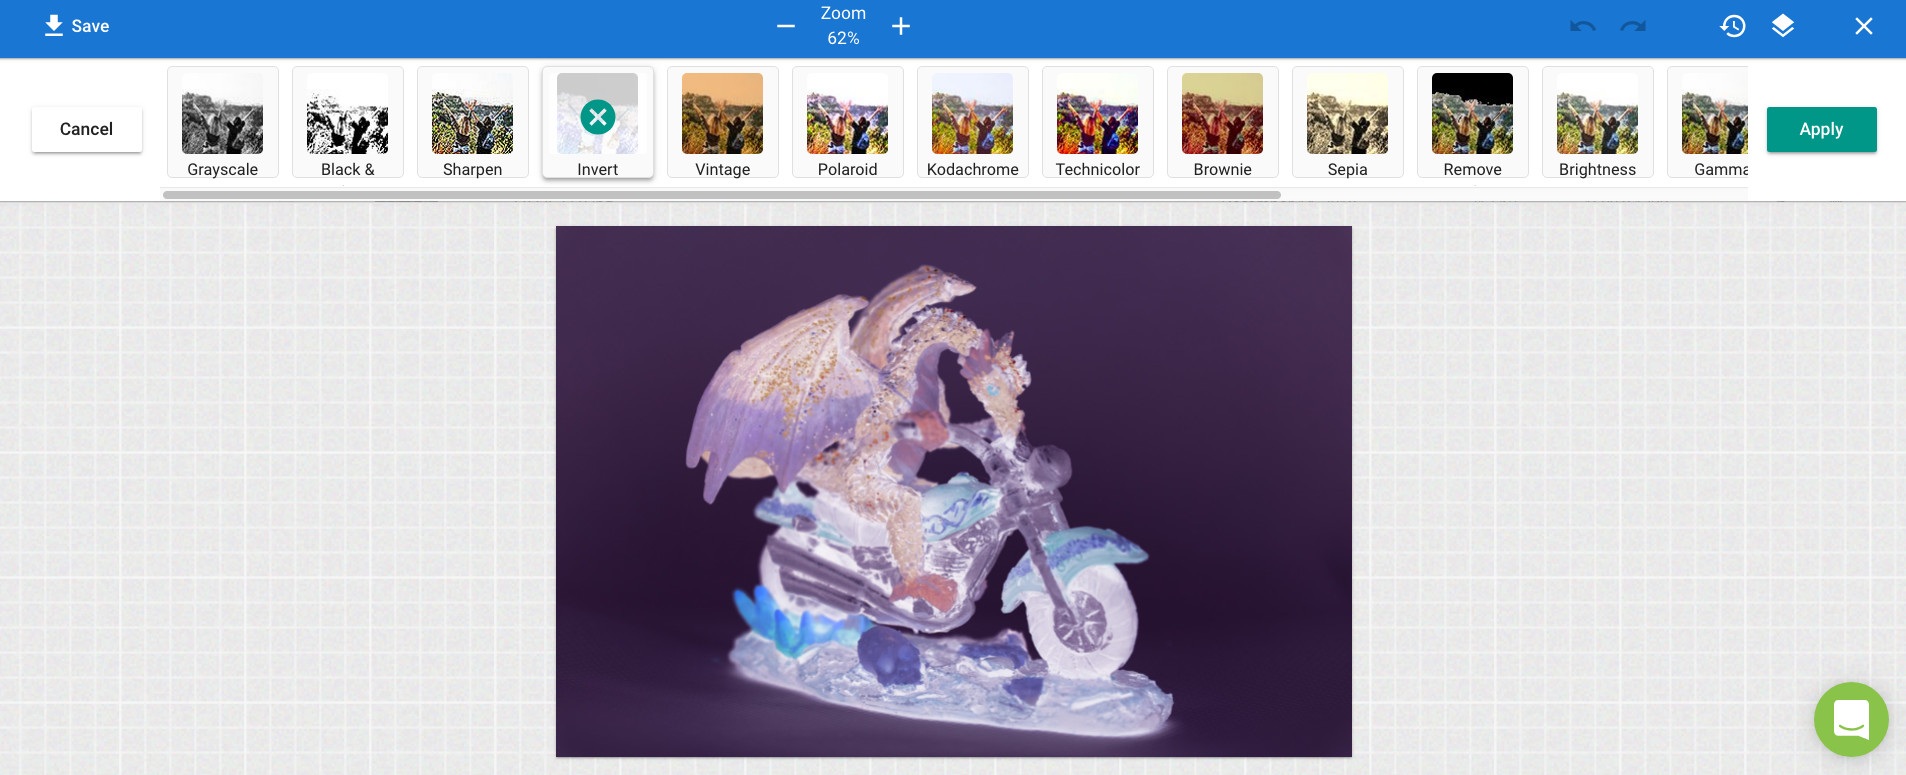
Use the "Invert" tool to invert the colors in your image, producing a "negative" of the original image.
| FILTER → VINTAGE |
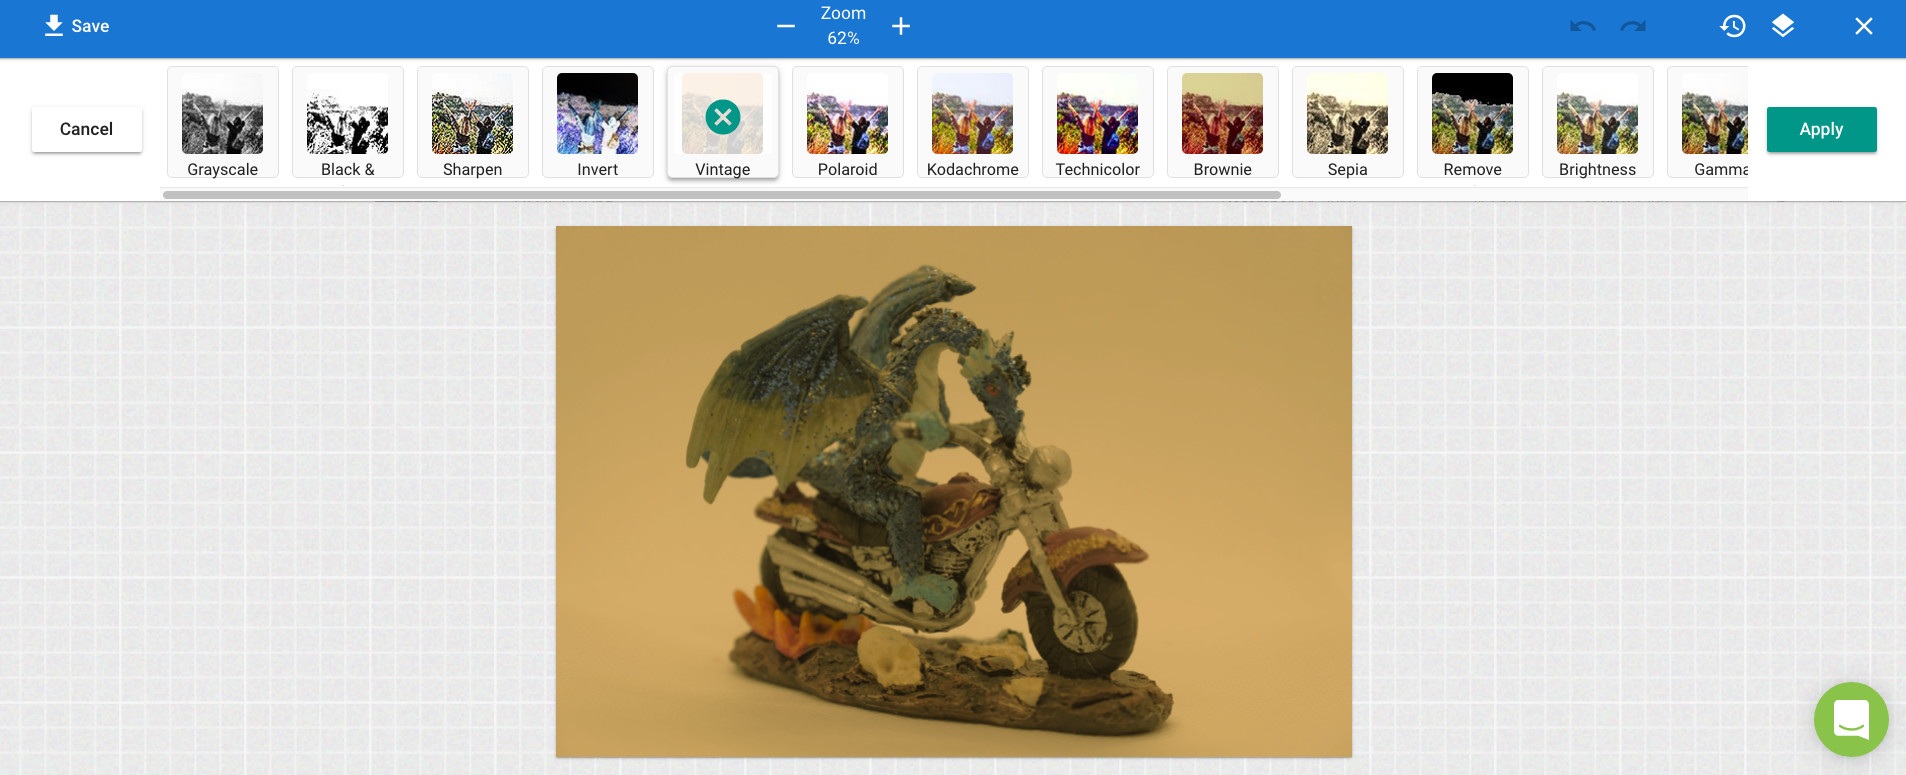
Use the "Vintage" tool to simulate an old, yellowed, faded photograph (or old, yellowed, faded goods).
| FILTER → POLAROID |
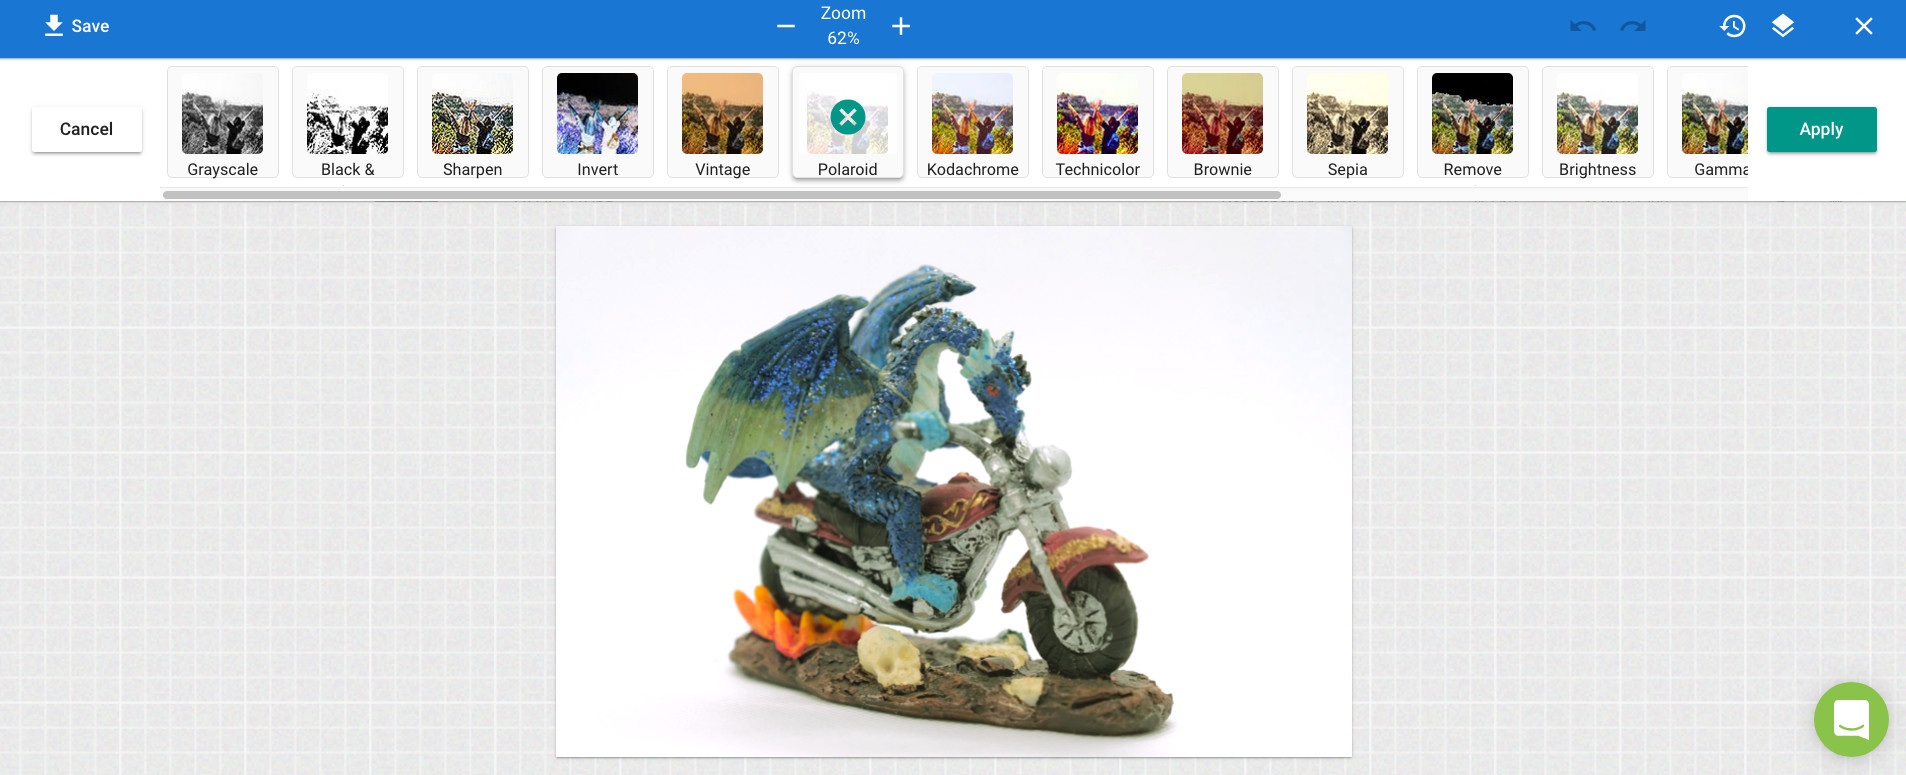
Use the "Polaroid" tool to imitate the exposure and color characteristics of Polaroid camera film.
| FILTER → KODACHROME |
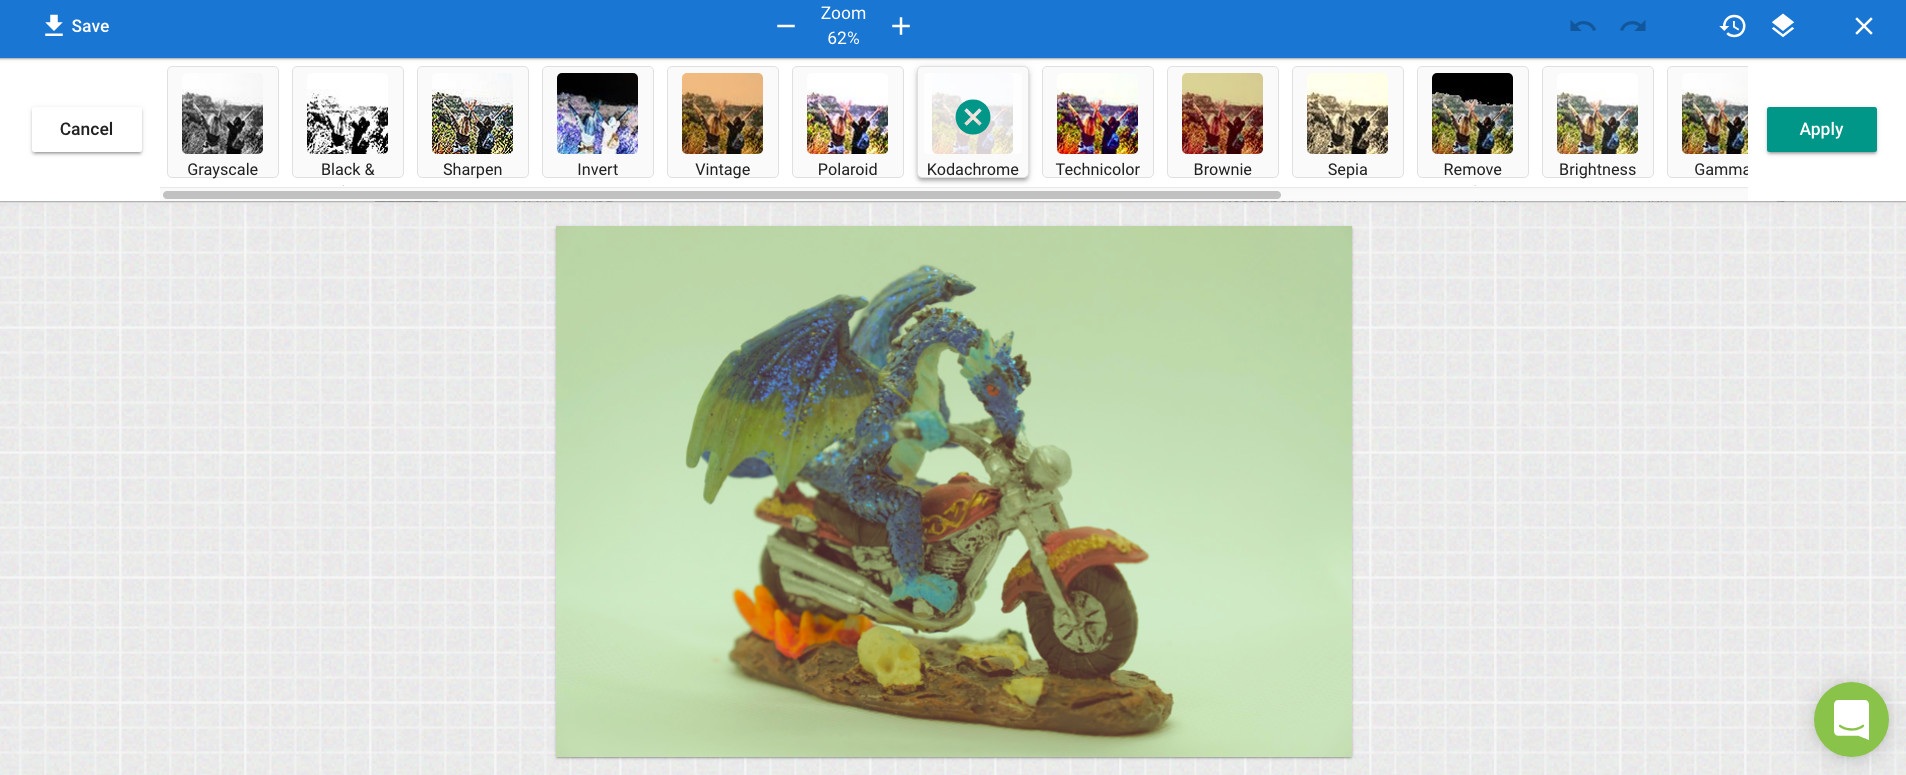
Use the "Kodachrome" tool to imitate the exposure and color characteristics of Kodachrome camera film.
| FILTER → TECHNICOLOR |
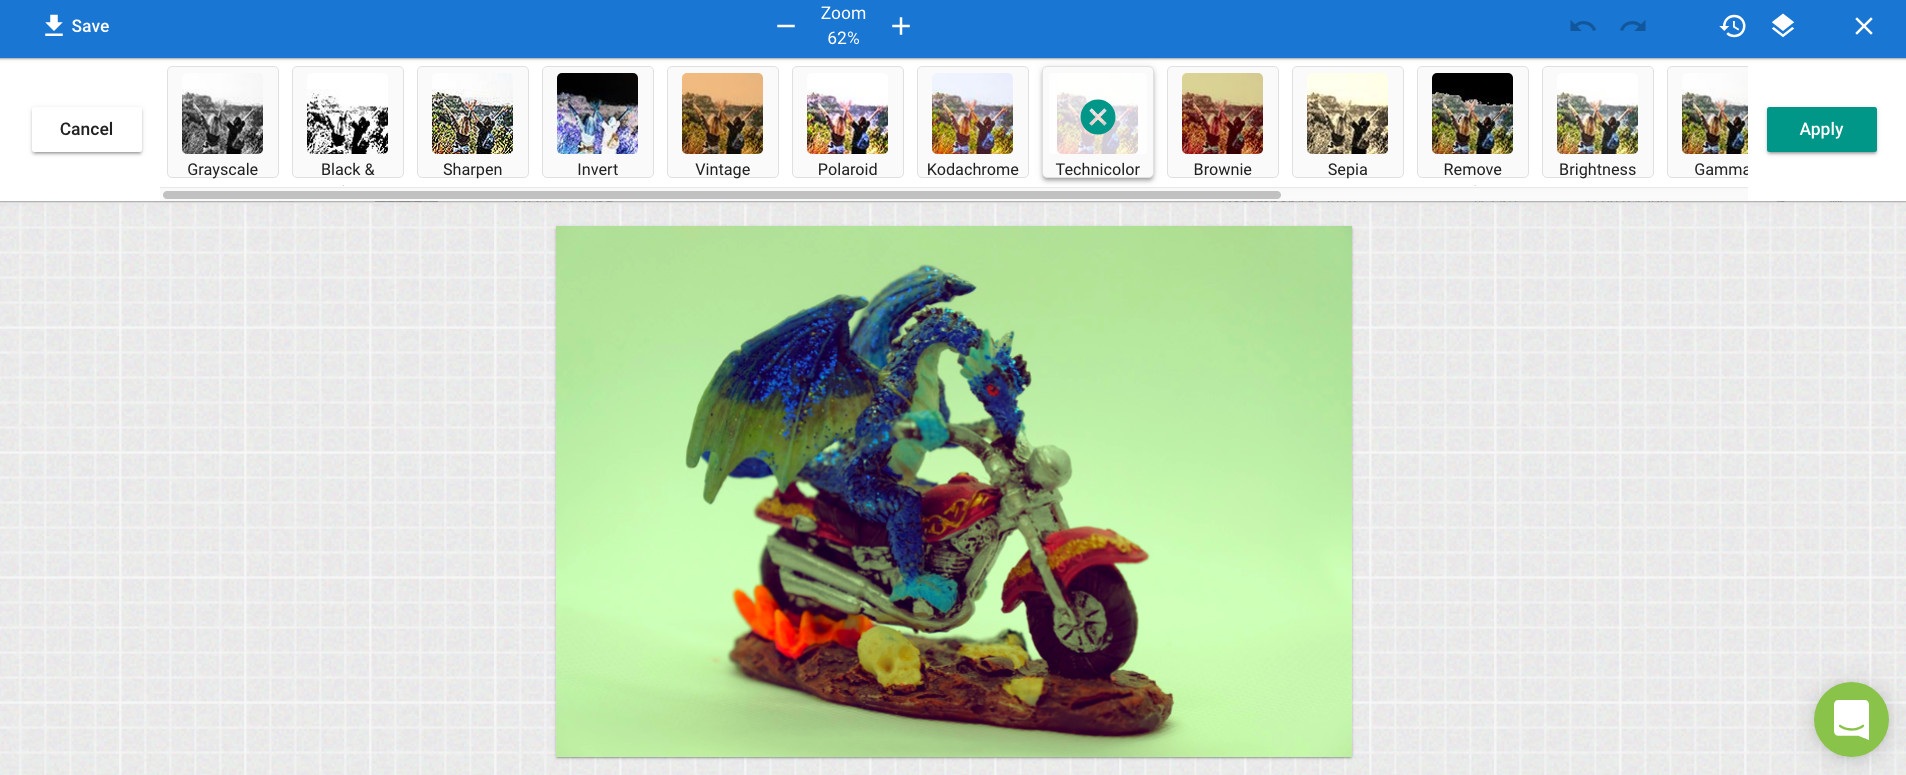
Use the "Technicolor" tool to significantly enhance the intensity of all the colors in your image.
| FILTER → BROWNIE |
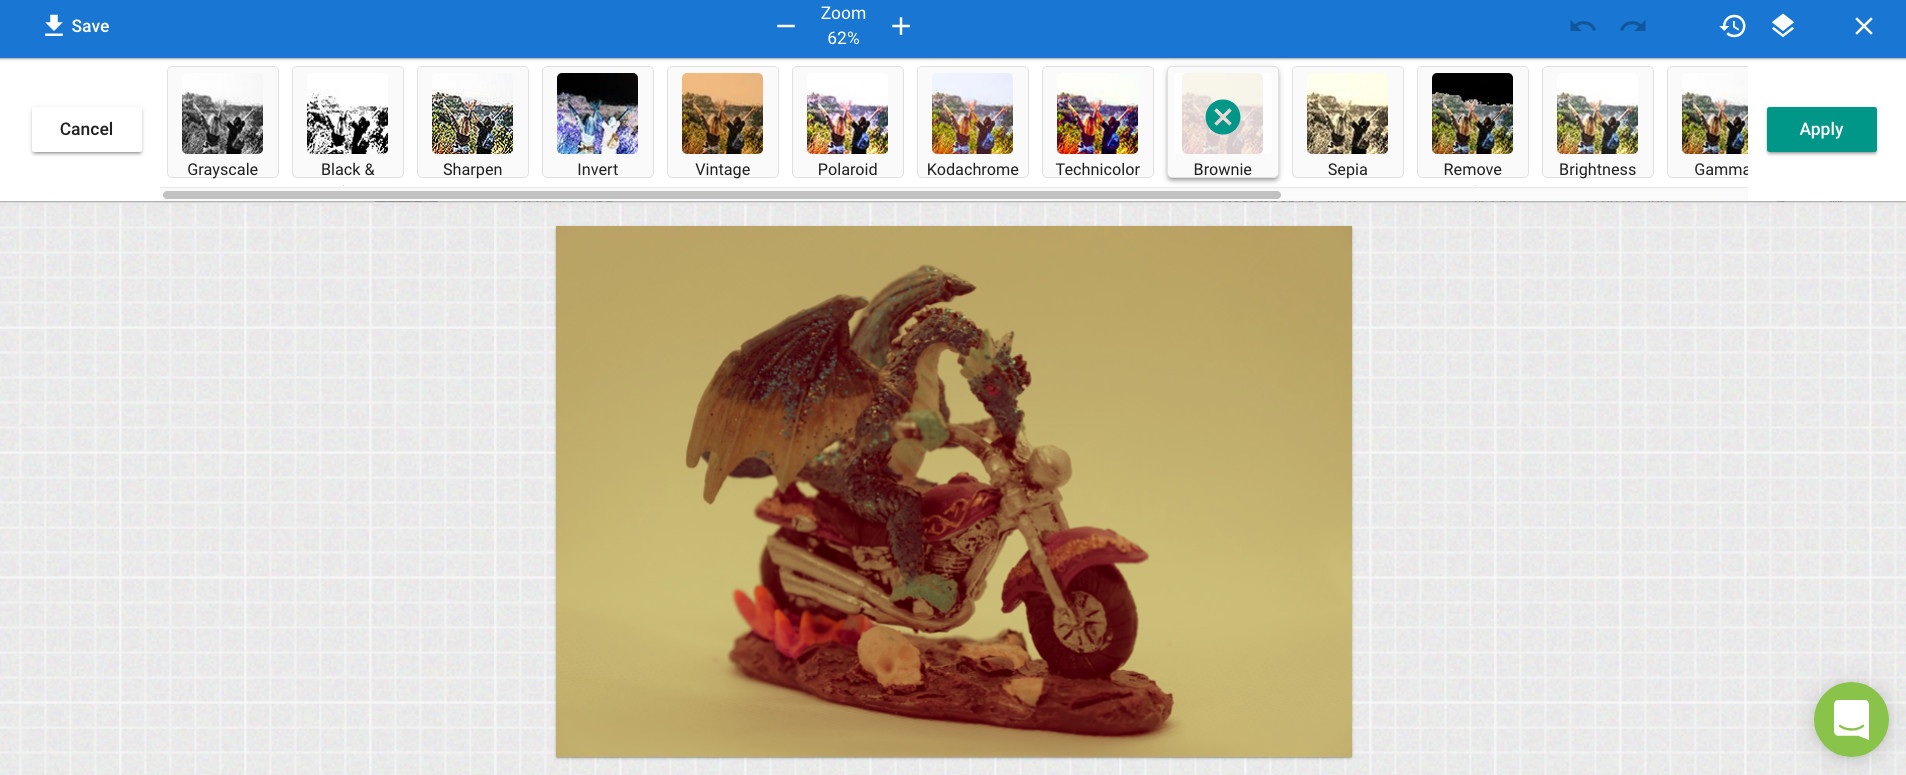
Use the "Brownie" tool to shift all of the colors in your image slightly, toward a dim brown color.
| FILTER → SEPIA |
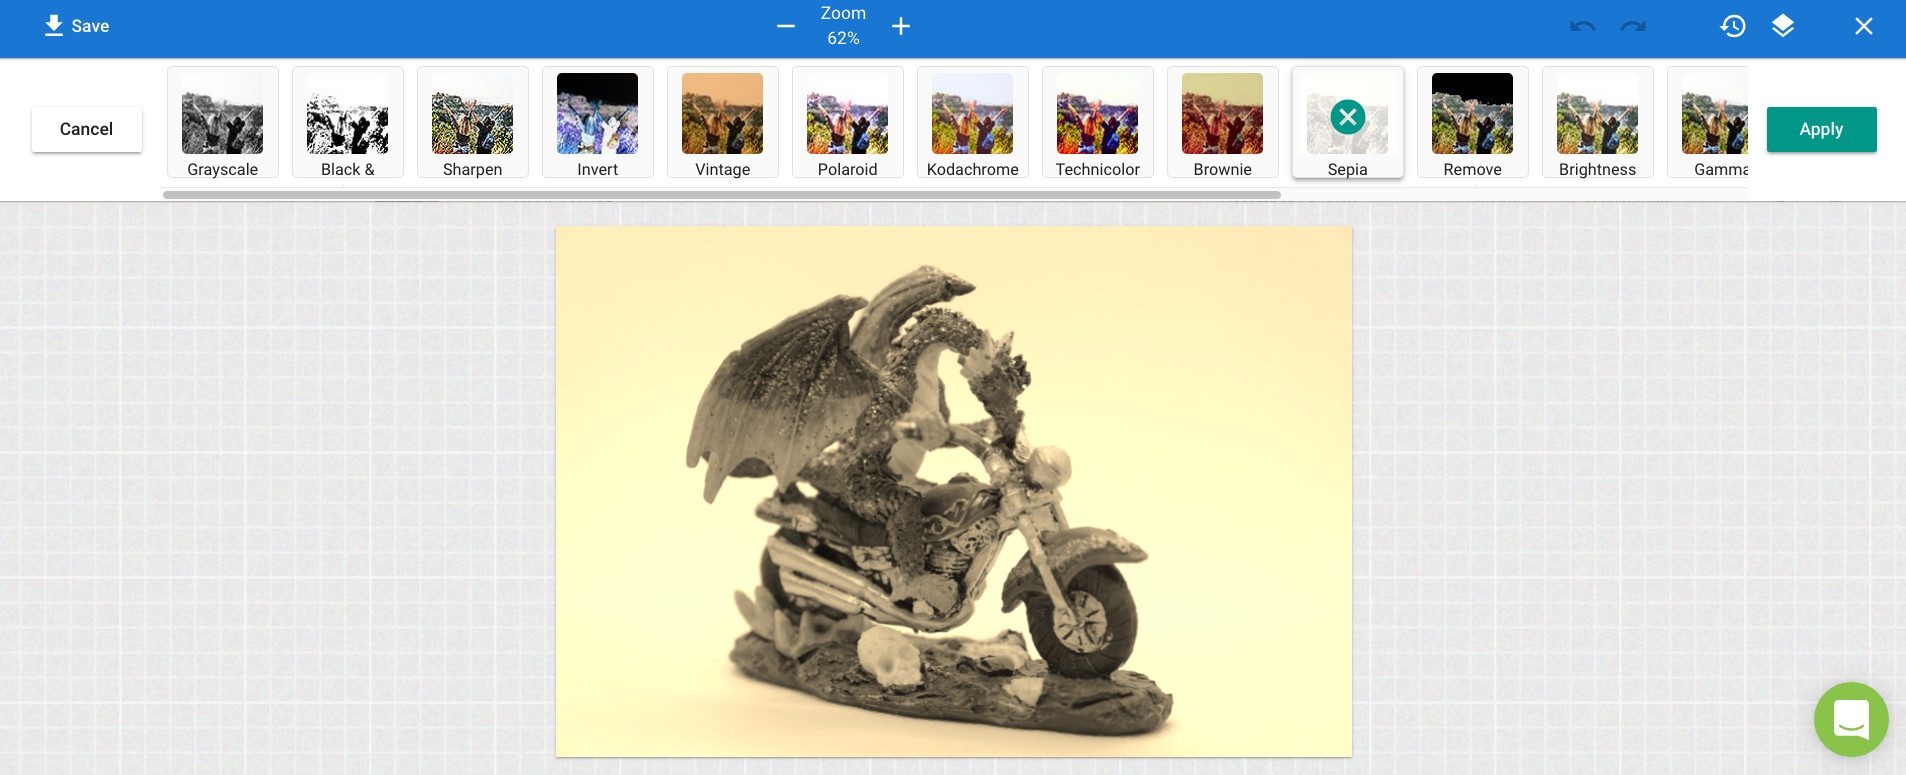
Use the "Sepia" tool to simulate the look of a sepia-colored vintage film print.
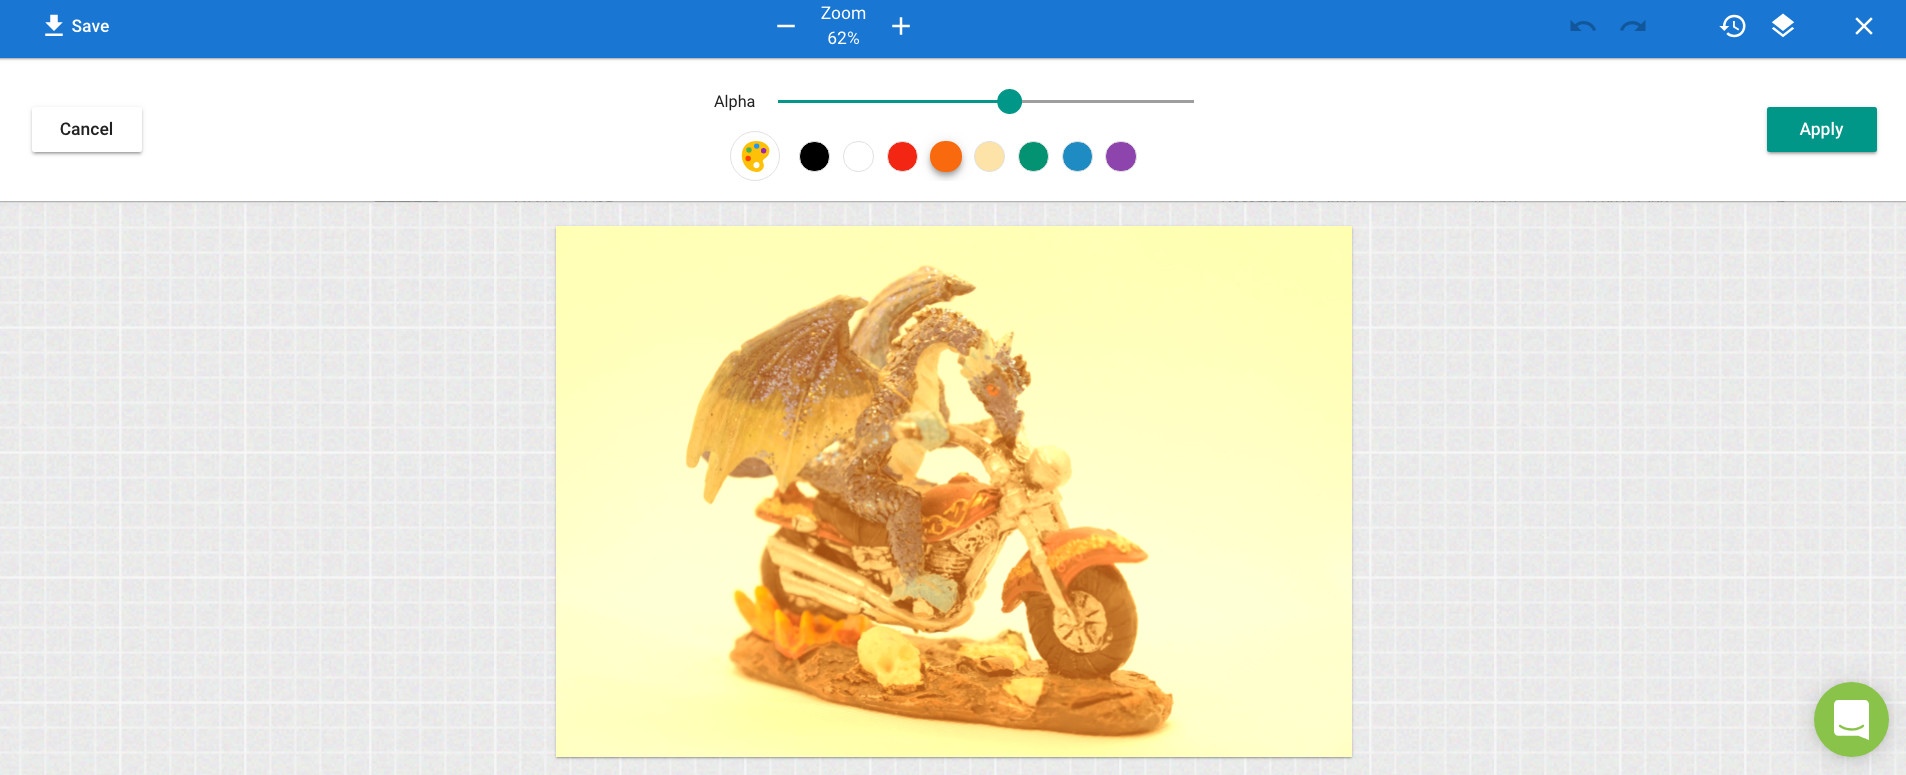
| FILTER → REMOVE |
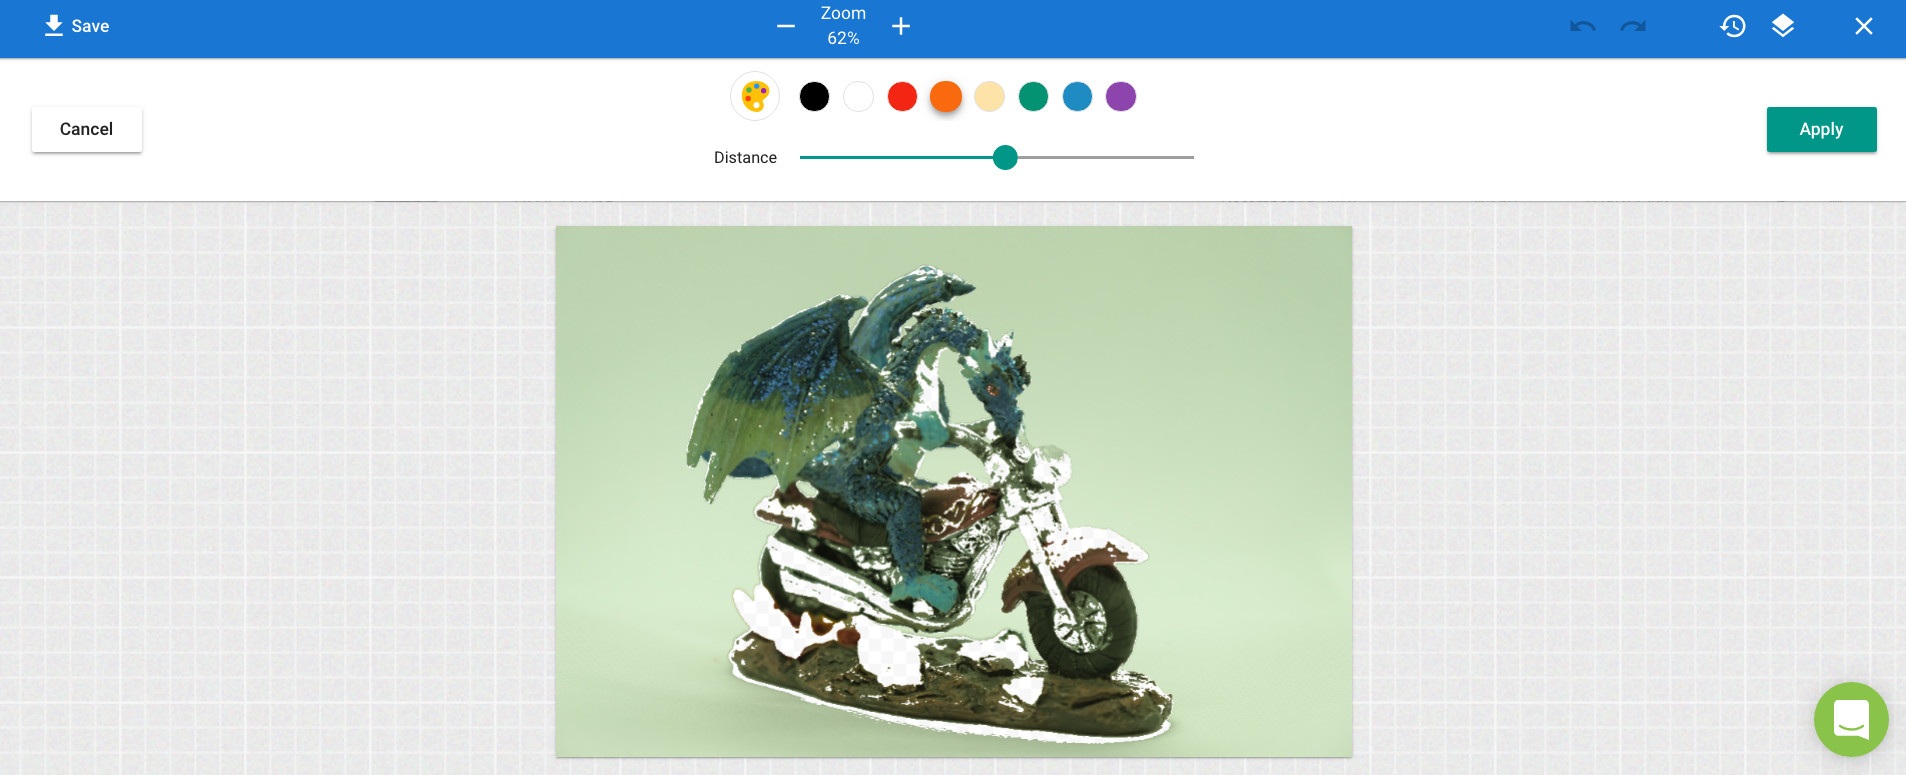
Use the "Remove" tool to remove areas of a particular color from your image. First, select the color you'd like to remove. Then, move the slider right and left depending on how much of these color areas you'd like to remove.
| FILTER → BRIGHTNESS |
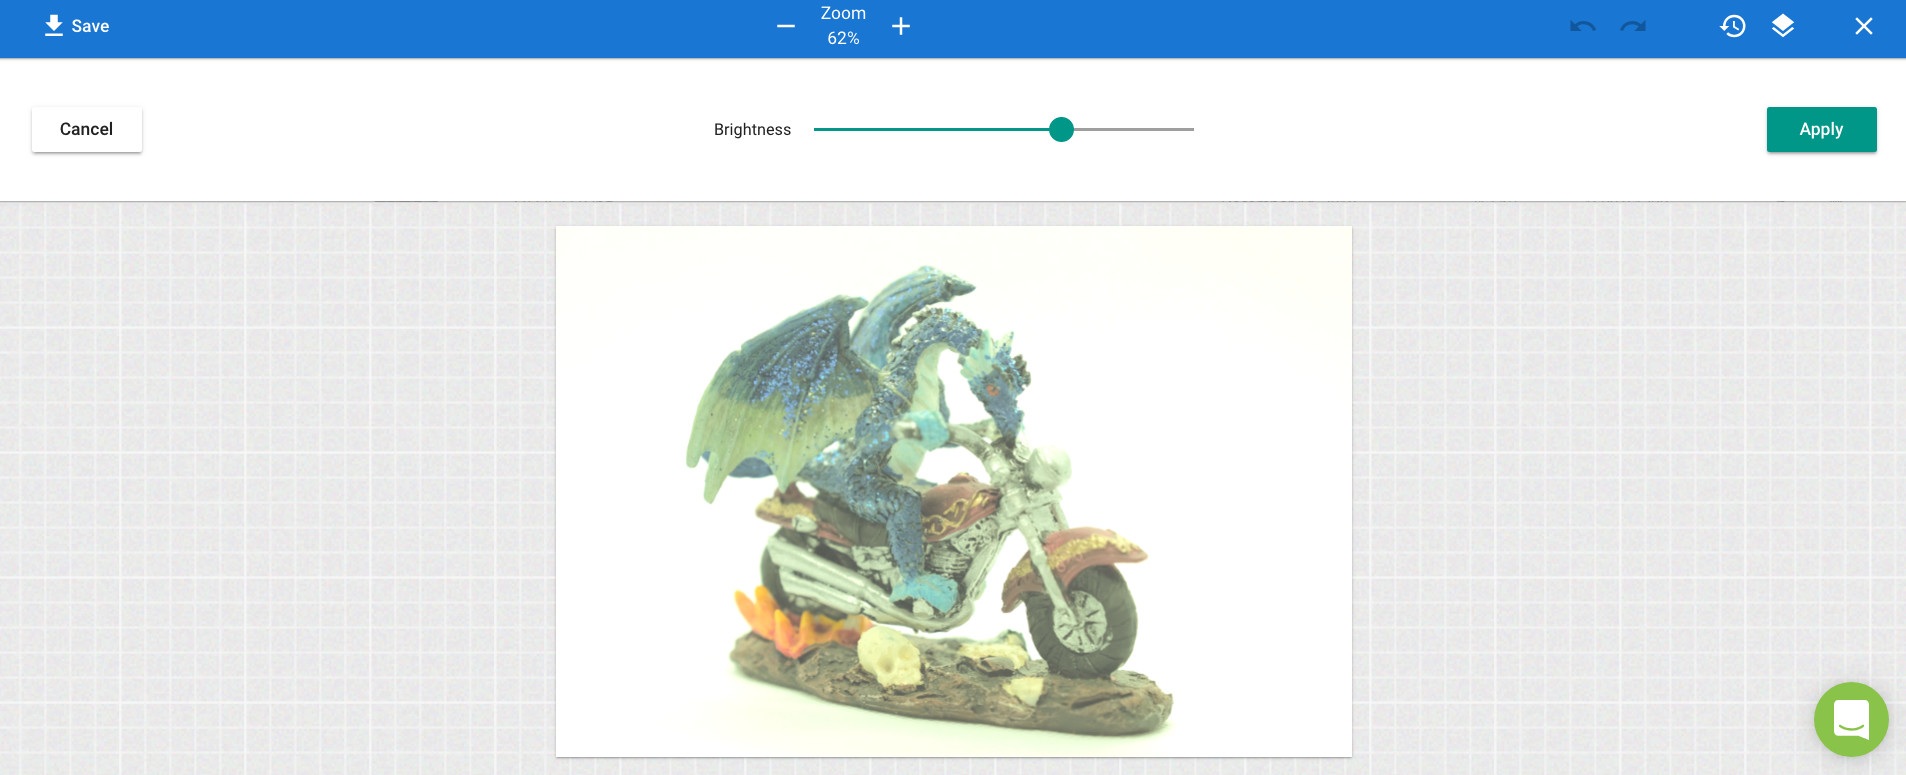
Use the "Brightness" tool to make your image either lighter or darker.
| FILTER → GAMMA |
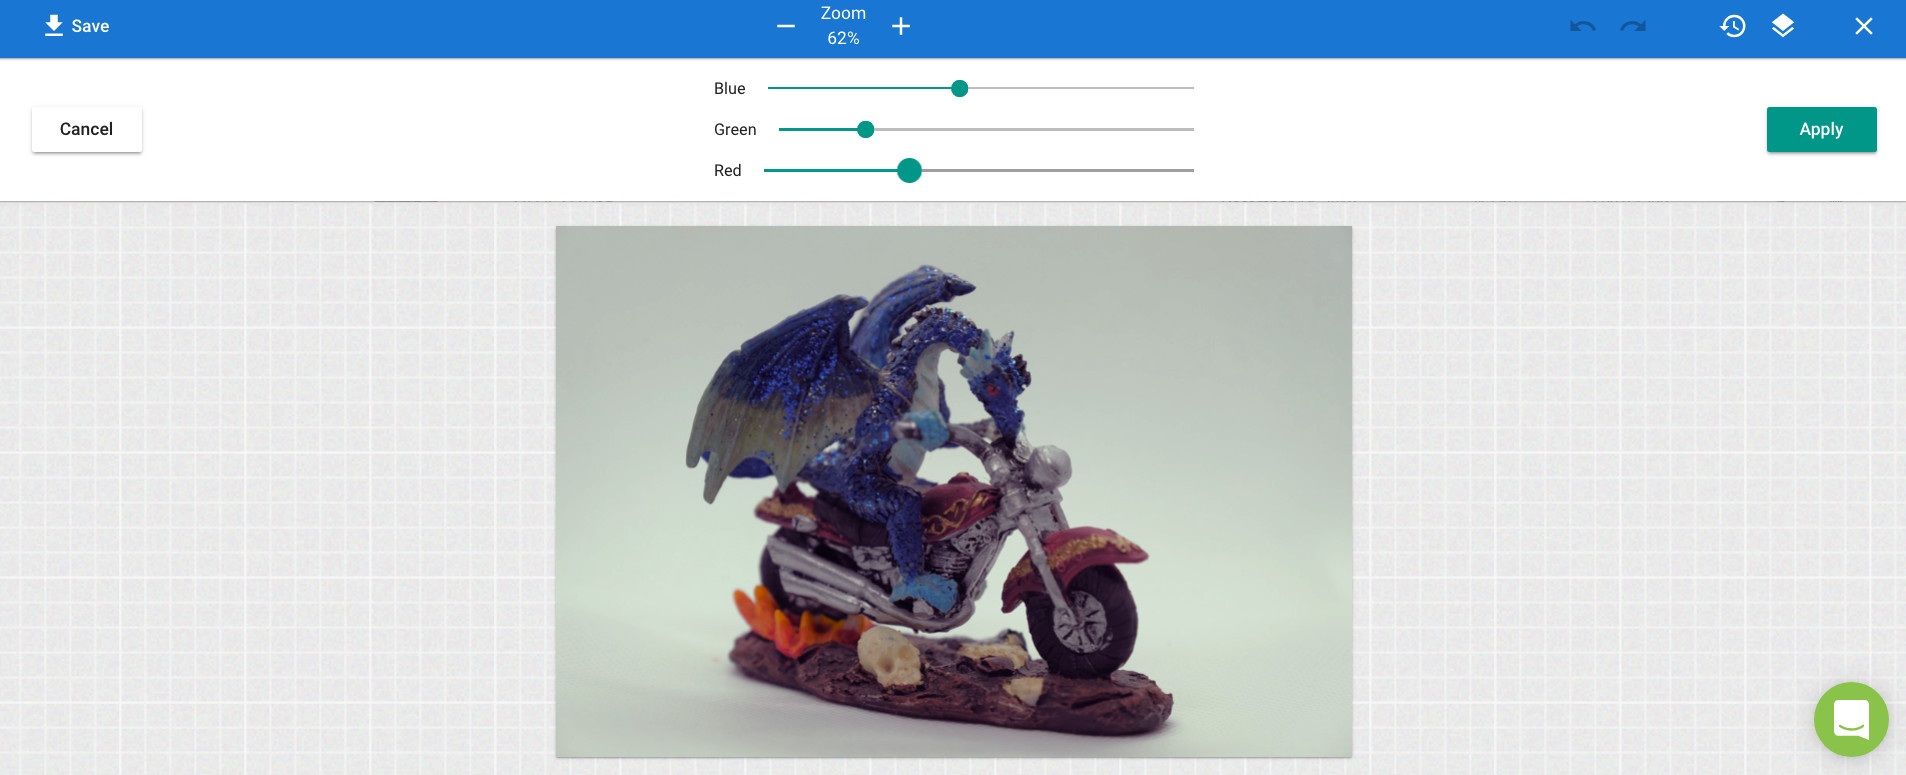
Use the "Gamma" tool to change the brightness of all the red, green, and blue primary colors in your image. Move each slider to indicate more or less of each color.
This tool is helpful for removing color casts, if you can keep the primary colors and how they interact in mind. For example, to remove a purple color cast, set the red and blue sliders slightly lower than the green slider, since red and blue make purple (and it's purple you'd like to remove).
| FILTER → NOISE |
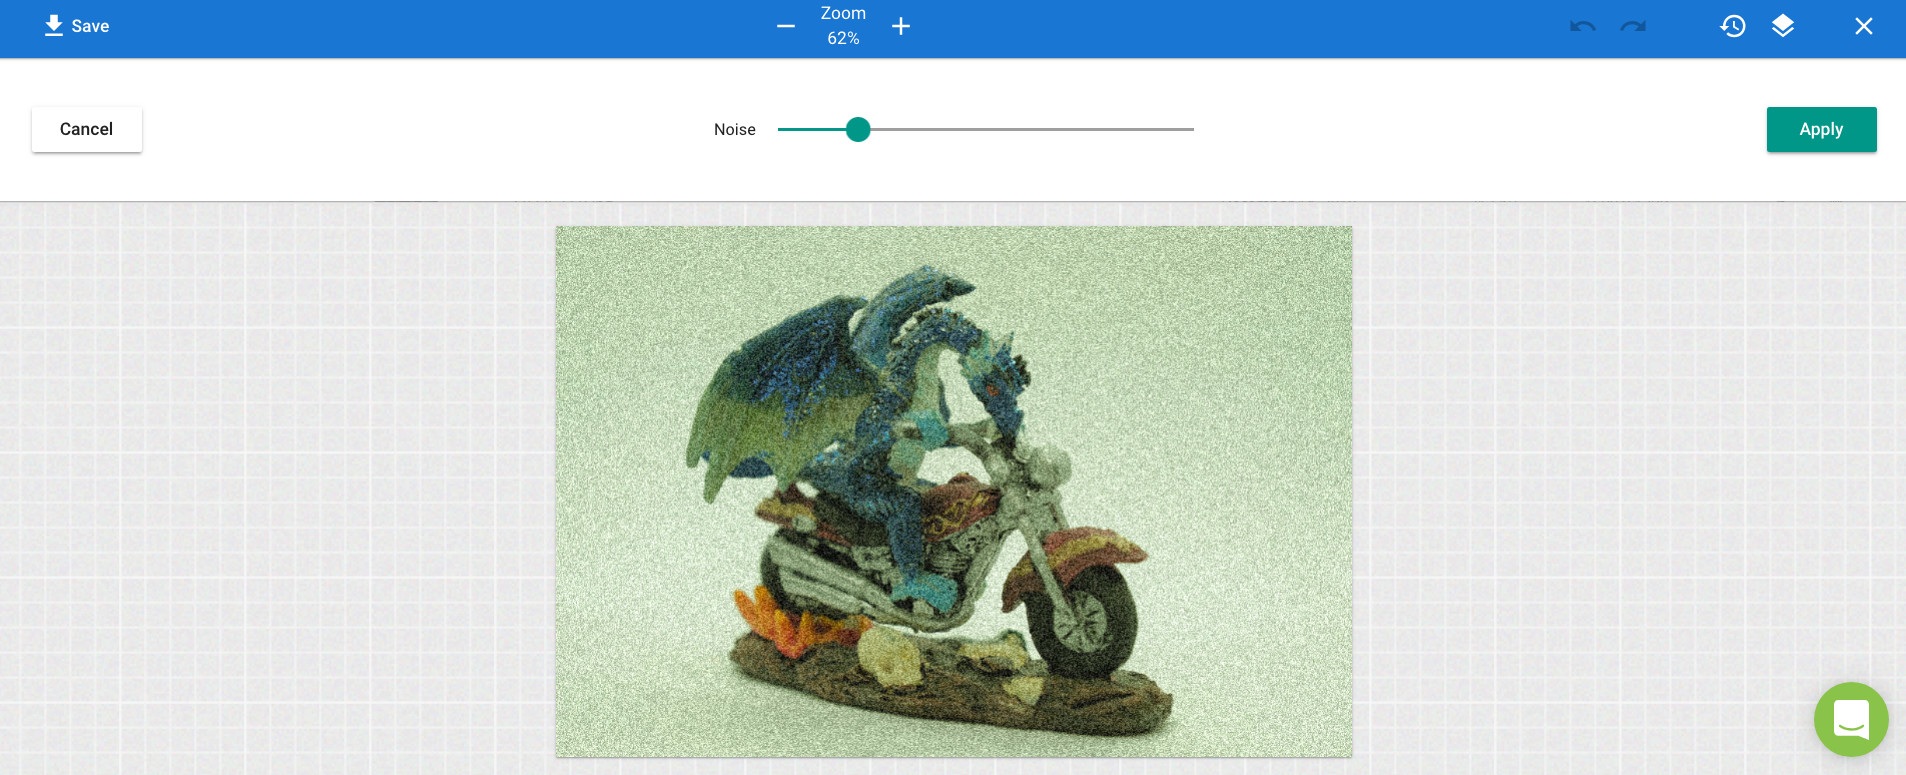
Use the "Noise" tool to add noise (similar to film grain) to your image for a gritty look.
| FILTER → PIXELATE |
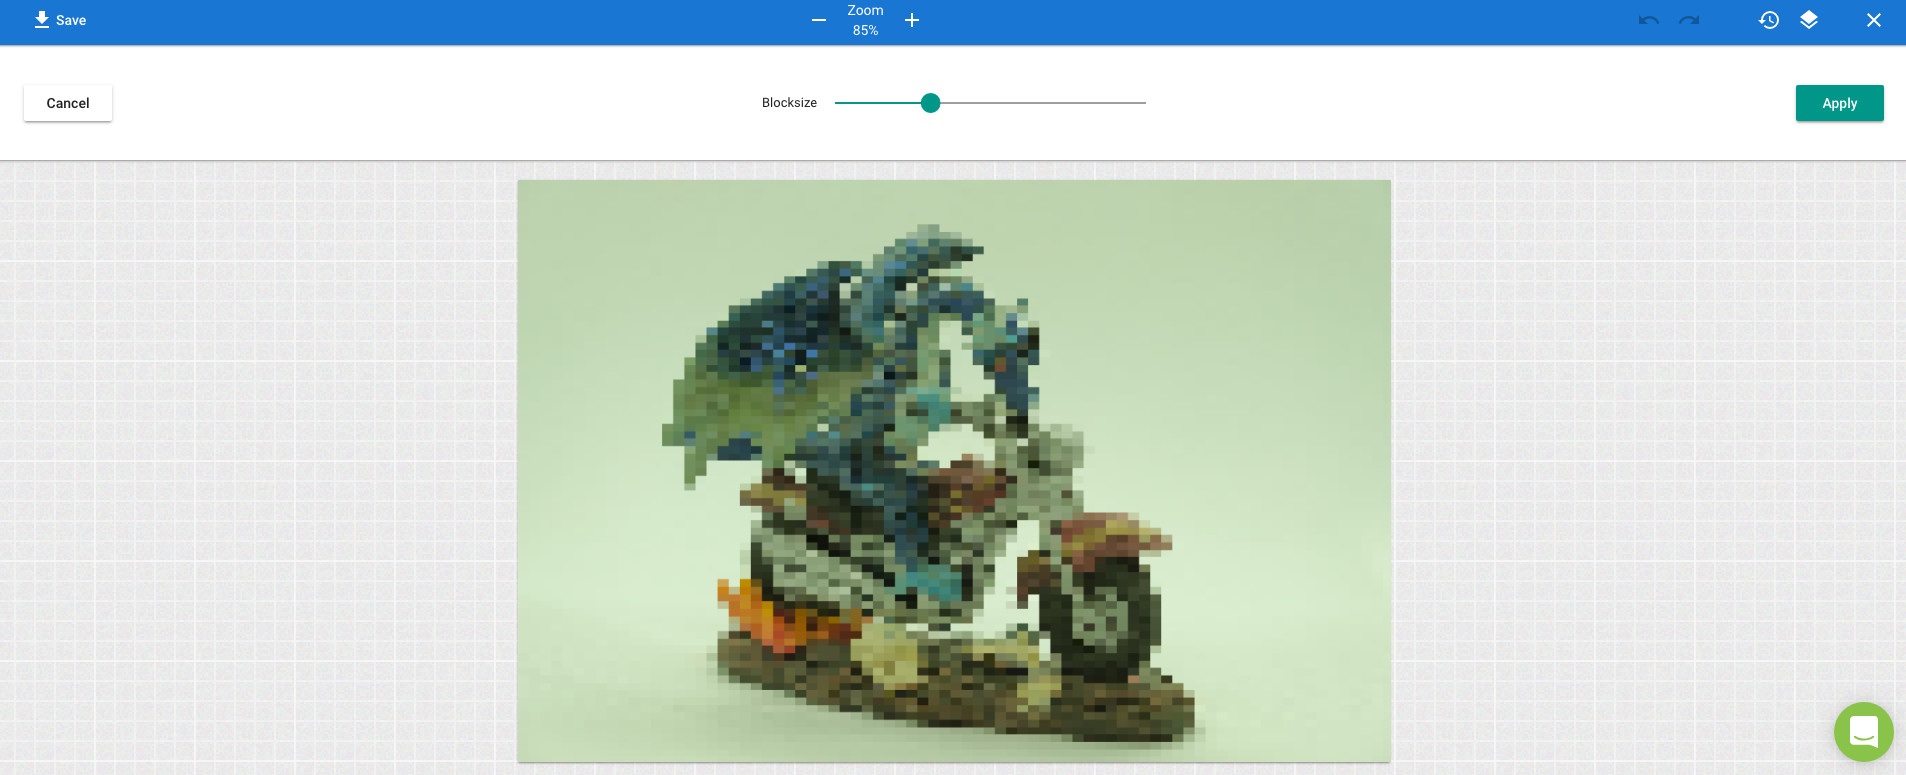
Use the "Pixelate" tool to lower the amount of detail in your image, replacing groups of pixels with larger single-color blocks, for a "digital" or "classic video game" look.
| FILTER → BLUR |
Use the "Blur" tool to blur the sharp edges in your image for a much softer look.
| FILTER → EMBOSS |
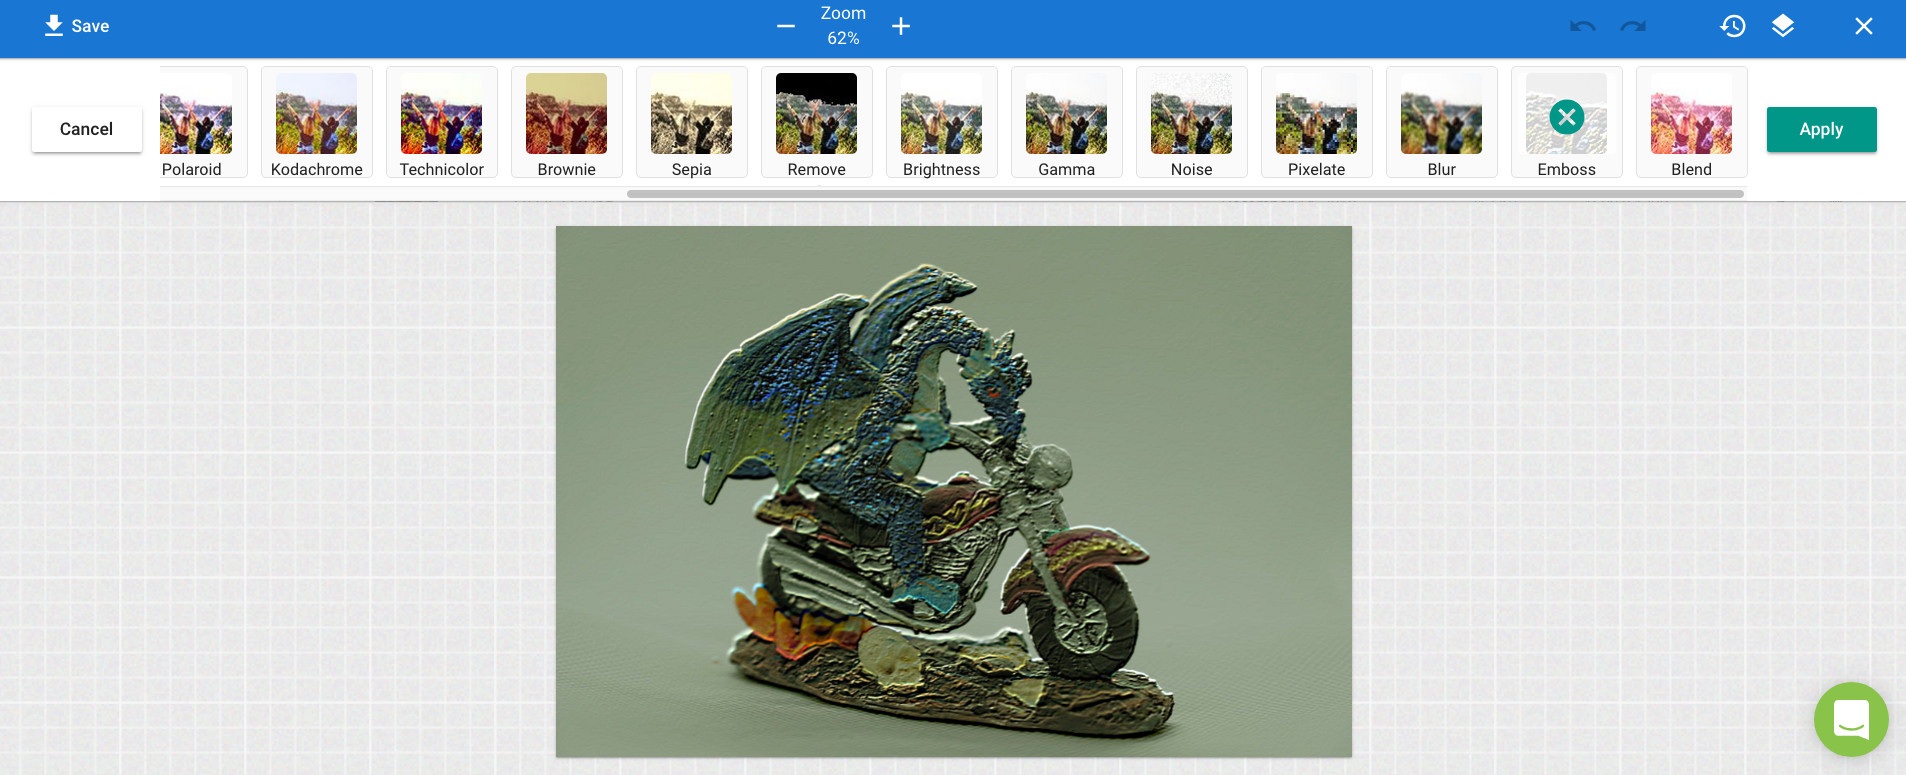
Use the "Emboss" tool to simulate slight three-dimensional raised edges in your image around every transition between two colors.
| FILTER → BLEND |
Use the "Blend" tool to add either a weak or a strong color cast to your image.
Lots of Tools to Improve Your Images
Whew! That's a lot of tools available to you in inkFrog's built-in image editor, all of which can be used to enhance the appearance of your images. As you use the editor, keep the following points in mind:
You can use more than one or even all of the tools together on the same image
When using the tools in the "FILTER" area, clicking on a tool "adds" the filter to your image (changes its appearance)
The effects of many filters can be combined for a more complex final result
To remove the effects of a filter that you've already added, click the "X" icon on the filter button
When you're done making changes to your image, click "Save" to save your changes
Now you've seen how each of the image tools in inkFrog's image editor works. In our next post, we guide you through the process of editing a single picture using multiple tools, to go from "iffy picture" to "great picture" in the end.
But for now, review the tools in this post and explore the editor tool and what it can do to help you improve your photos quickly, and without having to leave inkFrog!
Share this article:


Join the Newsletter
Get started for free today!
Try it free
Join the 200,000+
using inkFrog!