If you use inkFrog, yet you're still creating your listings one by one, it's time to learn about profiles.
inkFrog profiles enable you to list so quickly and easily that you'll never want to create listings one at a time again. If you haven't already done so, now is the time to put profiles to use. Here's how.
What Profiles Are For
Put simply, profiles are bundles of eBay listing form settings that you find yourself using over and over again as you list.
Profiles give you a way to save these repetitive settings. You spell them out as a bundle, give the bundle a name, and then inkFrog automatically fills out that part of the listing form for you whenever you ask it to.
Dozens of choices are made in creating an eBay listing. inkFrog profiles streamline this process.
There are five kinds of profiles in inkFrog—listing profiles, shipping profiles, return profiles, payment profiles, and master profiles that tie the others together.
Here's how they work and what to do with them.
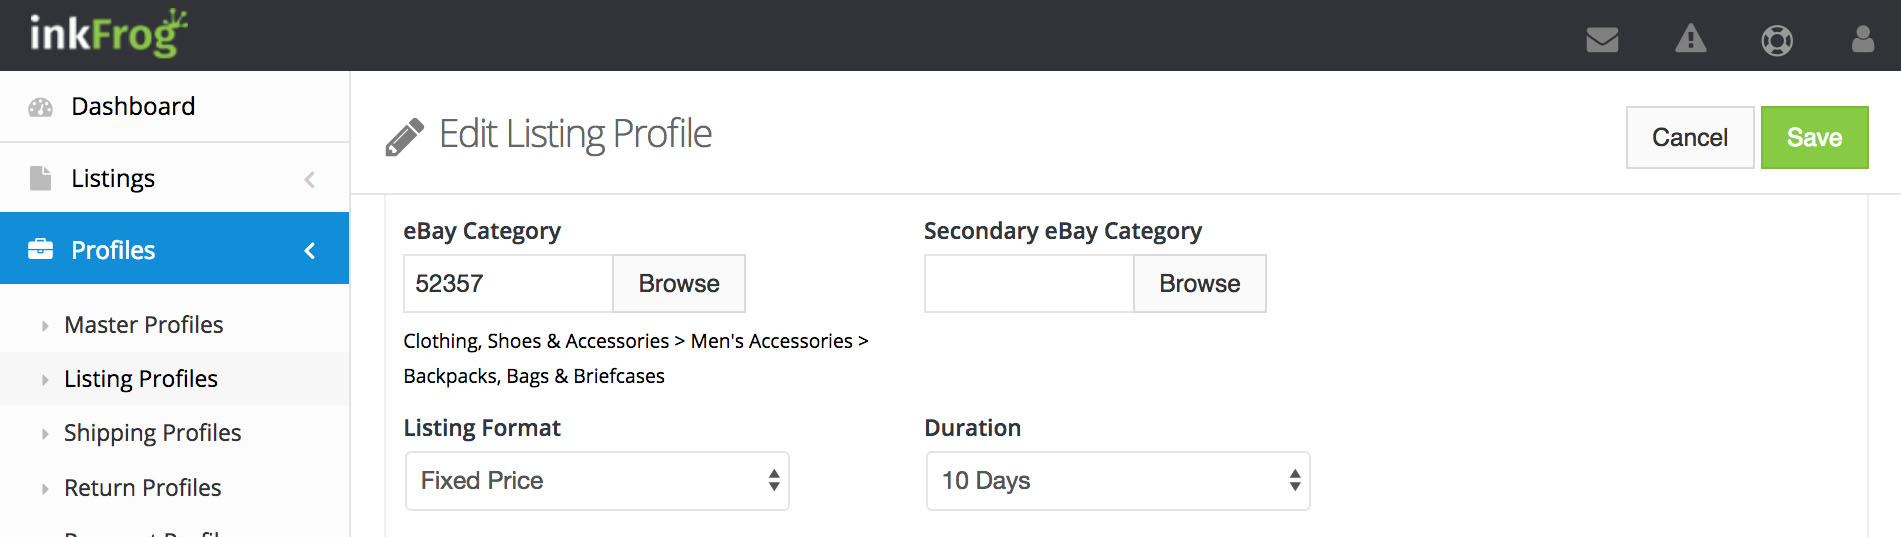
Listing Profiles
In listing profiles, you create named bundles of settings that each outline:
A catalog entry, eBay category, and optional second category
A listing format (fixed price, auction, etc.)
An optional eBay Giving Works ID and donation percentage
An inventory or product location
An inkFrog listing template
Use profiles to bundle eBay listing form settings that you use over and over again.
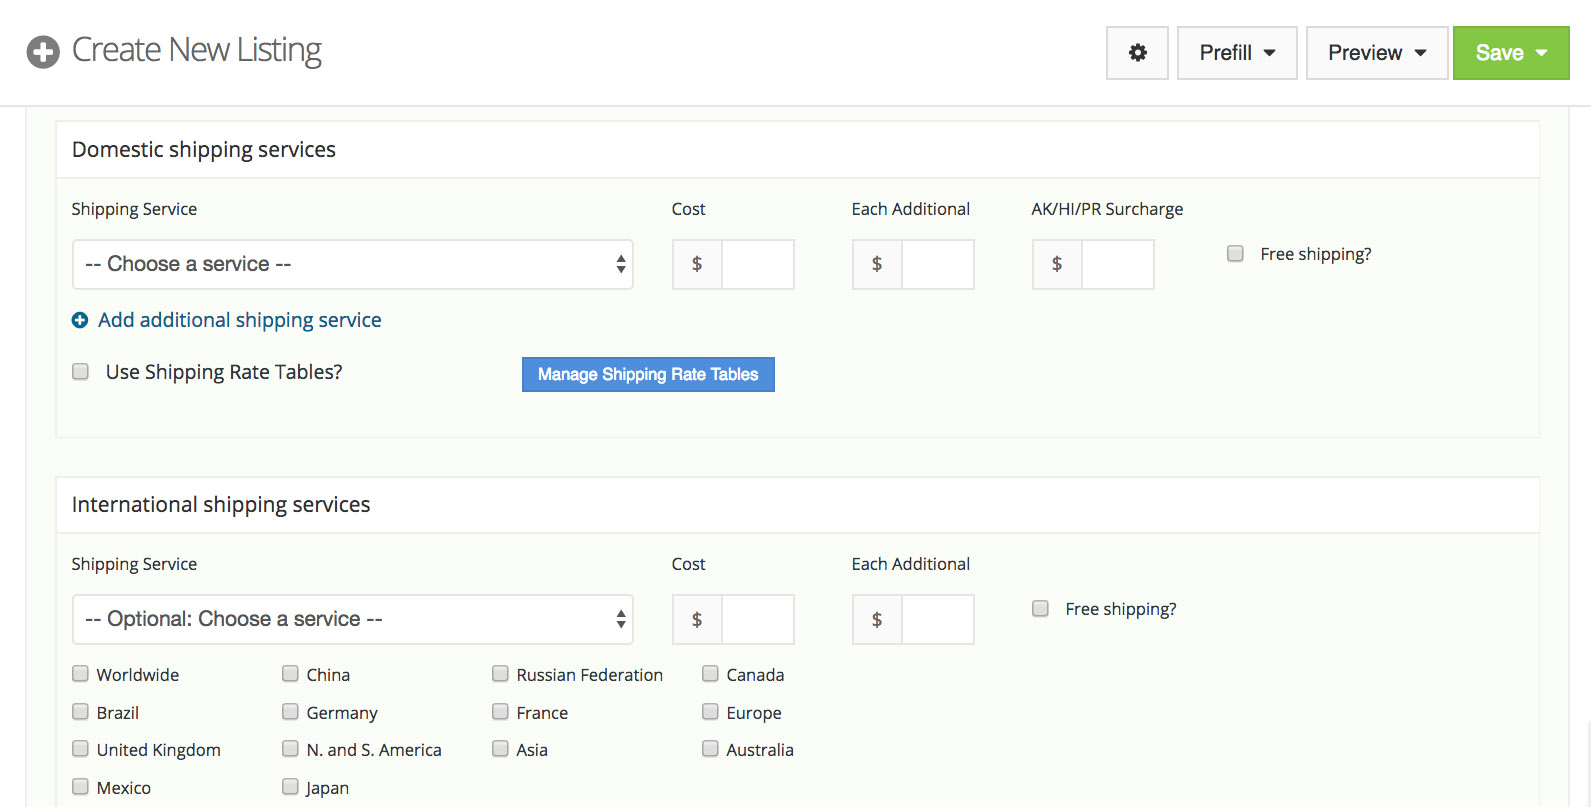
Shipping Profiles
In shipping profiles, you create named bundles of settings that each outline:
A type of shipping rate (flat, calculated, freight, etc.)
Eligibility for eBay's Global Shipping Program
Handling time for shipment
Eligible destinations or exclusions
One or multiple carrier services and rates
Return Profiles

"Highly recommended, great team with more than excellent response time. Absolutely love... how it makes my selling on eBay so much easier."
— My Wrist Time
In return profiles, you create named bundles of settings that each outline:
Whether or not returns are accepted and the length of the returns period
How refunds for returns are issued and who pays for return shipping
Any restocking fees for returns
A detailed return policy explanation
Payment Profiles
In payment profiles, you create named bundles of settings that each outline:
Kind(s) of payments accepted
A PayPal payment address
Whether or not immediate payment is required
How and where to apply sales taxes
"I LOVE this app. Easy to use! The app does all the work."
— Solo Stylezz
How to Begin and What to Do
Build a profile for each bundle of settings you repeatedly use as you list on eBay. Do this by visiting a profile area in your inkFrog sidebar, then clicking the "Create New... Profile" button.
For example:
Do you repeatedly create fixed-price listings in a particular category, with inventory in a particular location, using one custom inkFrog template? Click "Listing Profiles" → "Create New" to create a listing profile that spells these settings out.
Do you repeatedly create listings that direct payment to a particular PayPal address, requiring immediate payment? Click "Payment Profiles" → "Create New" to create a payment profile that spells these settings out.
And so on.
Master Profiles
After you build listing profiles, shipping profiles, return profiles, and payment profiles that represent your most commonly repeated eBay listing form settings, you're ready to create some master profiles.
Each master profile may contain:
Product images and/or SKUs
Pricing, quantity, and cost information
Variations details
A listing profile
A shipping profile
A returns profile
A payment profile
You can add to or modify these each time you use a master profile to create a new listing.
Notice that the listing, shipping, return, and payment profiles that you built now function like Lego blocks, enabling you to quickly build a master profile for each kind of product you carry.
Each master profile can contain frequently used text and images for a particular type of product(s), along with all of the eBay listing form details that you'd normally use to sell them.
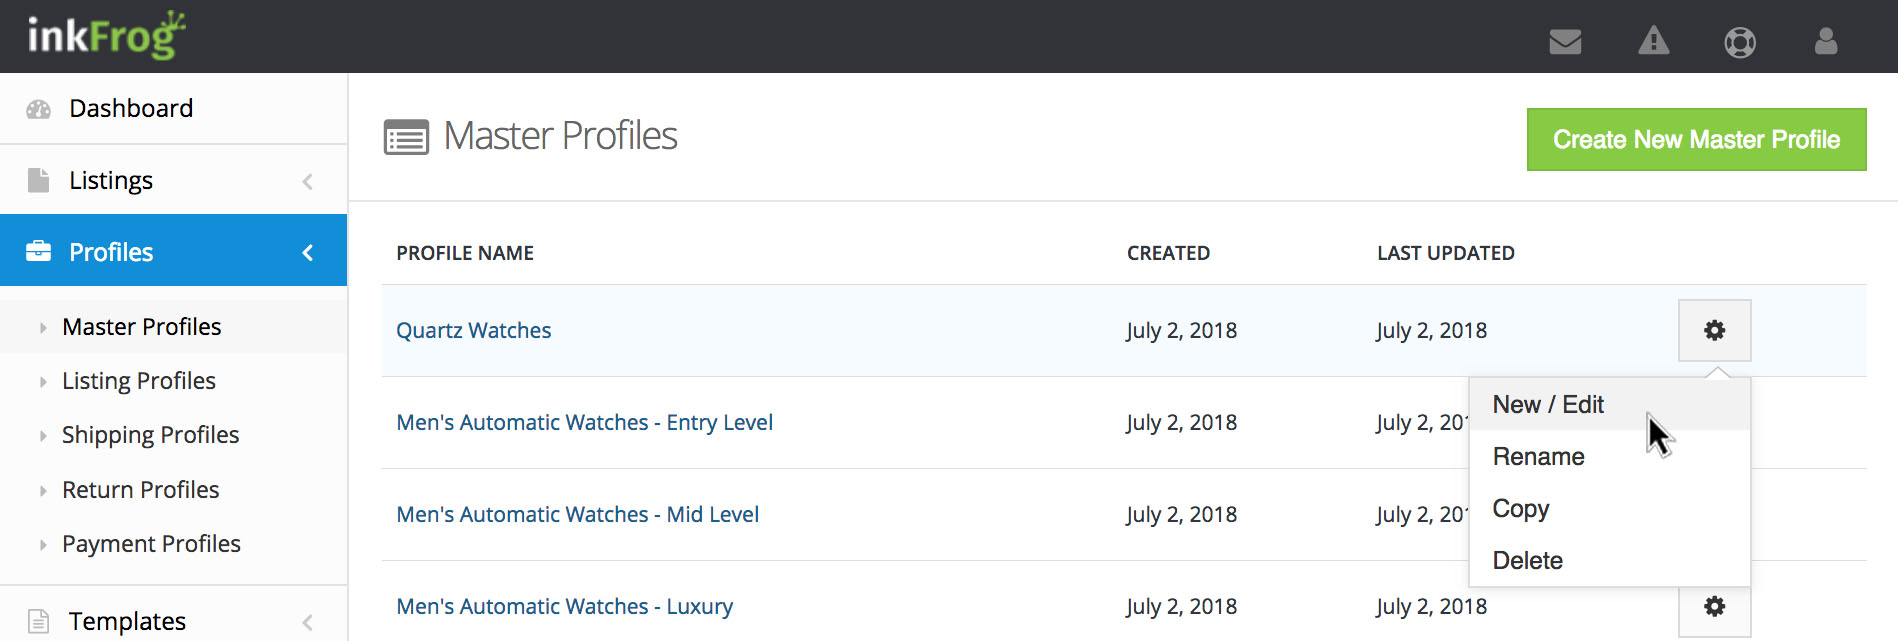
It's easy to create new eBay listings from your master profiles.
Once you have a master profile for a product, creating new listings for it is really fast. Just:
Click the icon on the far right of the master profile you'd like to list.
Select "New" and make any last moment changes or customizations needed.
Select "Save" → "Save to library" (to create a new listing in your library) or "Save" → "Save to library & launch" (to create a new listing and post it live on eBay).
With your profiles in place, you'll be able to create and publish new eBay listings at a startlingly rapid clip, without irritatingly repetitive effort.
Make Changes More Easily
All of this is great and saves tons of time, but now for the best part.
The best part is that when you create listings using profiles, you can change every listing that relies on a particular profile just by changing that profile.
So, for example:
If you move your warehouse to a new ZIP code, edit your listing profile(s) to reflect your new ZIP code; all of the associated listings will automatically be updated.
If you switch to a new shipping carrier or service, edit your shipping profile(s) to reflect your new shipping policy; all of the associated listings will automatically be updated.
With profiles, you can update—not merely create—dozens and dozens of listings easily.
With profiles, you won't just create listings more quickly than ever before; you'll maintain them more rapidly and easily than ever before, too.
Sound good? Log into your inkFrog account and give profiles a try—or if you don't yet have inkFrog, try it today!
Share this article:


Join the Newsletter
Get started for free today!
Try it free
Join the 200,000+
using inkFrog!