Start by opening the designer template tool.
inkFrog offers sellers hundreds of designer listing templates as starting points for beautiful eBay listings. As we've shown in the past, it's easy to browse through the library, choose a favorite or two, and then customize them for your store.
But what if you don't want to make use of someone else's work, colors, and images as the basis for your own listings? What if you already have a look in mind and think it might be easier to start from scratch?
Can you do that in inkFrog? Absolutely. Here's how.
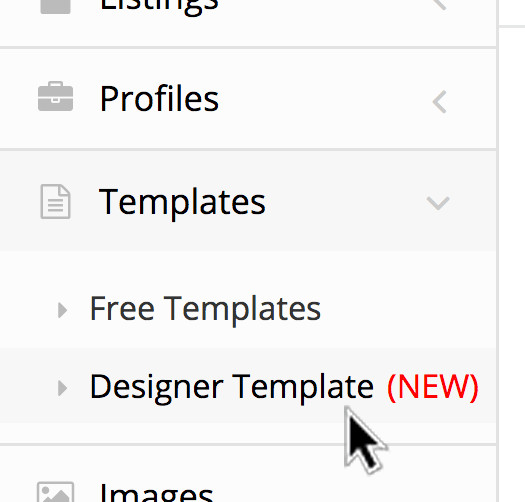
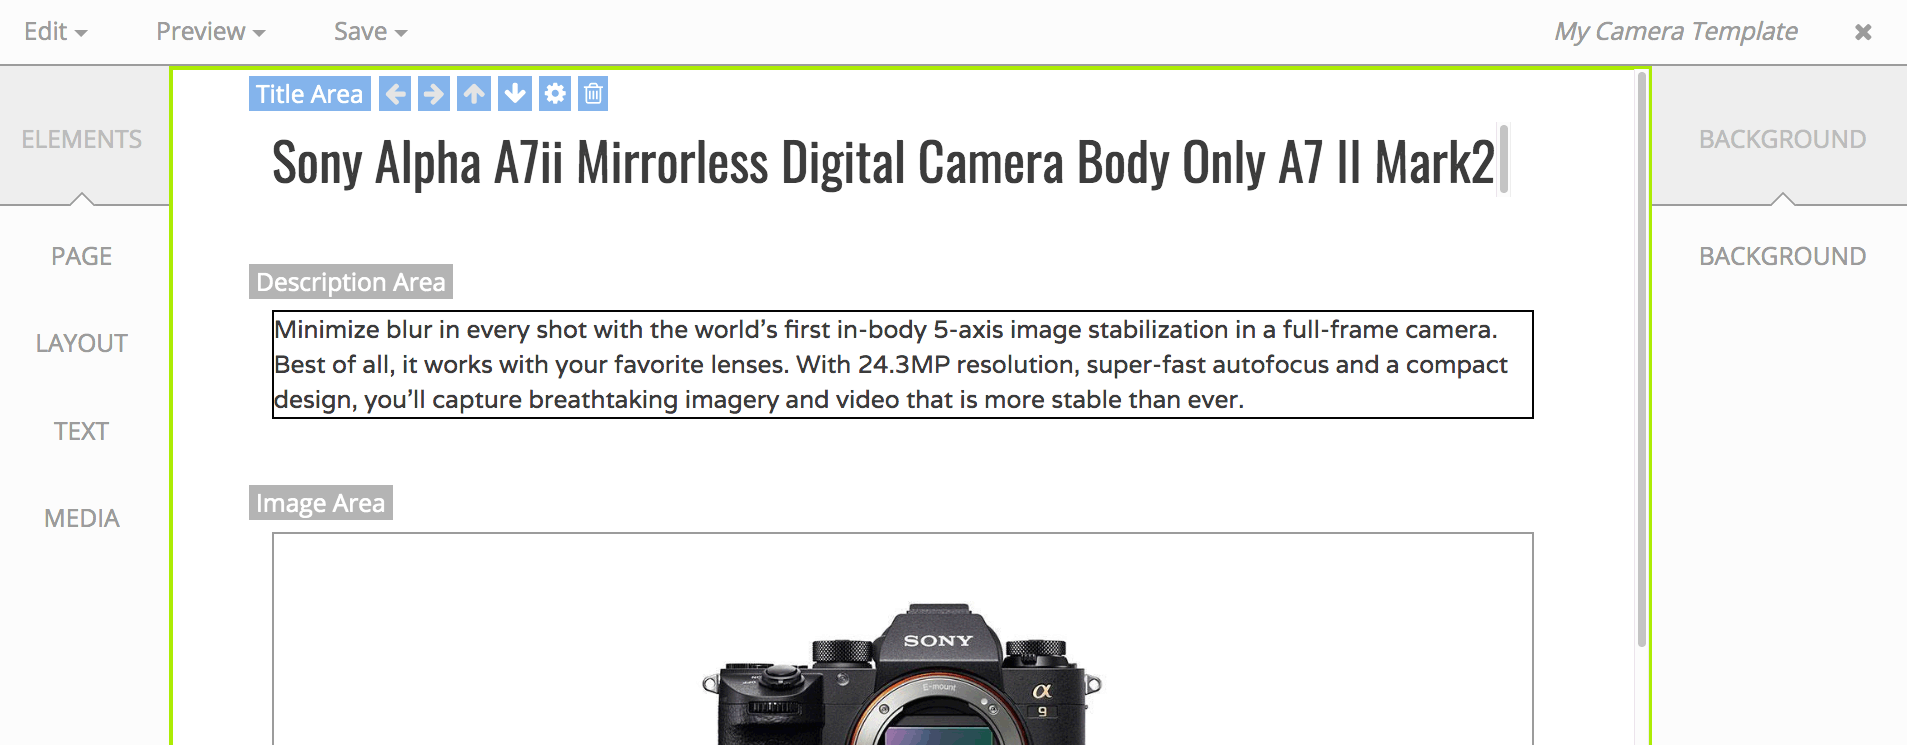
1. Open the "Templates" tool and select "Designer Template."
In your inkFrog account, click "Templates" in the left sidebar to open the templates tool. Then, select "Designer Template."
This is where you select designer templates to customize, yes, but it's also the starting point for your own template work in inkFrog—after all, what you're about to do is create a designer template of your own!
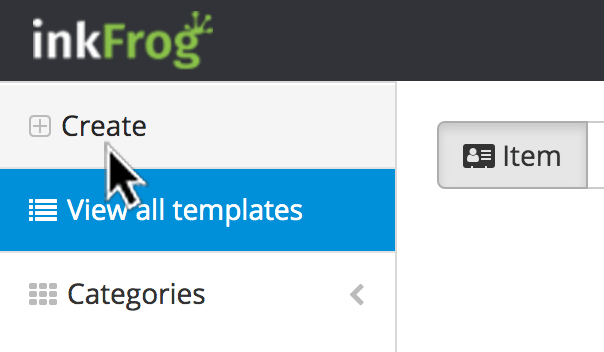
Then, create a new blank template.
2. Select "Create," then "Default Template" to create a brand new template.
With all the glam of our designer templates occupying screen real estate, you may have missed the unassuming little option labeled "Create." Click it.
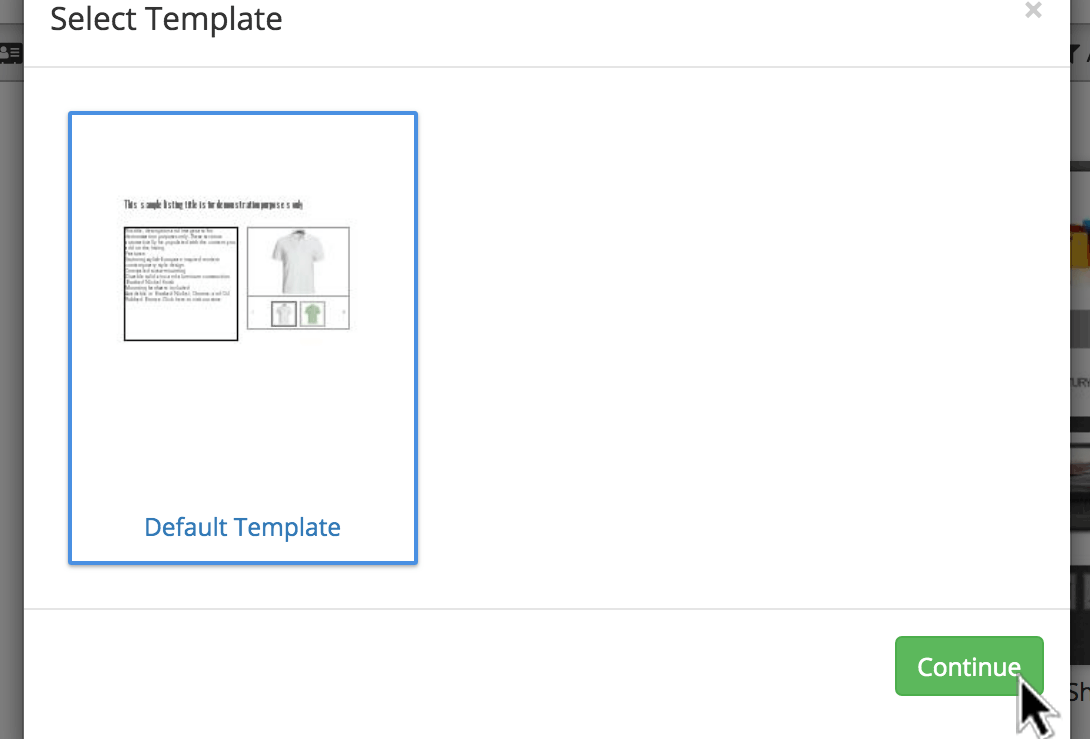
You'll be shown a dialog asking for which template to use as the basis for your new template. Select "Default Template," which is completely blank but for a title, description, and listing images on a white background.
After selecting the default template, click "Continue."
With a basic Amazon store you get one image and a text area—but it can be enough!
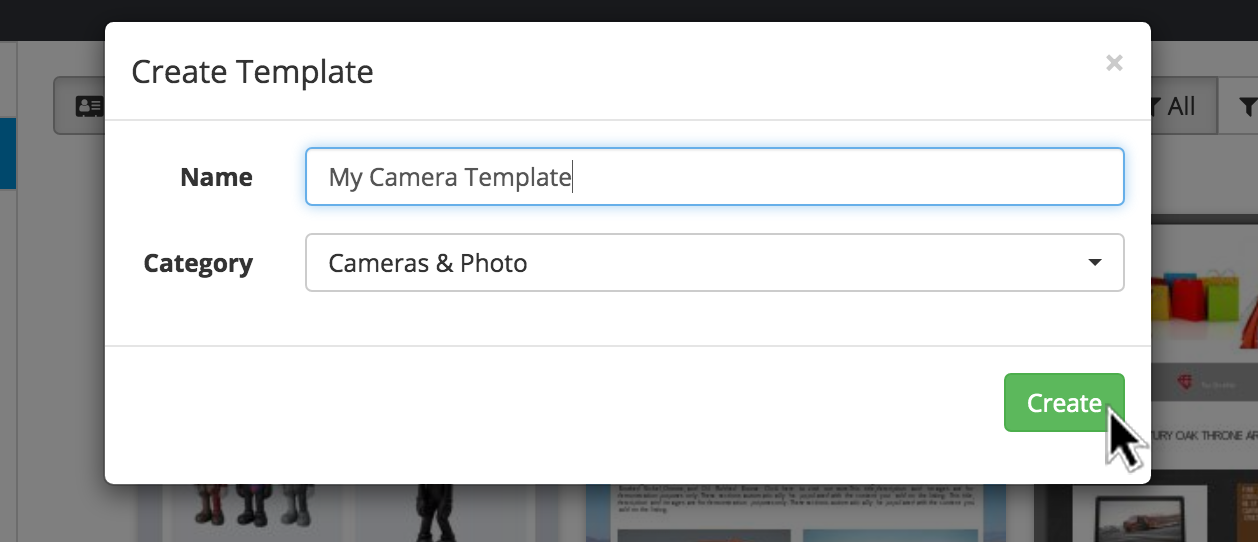
3. Name your template and select a category.
Enter a name for your template, then select the category where you plan to use it.
The name is for your benefit—so enter something that is meaningful to you and that you'll recognize later on. Then, click "Create" to open the editor, which will show the very basic, completely unstyled default template.
You're ready now to get to work.
With a basic Amazon store you get one image and a text area—but it can be enough!
4. Adjust the layout to include the elements you'd like to see.
By default, a new template is very short. It shows only:
The listing title
The item description
Your listing image(s)
Everything is on a white background. It's tempting to immediately begin working on colors and flashy art, but the first thing to do is to decide on what additional elements you'd like in your template.
Your new template starts as just a basic shell. It's up to you to bring it to life.
Do you want a header area with a company logo and more about your company and products? Do you want an area below your title, description, and images where you'll promote other goods? Do you want several tabs for things like usage and return instructions?
Use the "LAYOUT" tool in the left sidebar and select "Add Row" to add new rows to your template where you can place additional text and images of all kinds.
For each row you add, you'll be asked how many columns it should contain and how these columns should change if the window is to narrow to show them all (the "Tablet" and "Phone") modes.
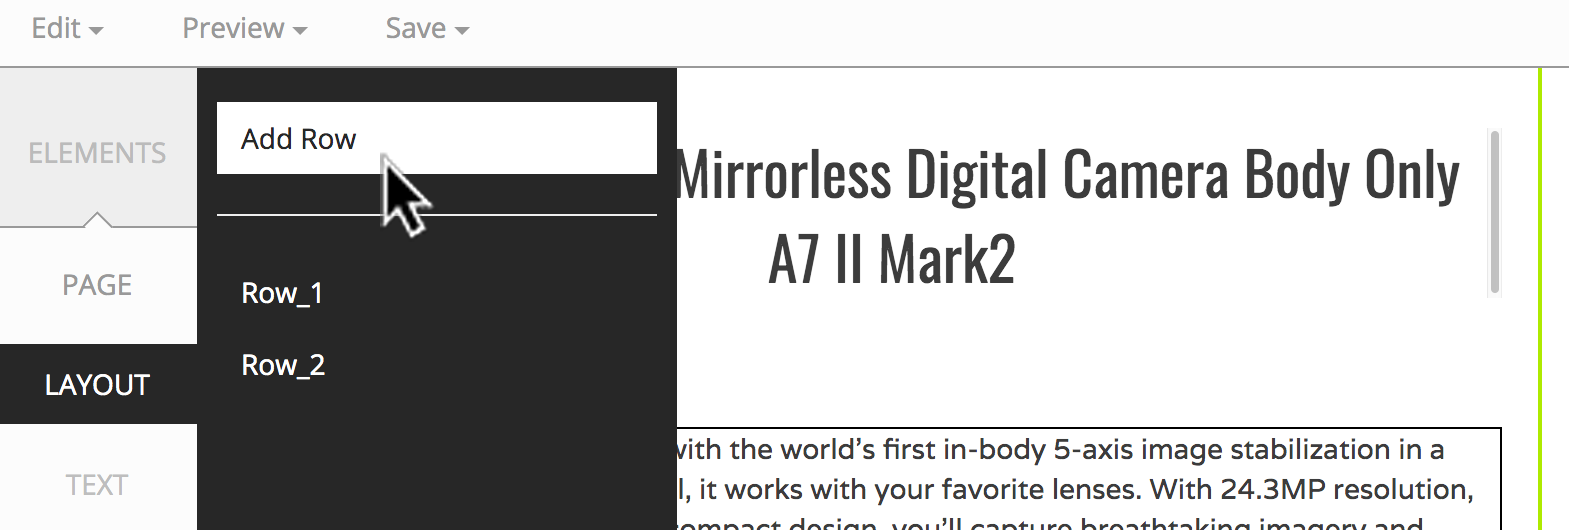
Start by adding new rows to hold the additional design elements you'd like to see.
5. Add text and images.
Now that you've created space for new rows and columns in your images, it's time to fill them up with the things you'd like to see in your listing:
Use the "TEXT" tool in the left sidebar to insert tabs and tab text, store links, or other kinds of text into the rows and columns you've just created.
Use the "MEDIA" tool in the left sidebar to insert images, image carousels, icons, shapes, or videos into the rows and columns you've just created.
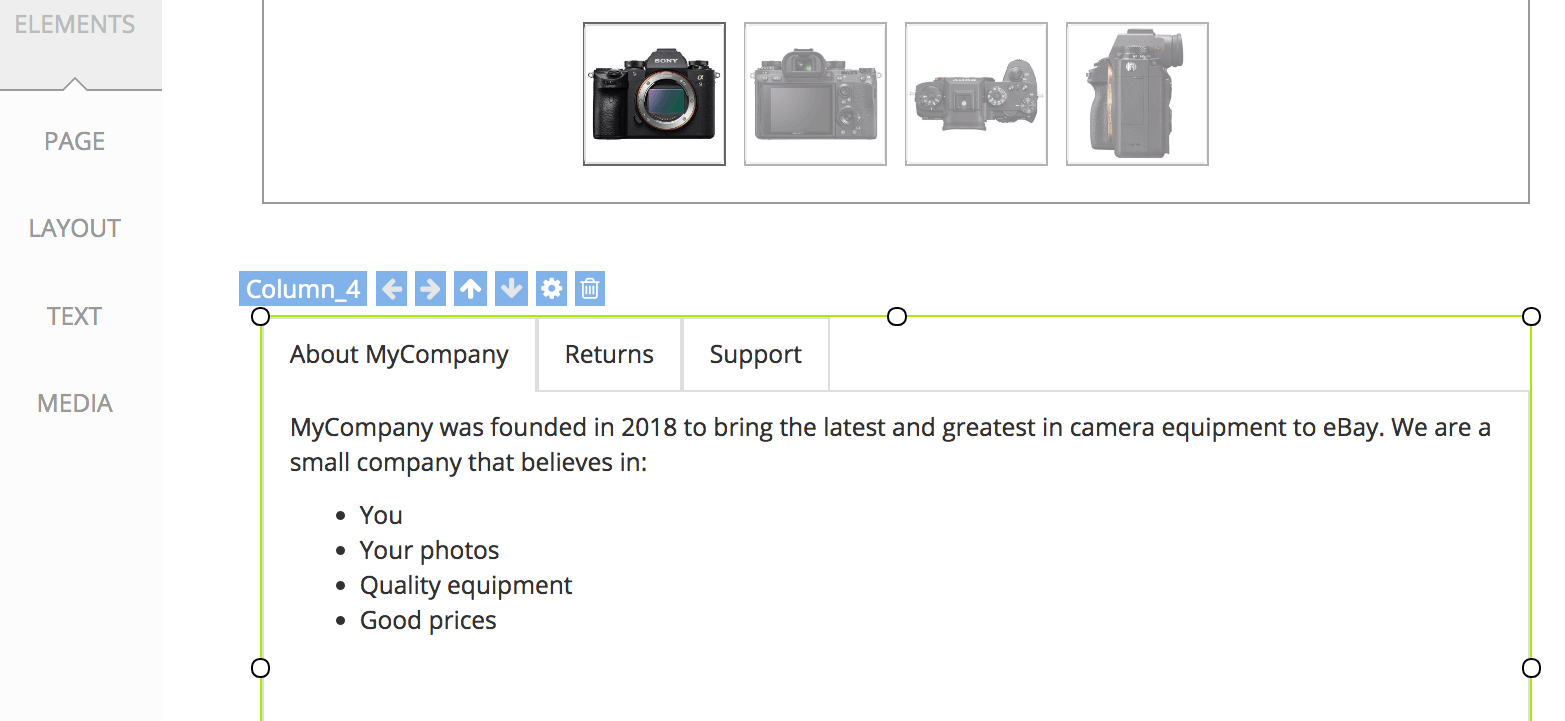
Use the left sidebar controls to add new text areas, tabs, or images to your template.
If you find that you need to change the order of the rows you've added to your template, return to the "LAYOUT" tool and hover over a row to move it up or down.
6. Beautify.
Once you've got the text, the tabs, the icons, and the images in the right places, now is the time to return to overall style elements like colors, font sizes, background colors, and so on. Customize these just as you would any of our pre-built designer templates.
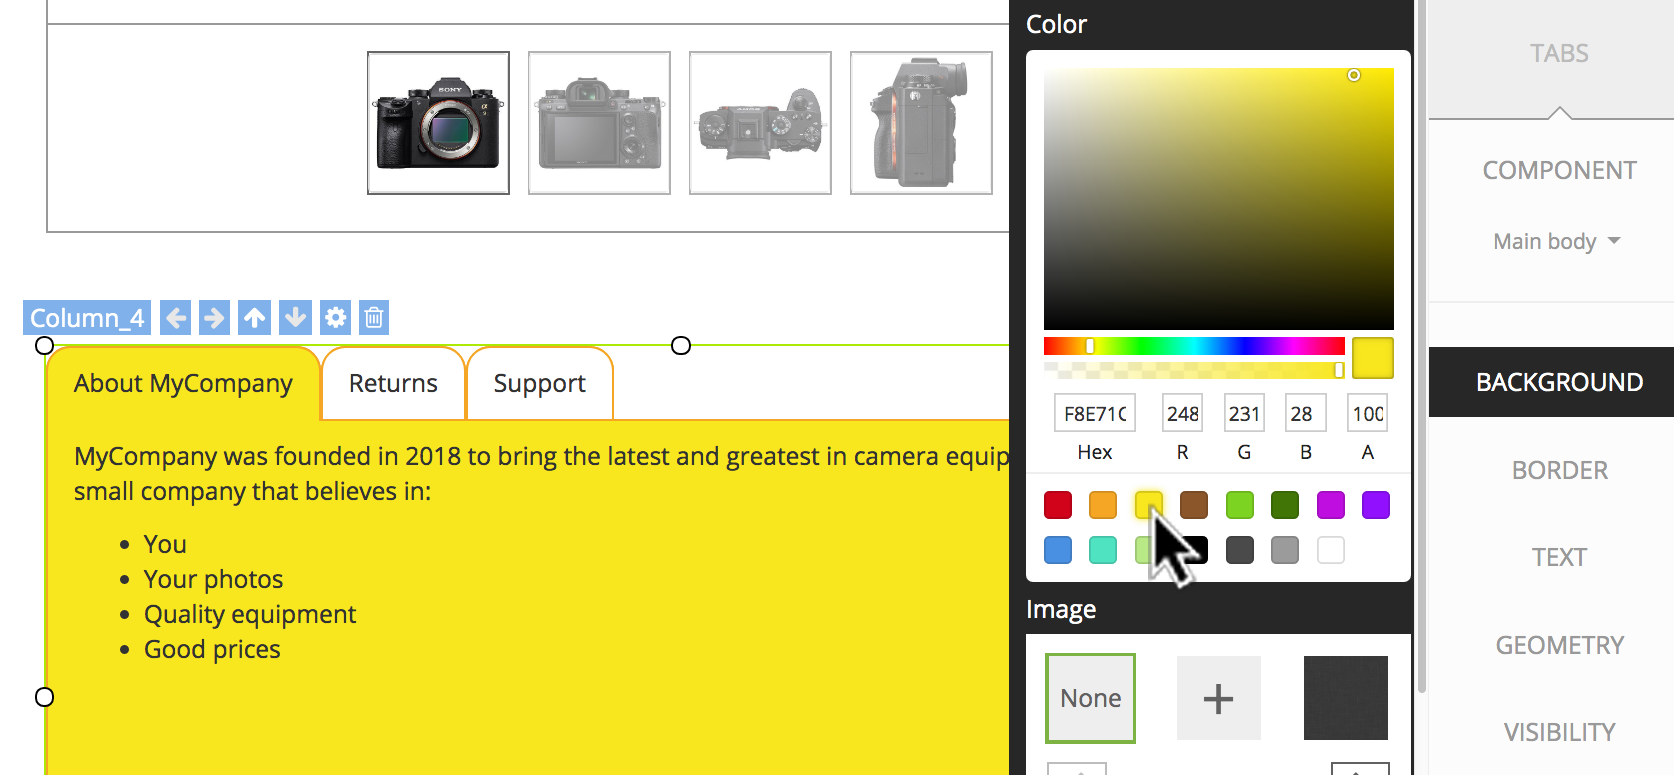
Use the right sidebar controls to change to look and feel of anything you add.
Work until your template is just the way you want it—then, save and exit and it will remain in your template library where you can leverage it to create future variations for new categories and new products in the future.
Ready to learn more? Check our our March 2019 webinar with Chris to see the template builder at work:
Share this article:


Join the Newsletter
Get started for free today!
Try it free
Join the 200,000+
using inkFrog!