If you're an eBay seller that's been hesitant to add Amazon sales to your business, it's probably because you're wondering how you'll maintain twice the number of listings as before while keeping inventory levels well-managed between matching listings.
If it feels as though this will be an impossible task, don't worry—inkFrog can help. With inkFrog, you can:
Link your eBay and Amazon stores together
Connect individual eBay listings to matching Amazon listings
Have inkFrog keep their inventory levels in sync for you
You probably saw this post on how to move into eBay if you already sell on Amazon. Here are the steps to take if you're moving in the opposite direction—if you'd like to add Amazon sales to an eBay business.
Create Your Amazon Account and Listings
Start by creating an Amazon.com selling account and Amazon product listings for the products you'd like to sell.
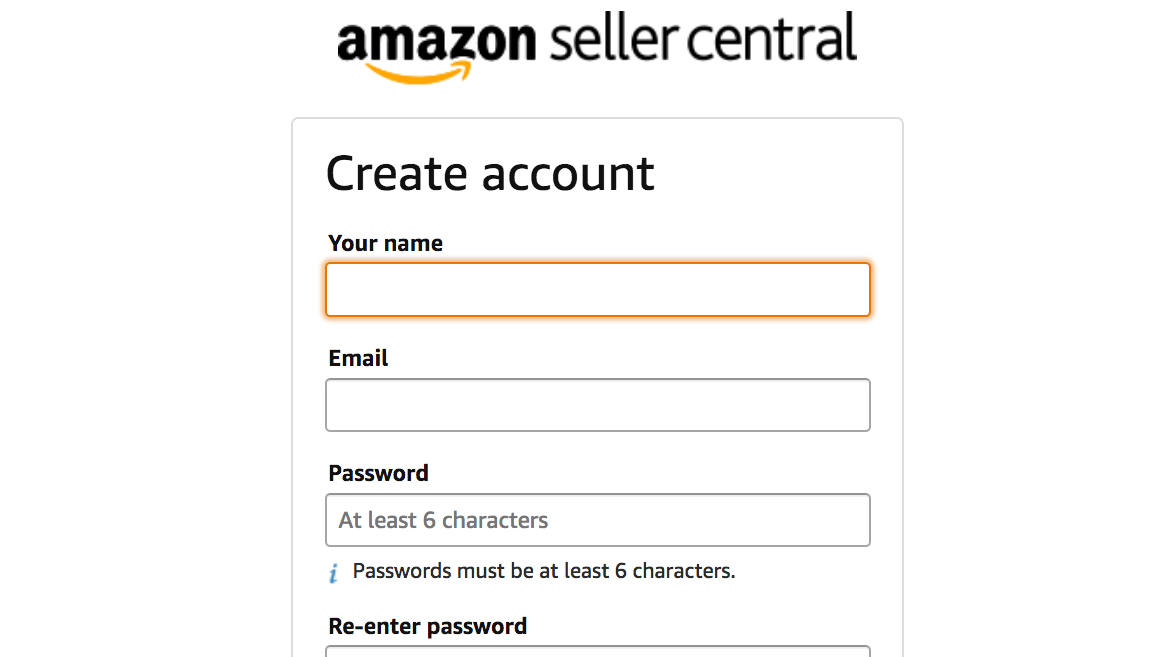
If you don't have one already, start by creating an Amazon selling account and getting your products listed.
Because Amazon doesn't call for as much bespoke listing content as eBay does, getting your products online in bulk is somewhat easier on Amazon; consider using inventory files to quickly create all of your Amazon listings, particularly if you have a lot of products.
Once your Amazon listings have been created, it's time to put inkFrog to work.
Connect Your Amazon Store to inkFrog
Log into your inkFrog account. In the left sidebar, click "Store Connector" followed by the "Add a Store" link.
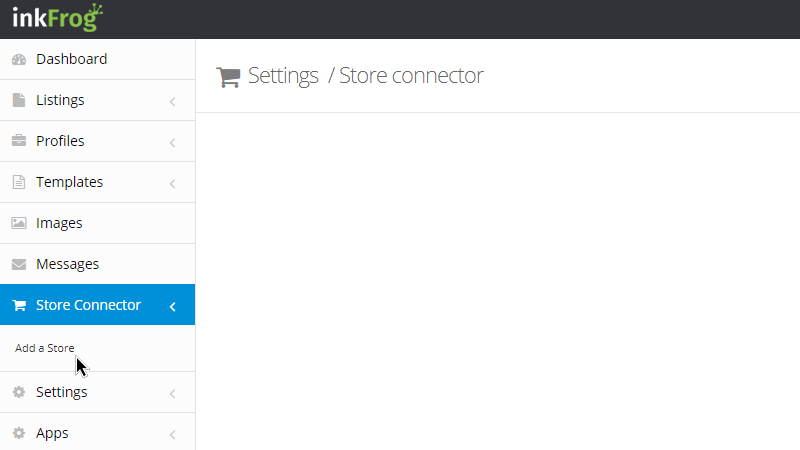
Click "Store Connector" and then "Add a Store" to link your new Amazon account to inkFrog.
You'll see a pop-up dialog that asks which kind of store you'd like to add to inkFrog. Select Amazon.com to continue.
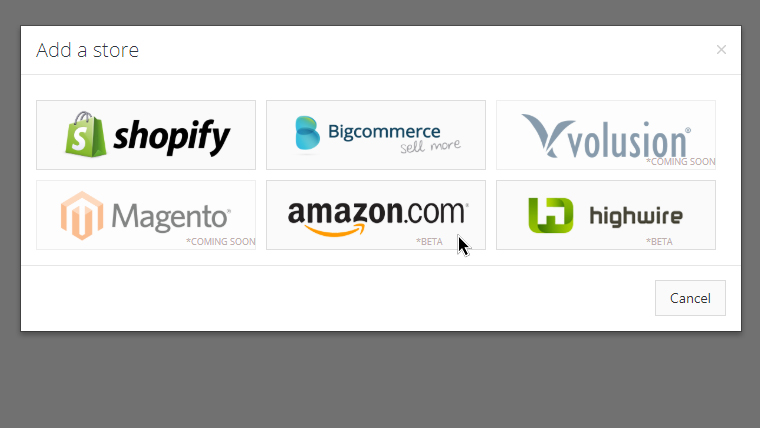
Select the "Amazon.com" option, then tell inkFrog about your Amazon account.
Follow the instructions provided to link your new Amazon store. You'll provide the name of the store and the region in which it's registered. Then, you'll be asked to grant permission for inkFrog to maintain your Amazon listings.
Once your store is linked, you'll return to the "Store Connector" page in inkFrog.
Configure Your Sync Settings
Before doing anything else, configure your sync settings so that connecting your eBay and Amazon accounts doesn't result in changes that you weren't expecting.
Click the "Import" icon to the far right of your Amazon store name (it looks like a down arrow inside a circle) to open the import dialog. Click "Settings" and then "Sync Settings" to open the list of settings that inkFrog will use to keep your eBay and Amazon accounts updated relative to one another.
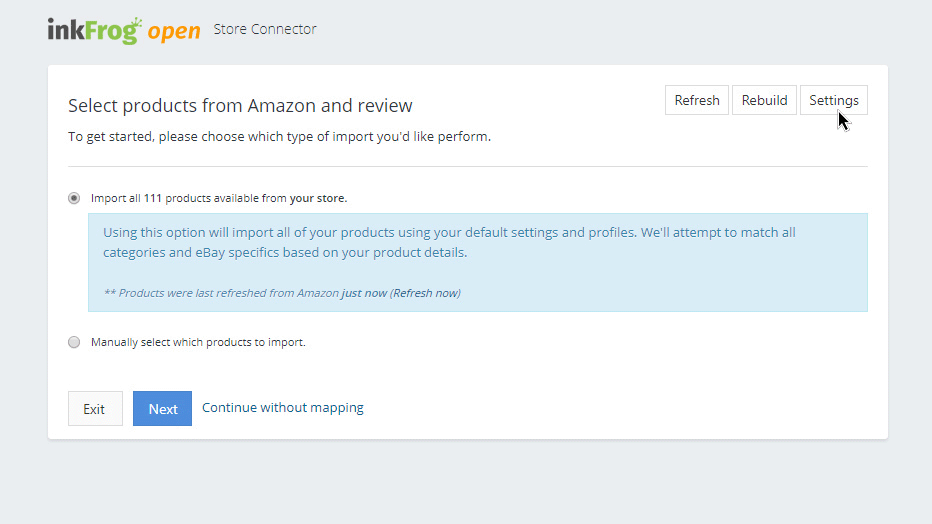
Click "Settings" and then "Sync Settings" to tell inkFrog how your link should behave.
The settings you see now control what inkFrog will do when it finds that eBay and Amazon listing data differs, or when new sales occur on your eBay or Amazon accounts.
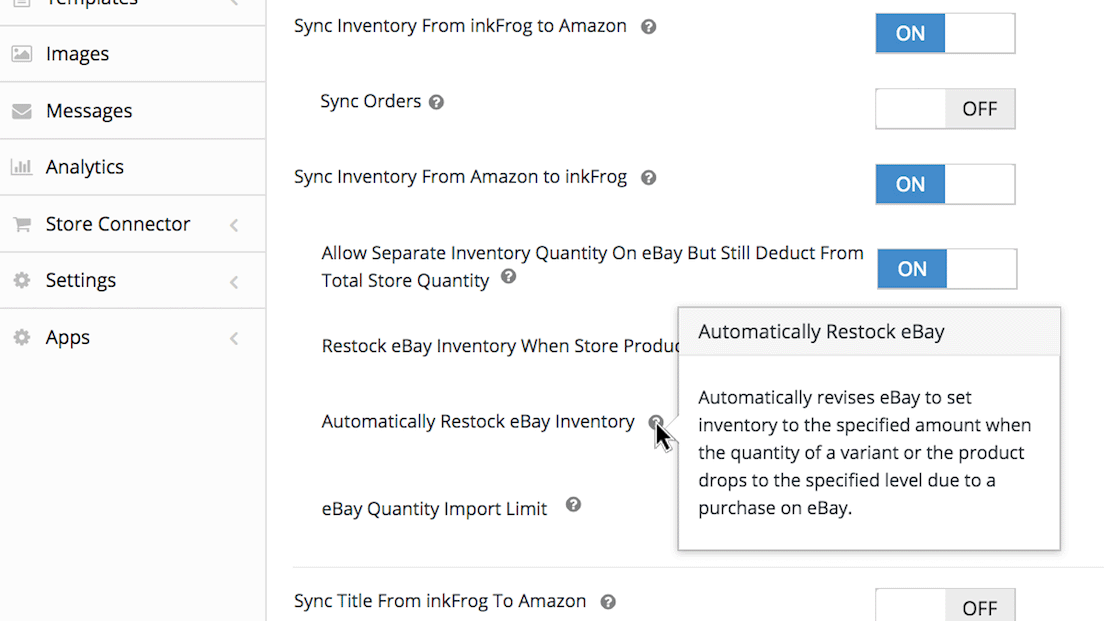
Hover over tooltip (question mark) icons to get help as you configure each setting.
Spend some time making sure that each option is configured according to your preferences, then click "Save Settings" to save your choices.
Import Your Amazon Products
Don't be put off by the word "import" here; the goal isn't to create entirely new eBay listings from your Amazon listings. Rather, in this step you'll use the import tool to pair matching eBay and Amazon listings together, so that inkFrog can keep them in sync for you.
Click the "Import" icon once again to re-open the import dialog. To connect each of your Amazon listings to its matching eBay listing, leave the default "Import all" option selected and click the "Next" button to see the "Review, map and list" dialog.
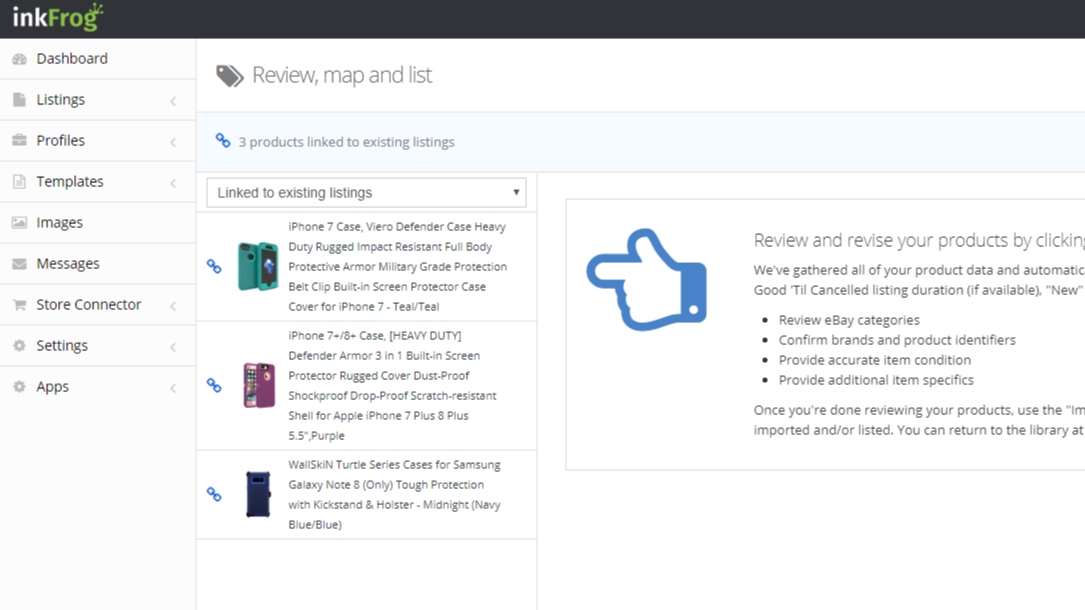
The "Review, map and list" dialog helps you to match your Amazon products to eBay listings.
inkFrog is now showing you two groups of your Amazon listings:
Those it was able to match to one of your existing eBay listings (these have a blue "link" icon next to them)
Those that it couldn't automatically match to one of your existing eBay listings (these have a green check mark next to them)
Use the drop-down list at the top-left to manage which you see at any one time. Select "All products" in this list to see all of your Amazon listings at once, matched or unmatched.
Map Your Unmatched Products
Your goal now is to attend to any products that:
Have a green check mark beside them, yet
Should not be used to create a new eBay listing, but rather connected to an existing one
If you don't see any products in the "All products" view that have a green checkmark beside them, you're good to go—all of your Amazon listings have been matched to existing eBay listings, and you can skip this step and proceed to the next section.
If you do have products with green check marks beside them that should not be used to create new listings, it's time to tell inkFrog yourself which of your eBay listings match them.
Select one of these unmatched products to and click the "Map to existing listing" button to begin the matching process.
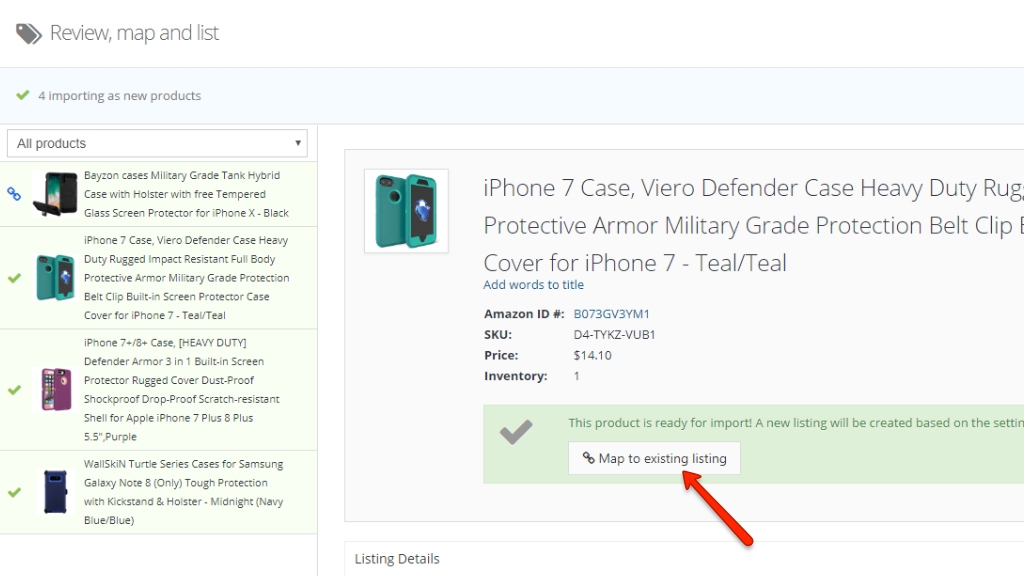
Select an unmapped product, then click "Map to existing listing" to tell inkFrog you'd like to map it.
You'll see the "Map existing listing" dialog, where inkFrog shows you all of your eBay listings. Scroll through the list or use the "Search for listings" box at the upper-right of the dialog to find the eBay listing that matches the Amazon product you've selected.
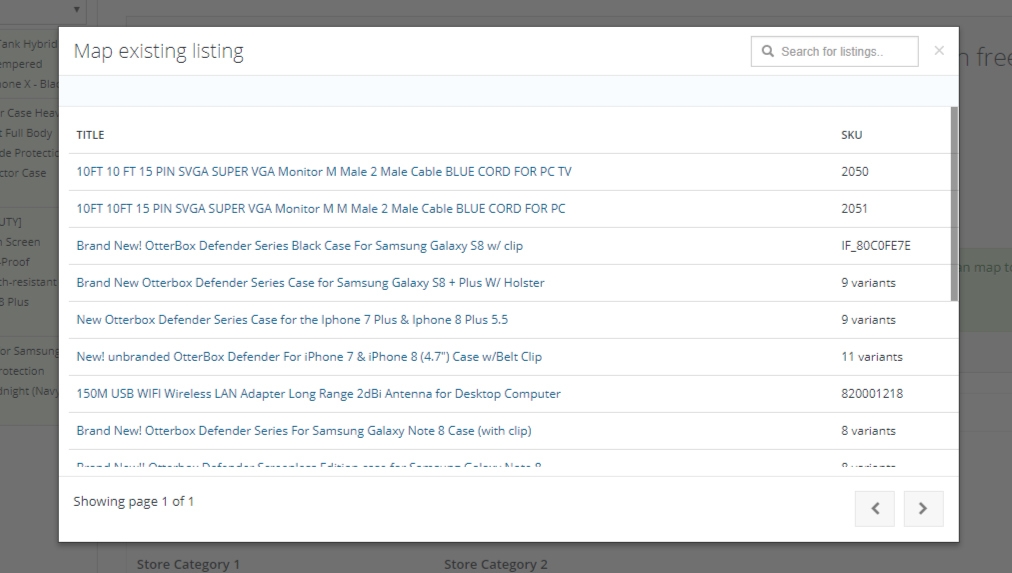
Find the eBay listing that should be mapped to the Amazon product you selected, then click it.
Once you locate the correct eBay listing, select it to tell inkFrog that it matches the Amazon product in question.
As you select eBay listings to match Amazon products, you'll find that the green check marks next to each product change to "blue" link icons to indicate that matches have been found.
Repeat this process for each Amazon listing that wasn't automatically matched (or "mapped"). Remember that any products left with a green check mark will be used to create entirely new eBay listings in the next step.
Complete the Import Process
Once you've ensured that all of the Amazon products that should be mapped actually have been mapped to your eBay listings, click the green "Import & list" button at the upper-right of the page to confirm your choices.
That's all there is to it! Your import is now complete:
All of your mapped products will now be kept in sync by inkFrog
New eBay listings have been created for any products that weren't mapped
inkFrog will use the sync settings that you configured earlier to ensure that prices, inventory levels, and/or other details about your eBay and Amazon listings continue to match each other in ways that make sense for your business.
So congratulations—using inkFrog, you've added an Amazon store to your eBay selling business, enabling a huge new universe of sales without creating tons of new work for yourself going forward. It's a win!
Don't have inkFrog yet? You'd better get it and then follow the steps above—so that your new Amazon store won't double your workload!
Join the Newsletter
Get started for free today!
Try it free
Join the 200,000+
using inkFrog!


