Over time as you grow, the list of images that you have on file in inkFrog can grow to epic proportions.
Managing your image library carefully may seem like a secondary task, behind creating new listings and fulfilling orders, but investing time to organize your images now can save you loads of frustration in the future.
Name inkFrog Images So That They're Easy to Find
Before uploading or importing images, name them carefully so that they're easy to find later on.
One way to do this is to name each image using a combination of your product SKU number and the view shown in the image. For example:
923483-box.jpg
923483-front.jpg
923483-back.jpg
923483-accessories.jpg
All of the images above are for the product in your inventory with SKU number 923483, and each view is clearly labeled.
Another popular alternative is to name images using their product the make and model:
Citizen-BJ700052L-front.jpg
Citizen-BJ700052L-back.jpg
Citizen-BJ700052L-side.jpg
Citizen-BJ700052L-box.jpg
This method also enables you to find images quickly and easily, as well as to quickly search for a manufacturer (in this case, "Citizen") to see all images for your products from a particular manufacturer.
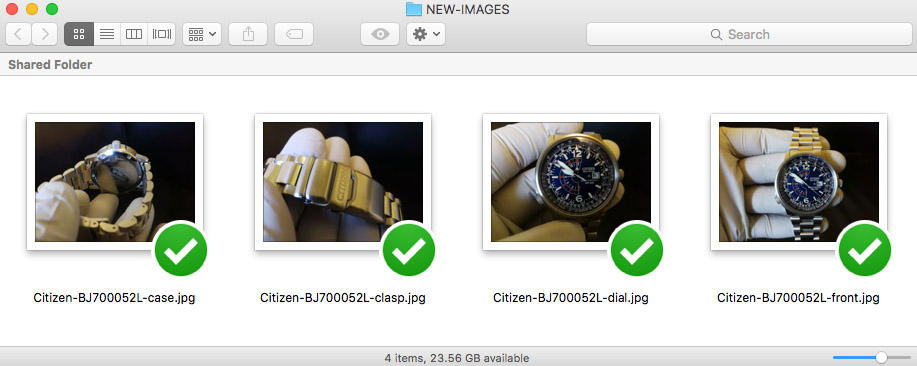
Name your images using product SKUs or a make and model.
Renaming Images
If you already have a library of automatically-imported images inside inkFrog, you can still use the naming techniques just described. Set aside an hour or two to rename them, following these steps:
Visit the "Images" area of your inkFrog account.
Check the image(s) that you'd like to rename.
Select "Bulk Actions" → "Rename Images."
Enter new names for each image in the list, then click "Save."
This method makes renaming your images for fast discovery a quick and painless task.
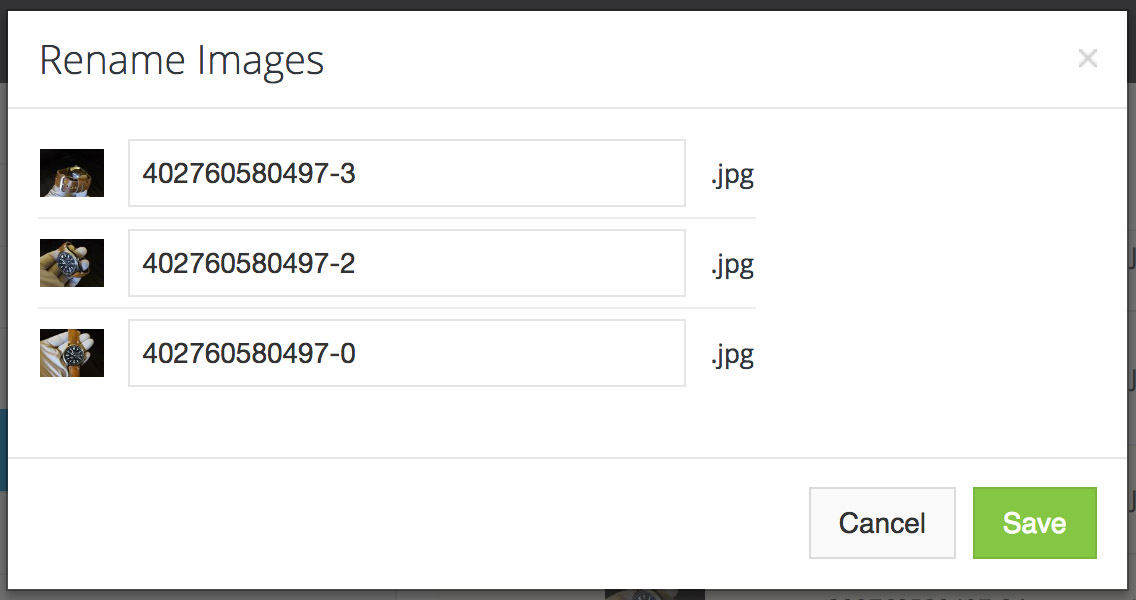
If you already have images in your library, you can bulk rename them quickly.
Importing New Images
There are several ways to add more images once you're ready to begin managing listings from inkFrog. In the "Images" area of your inkFrog account:
Click the "Upload" button to bulk-upload images from your browser, or
Select "Import" and then "From Dropbox" to import images from a Dropbox folder, or
Select "Import" and then "From URLs" to import images already stored online
In general, the upload and Dropbox import options are easier to use for larger numbers of images. Dropbox is the best choice for very large collections, since it runs in the background and doesn't require attention. To import from Dropbox, follow these steps:
Create a folder in your Dropbox for your images.
Save, edit, and name your images there.
When you're ready, select "Import" → "From Dropbox" inside inkFrog.
Authorize inkFrog to access your Dropbox account.
Browse to your Dropbox folder.
Either check the box at the top of the list to select all images or select your images one by one.
Click "Import Selected" to import the images into your inkFrog image library.
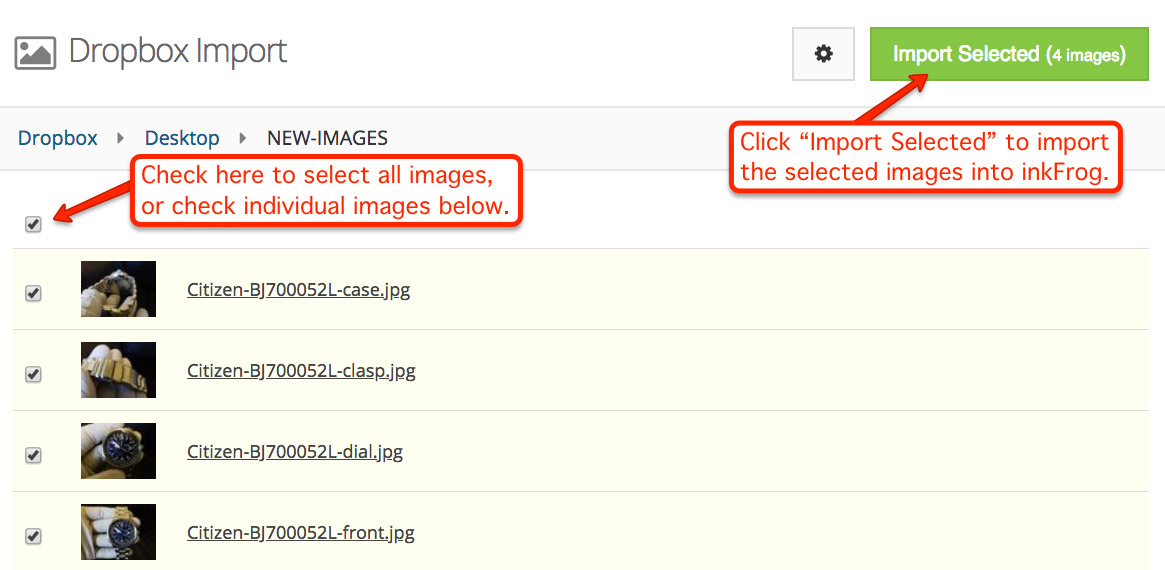
Import large numbers of pre-named images from your Dropbox storage.
Organizing Images in Folders
For very large image libraries or in other circumstances in which more organization is needed, you can also create folders for your images in inkFrog. To create a new folder, follow these steps:
Visit the "Images" area of your inkFrog account.
Click the folders drop-down list (on the far left).
Click "Manage Folders."
Click "Add new folder."
Enter a name for your new folder.
Click "Add folder" to create a new folder with this name.
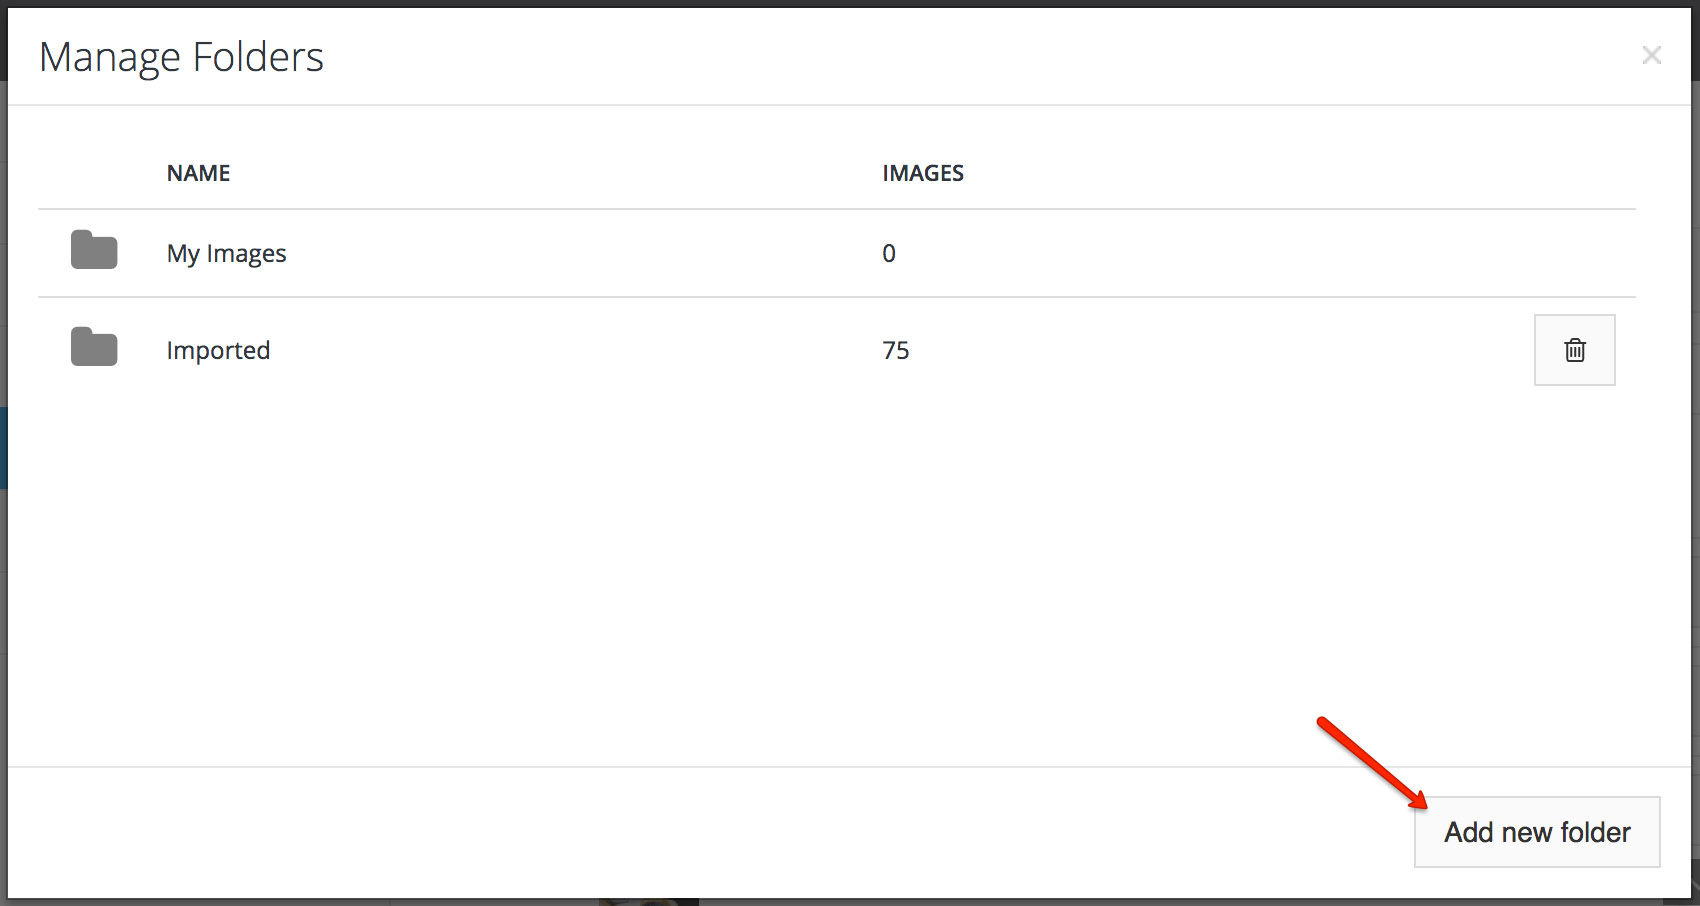
Click "Add new folders" in the "Manage Folders" area to create folders.
Once you've created a new folder, move images into it by following these steps:
Check the image(s) that you'd like to move.
Select "Bulk Actions" → "Move to folder."
Select the folder to which you'd like to move the selected images.
Click "Move Images" to move them.
With these techniques, you can manage thousands or even tens of thousands of images and keep them well-organized, easy to group, and easy to find.
Finding Your Images
If you've used the SKU or make and model method(s) for naming your images, they're easy to find inside inkFrog. Either from the "Images" area of your inkFrog account, or in the "Add Images" view as you create listings, do the following:
Enter the SKU, make, or model for the image(s) you're looking for.
Press Enter.
The list of images shown will be filtered to include just those with matching SKU, make, or model information—so that you can quickly find and edit them, file them elsewhere, or include them in your listing.

When your images are well-named and organized, they're incredibly easy to find.
If you've named your images well, you'll always have exactly the images you're looking for, available just by entering obvious product information that's a part of your listing workflow.
Keep Your Images Organized Going Forward
Using one or a combination of these techniques, you can keep your inkFrog image library organized and easy to search.
It's a small investment in time early on that will pay dividends later—as your listing volume and product line grow!
Share this article:


Join the Newsletter
Get started for free today!
Try it free
Join the 200,000+
using inkFrog!