How to Use inkFrog Designer
We recently released a tool called Designer which is a high quality tool for creating eBay listing templates for inkFrog users. It has some really great features such as:
- Templates are completely separated from listings on our end which makes it really easy to change templates or switch to/from a different listing provider.
- Designer is powered by a WYSIWYG (what you see is what you get) editor which is very easy to navigate once you’ve spent some time with it - you don’t need to know HTML to create amazing eBay listing templates with inkFrog Designer!
- We have recently added the ability to display YouTube videos in templates so you can have videos on your eBay listings.
- We have recently added a new Cross Sell widget which lets you showcase other listings on your eBay listings. Imagine creating a professional listing template and it shows several other products you are selling - it’s a great tool for generating additional sales on eBay!
- Even better - we have hundreds of professionally-designed templates ready to go, simply login to inkFrog, go to the designer tool, and select one of them and you can have it up and running in minutes!
Now because this is such an advanced tool it can be a little complicated to get started with. So we’ve put together these guides so you can learn how to use the Designer template like a professional and increase your sell-through rates by 30% or more!
How Templates Work
Templates are essentially a framework that will apply to all of your eBay listings. Think of it as a muffin pan - it’s a framework which, when used properly, produces the same desired outcome (muffins that all look relatively the same) but you can change the flavor or color or the ingredients of each individual muffin if you wanted. That’s how templates work - the template is your muffin pan and your individual items you want to sell on eBay are the muffins.
The reason you want to use a template is that it enables you to automatically put content on every eBay listing. This is great for branding (i.e. your logo), policies (i.e. you can outline your return policy on the template and every eBay listing will have that same policy), shipping information, and so on. In short, it can be a huge time saver because you just need to create the template once and it will apply to all of your listings.
Another example of why you would want to use a template is sales and promotions. You can put promotional material on your template which directs people to your eBay store or your items for sale page which encourages customers to look at everything you have for sale, not just the one item they initially came to you for.
Now that we’ve covered the theory, let's move onto application!
Accessing the Designer Template System
To load the Designer tool you simply need to go here:
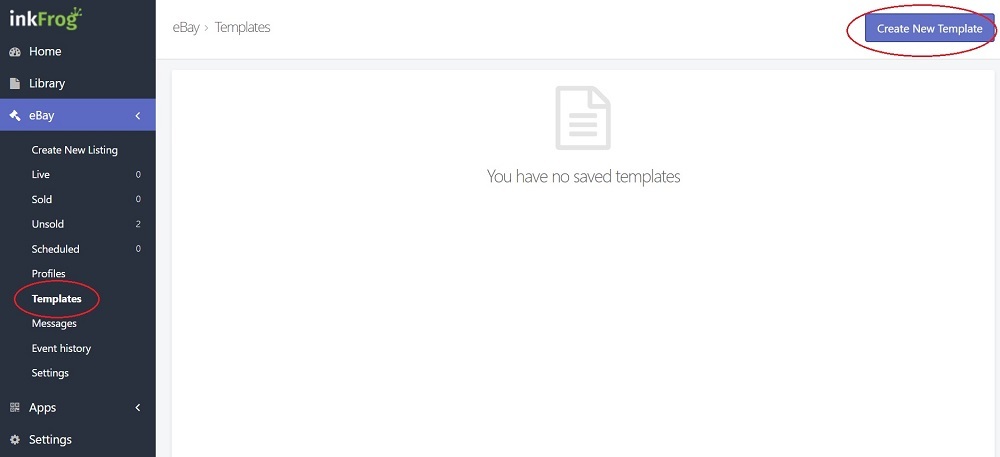
If you are in inkFrog Open, simply click on eBay > Templates, then Create New Template in the top-right corner, then Designer Template in the popup window:
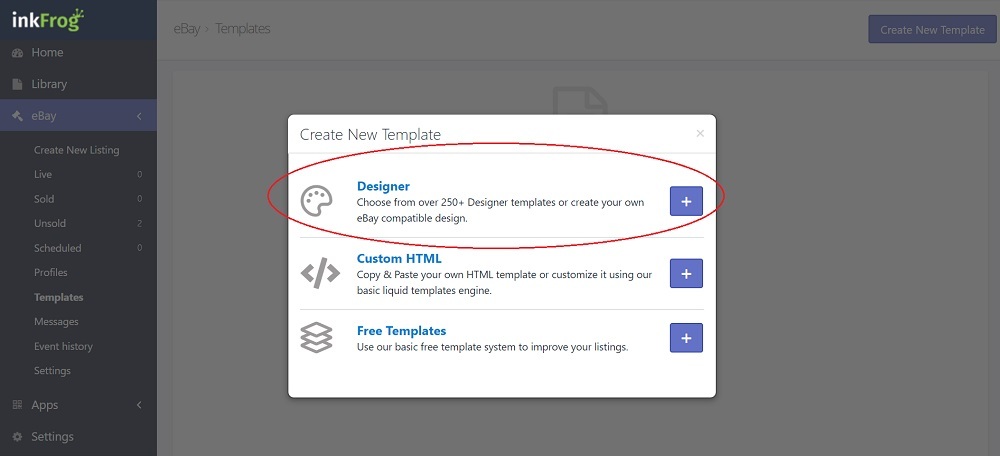
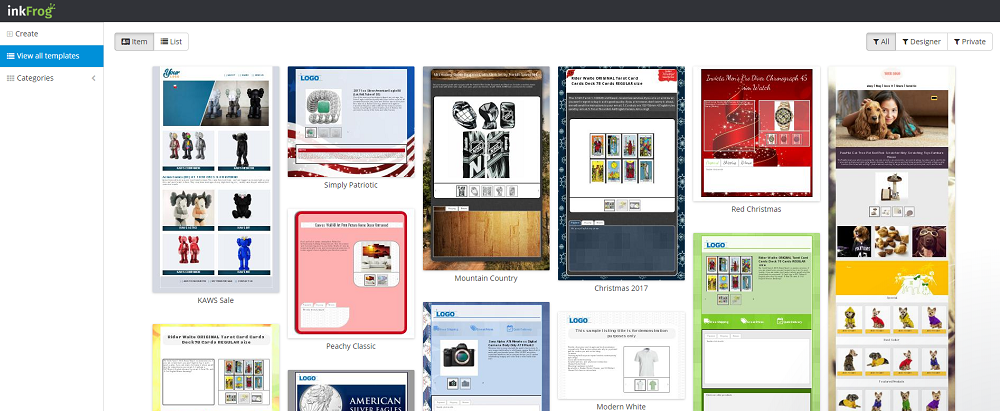
It will show you the hundreds of templates we have designed (which you are welcome to use if you are on the Designer subscription plan) and it also gives you access to the template builder where you can create your own template:
Using an Existing Template
Let’s say that you want to use one of our pre-built templates. All you need to do is find one you like and make a copy to your account. The steps are simple:
- Go to the Designer Template tool (http://builder.inkfrog.com)
- Look for a template you want to use
- Edit the template to load it
- Save > Save As to create a copy and save it to your account
- Make modifications (if you want any changes made)
- Save > Save Template to save your changes to your copy of the template
- Go back to inkFrog Open and assign it to the listings you want to use it with
Let’s walk through an example:
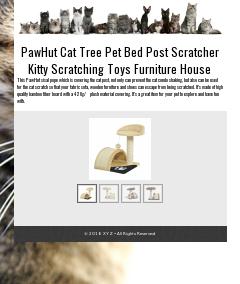
Let’s say that I want to sell pet supplies. So I’m going to to Designer Template tool and in the left menu I click onto the Pet Supplies category:

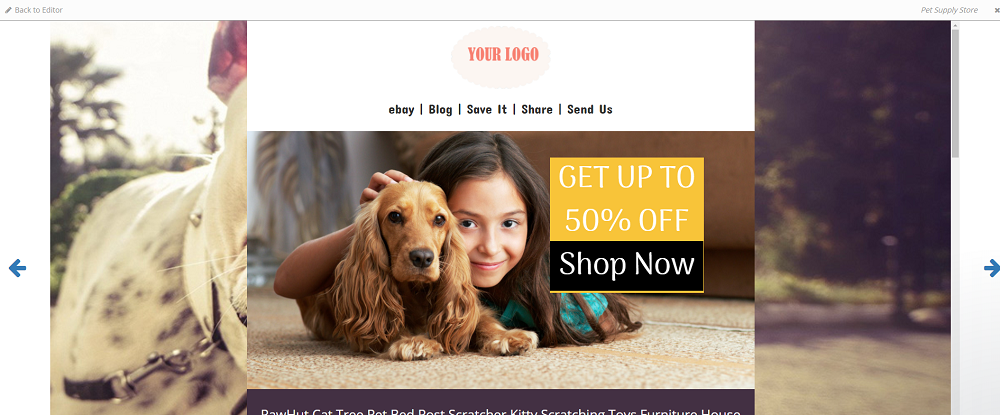
I find this really adorable template which I think would be perfect for my pet supplies:
Click here to open this template in a new window
I click on the template to open the full size preview:
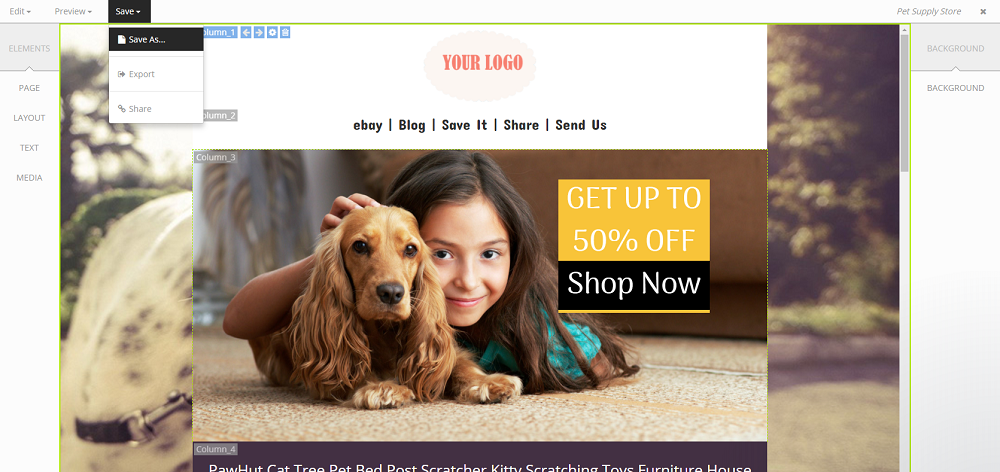
I edit the template by clicking on “Back to Editor”:

I then click on Save > Save As to create a copy of the template and save it to my account:
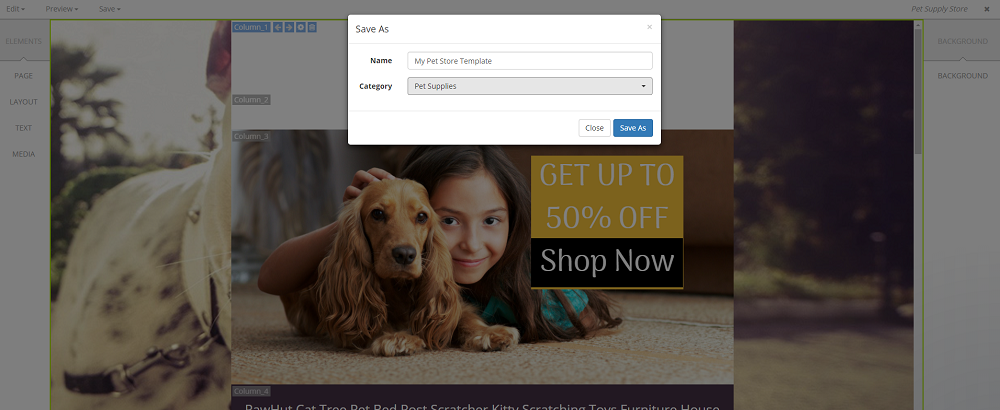
I give it a name and save it to the Pet Supplies folder on my account:
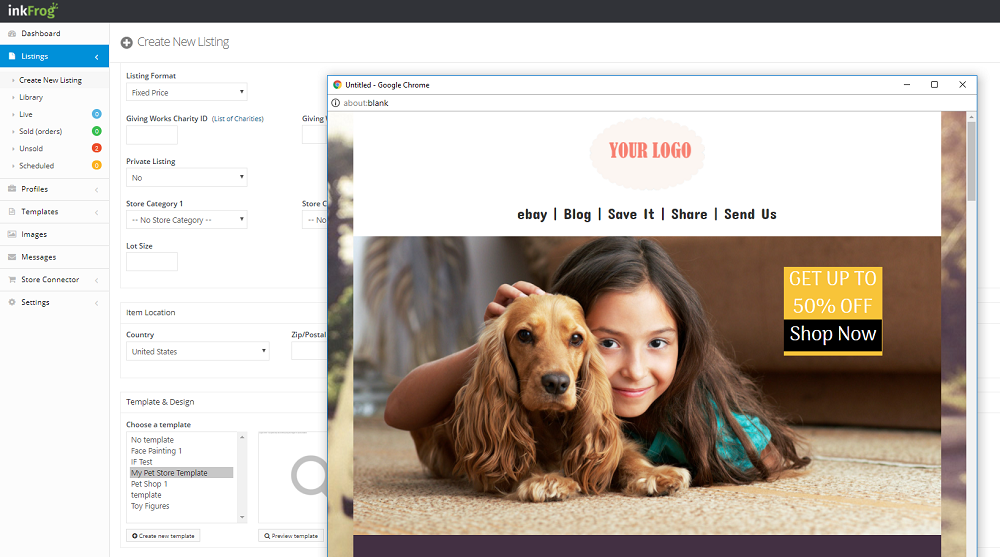
Now this template has been copied to my account. I can make changes to it (see the section below on how to edit templates) or I can start using it. The template now appears in inkFrog Open when I am creating or editing a listing and go to the template selector option:
It has now been published to my account! I go back to my inkFrog Open account and decide I want to immediately list it with some products. So I go into the Listings section, select 2 listings, and then bulk edit them to apply the new template:
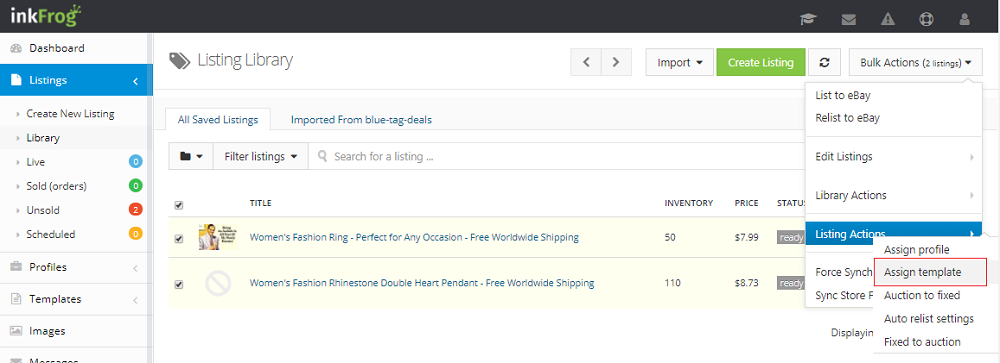
Viola! Those listings will now use that template moving forward and will look much more professional!
Creating a New Template From Scratch
Let’s say that for whatever reason you don’t like the hundreds of pre-built templates that we have created. You have an idea of how you want your template to look and want to create your own, no problem!
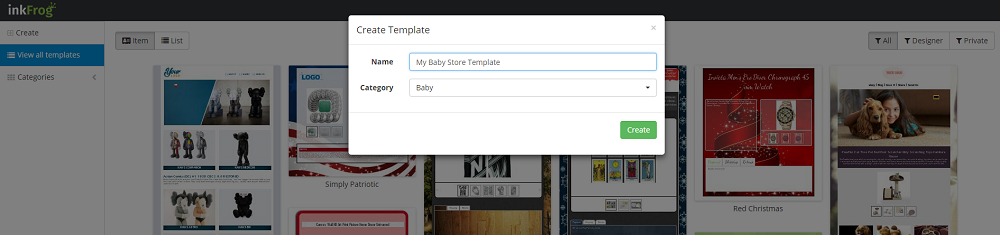
Go back to the Designer Template section (http://builder.inkfrog.com) and click on Create:

This will pop open a little window asking you to select the template type (currently there is only one type to select so use that). It will then ask you some questions like a name and the category:
Once that’s done you will be taken to the Editor tool and there will be a very basic template appearing:
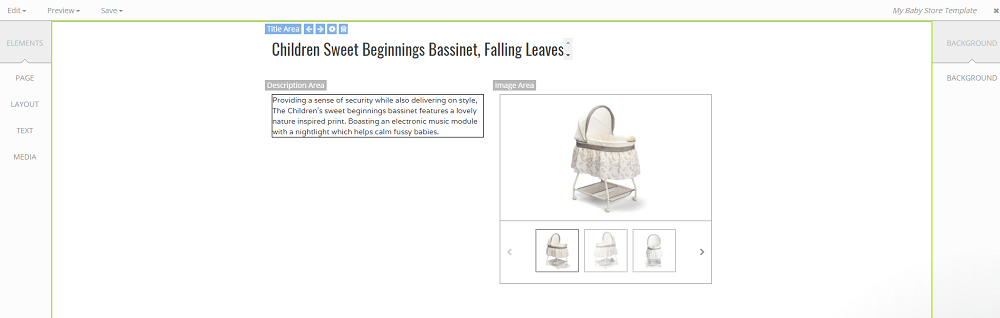
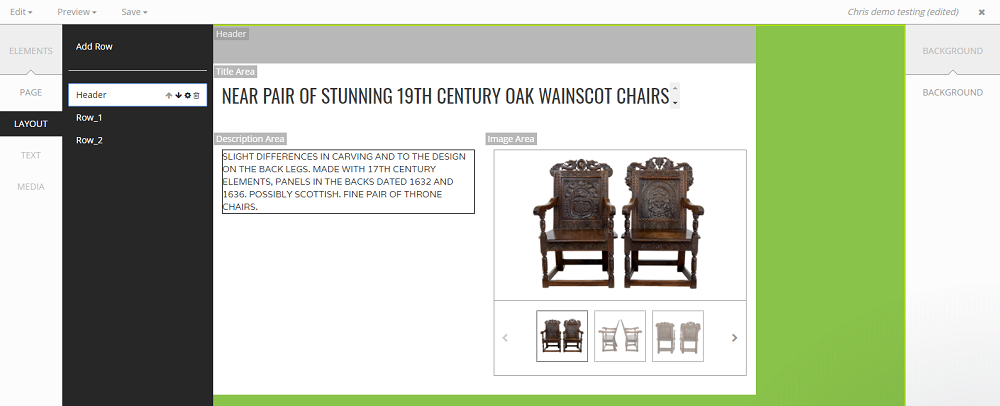
Now a few important things to note - the data you see for the listing (the title, the description, and the pictures) are just placeholders. They look the same for everybody. When you publish the template with a listing those fields will be replaced with your actual product data.
With a basic template in hand, it’s time to get down to editing it and making it look fancy!
Editing a Template
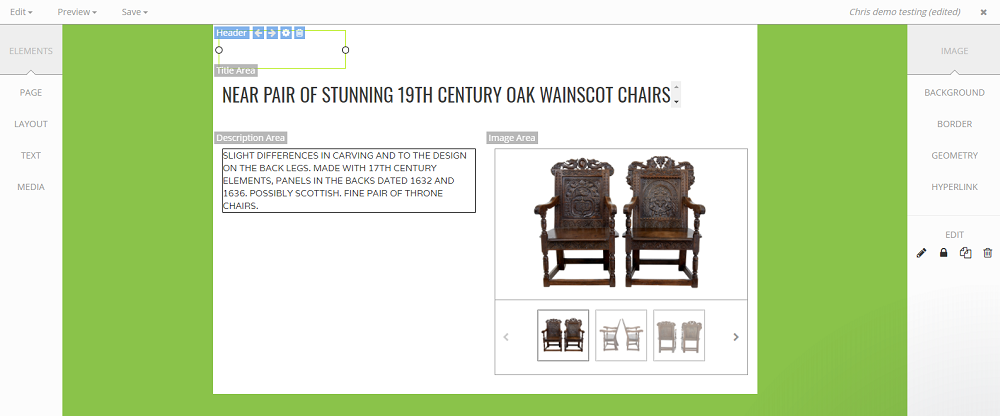
Before you edit a template, you need to understand that there are three menus:
Top Menu - This controls functions like Save, Undo, and other features that you will typically find in a menu in a word processor.
Left Menu - This controls the general layout (we call them Elements) of the page. You can create new sections of content and move them around here.
Right Menu - This controls the finer details such as colors, fonts, etc.
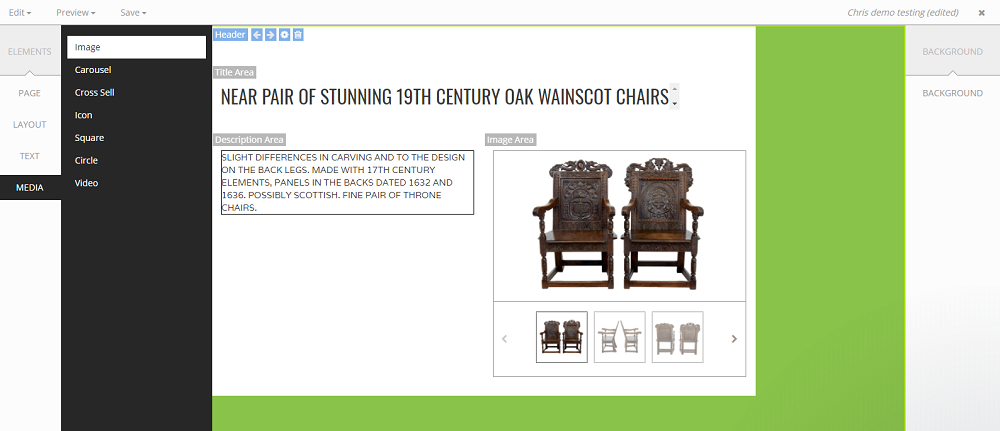
Example: Let’s say you want to add your logo to the top of a new template. In the left menu you simply select Media > Image. It will ask you to either upload an image or provide a link to one. Your image will then appear and you can simply click and drag it around the template where you want. If you want to hyperlink the image or make it bigger or other edits, you simply click on the image and then select the appropriate controls from the right menu (which controls the fine details of every element on the page).
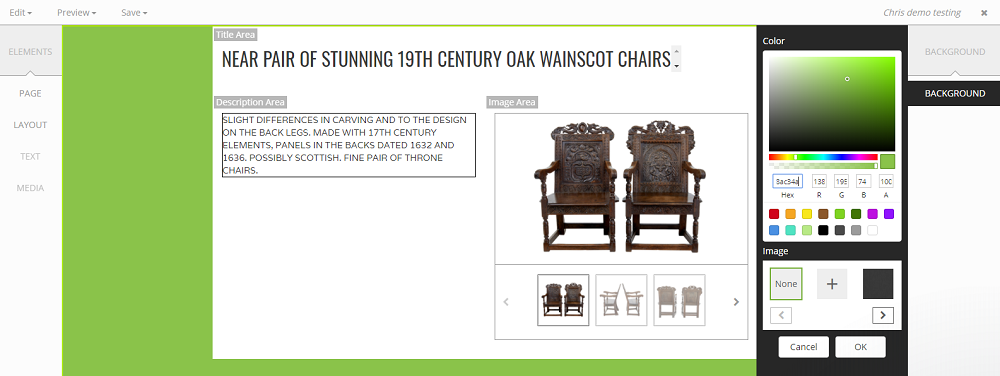
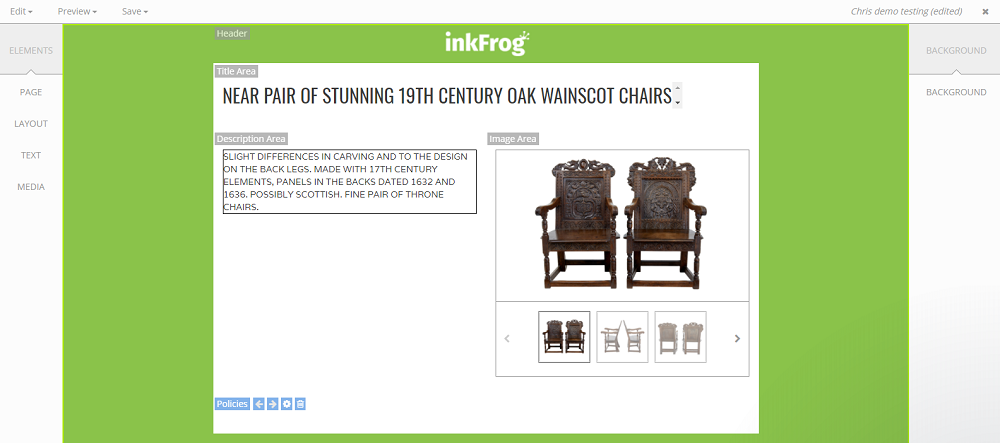
Let’s make some basic modifications to the default template. We want to add some color, our logo, and some other basic things just to make it look more presentable. Here is the starting point:
First, we are going to make the background inkFrog green. In the left menu we select Elements > Page > Background. This selects the background of the template. Then in the right menu we select Background which opens up the controls for it. We enter in our desired background color and it instantly updates to inkFrog green in the preview panel:
Now we want to add a header which shows our logo. There’s a few ways to do this but the easiest way is to simply add a row and move it above the other rows in the template. We do this in the left menu, select Elements > Layout > Add Row:
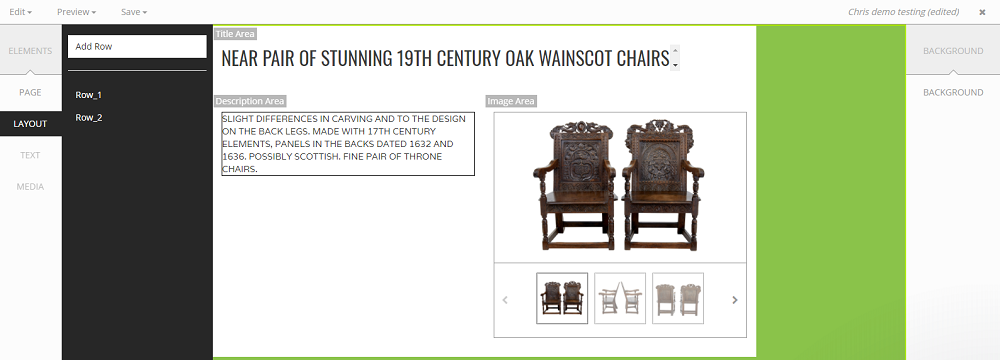
It will open a little window asking for you to specify the type and name it. We are going to call this row Header to make it easy to identify in the future and make it a single column row:
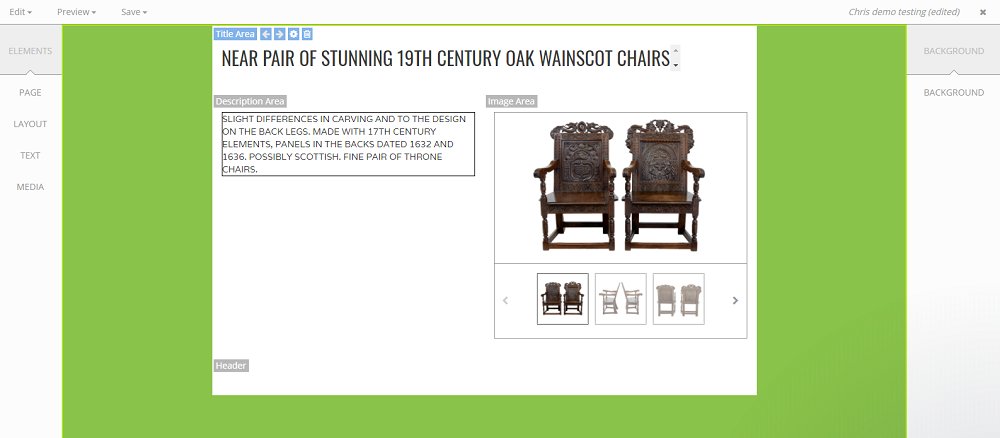
Great! We have added a row to the template called Header, however by default it gets added underneath the other rows:
So we need to move it. Moving a row is very easy. In the left menu under Elements select Layout and then hover your mouse over the row you want to move. A few buttons will appear beside it and the row will be shaded in gray in the preview panel so you see exactly what you are touching. Simply click the little up arrow a few times to move it to the top:
Now we need to add our logo to the header. To add an element to a row you have to click on the row in the preview panel (the name will light up blue when it’s selected), then in the left menu select Media > Image. This will open a little window asking you for some specifics on the image before it drops it onto the template:
This presents us with an interesting problem, the image I selected used white text with a transparent background (oops!):
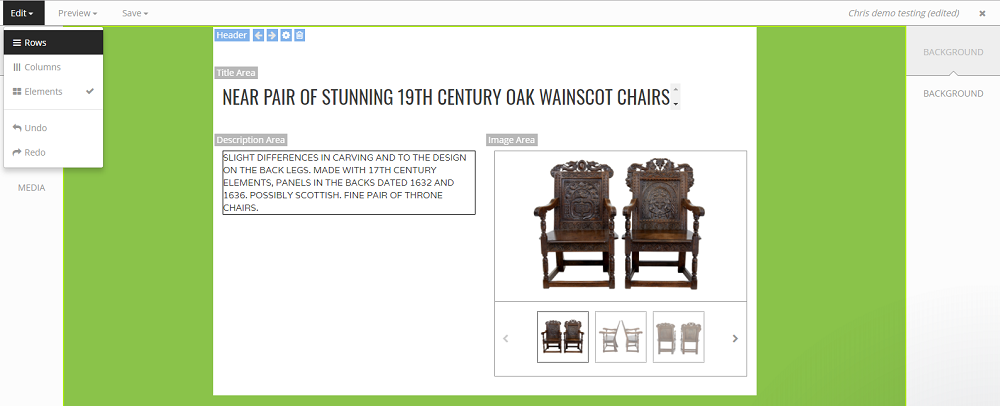
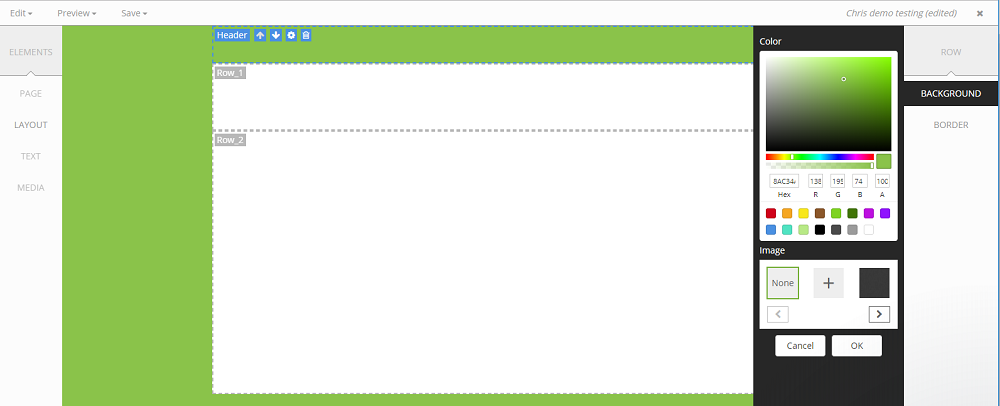
Obviously that is quite useless to us so we have a few options. I could change the logo to a different file, or I can change the background. So I’m going to change the background behind the logo. It’s going to use inkFrog green just like the rest of the template. To change the background color of a Row, you need to switch to the Row editing mode by clicking Edit > Rows. By default the template designer works in Elements mode which lets you modify the individual elements on the page.
Once we are in the Row Editor mode, we will only see the rows and the template background. It hides everything else. We select the row we want to update, then select Background in the right menu like before and enter the color we want to use. That will change the entire row to use the background color we want:
Now we have to switch back to Element Mode by clicking Edit > Elements. That will bring everything else back:
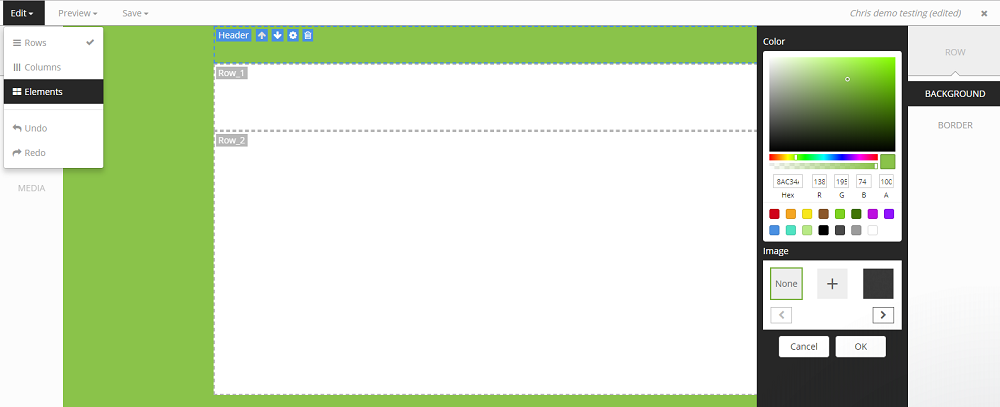
Great! We are back in Element Mode and we can see what the background color change did:
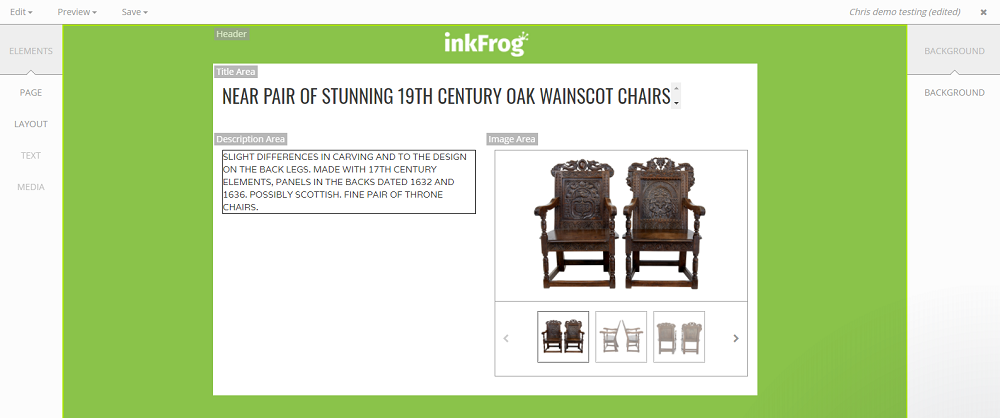
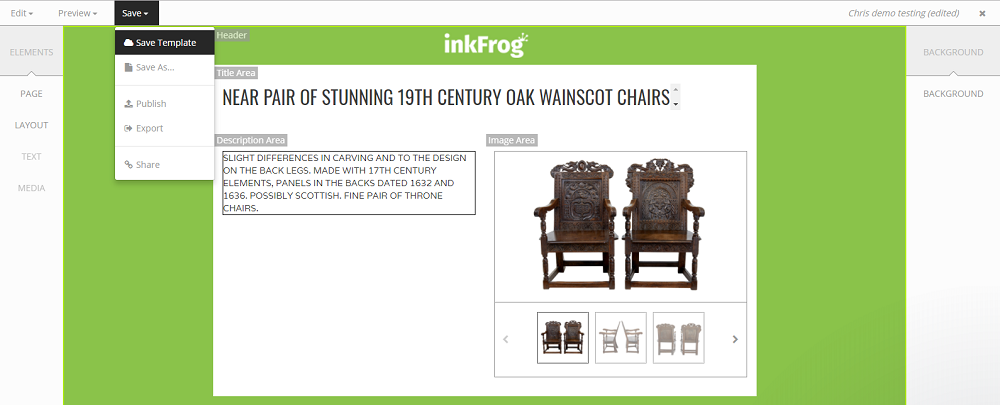
Before we go any further we are going to save this template. As a rule of thumb you should save your template often just in case your computer does a forced restart or something and you lost the changes you’ve made:
Now let’s add some more stuff to the listing. I like to have detailed information about shipping and returns and those types of policies clearly present on everything I sell. First we are going to add a row called Policies just like we did with the Header row above:
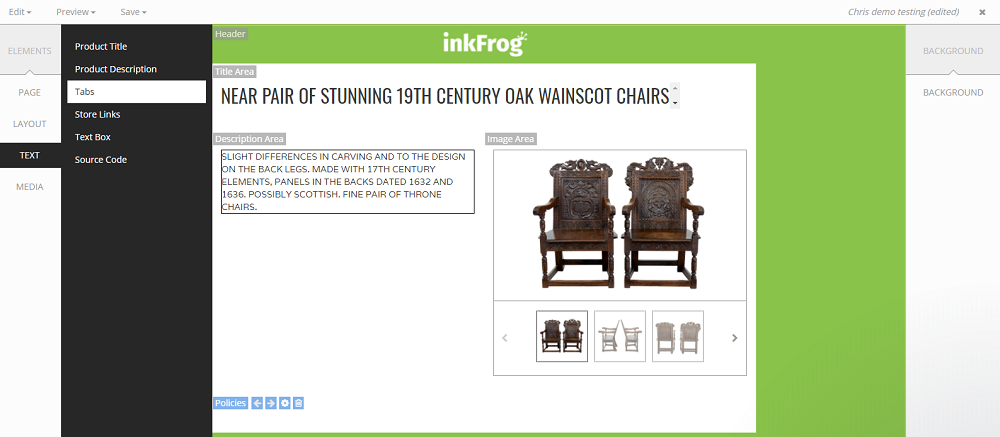
We’re going to add a type of text widget called Tabs which let us add blocks of text that you can cycle through by clicking on the tabs above them. We do this by going to the left menu and clicking on Text > Tabs:
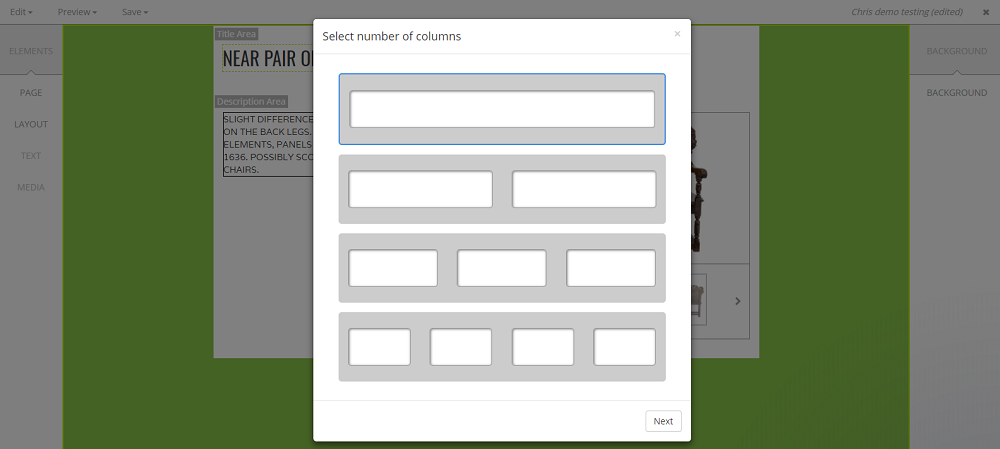
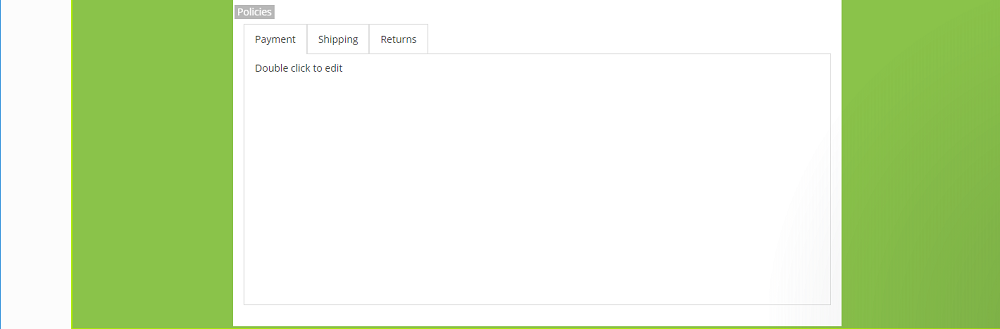
This is going to open a little window which asks us for how many tabs we want to create and what they are each called. We are going to use the default 3 tabs in this example:

Once we are happy with the tabs settings, the widget gets added to the template:
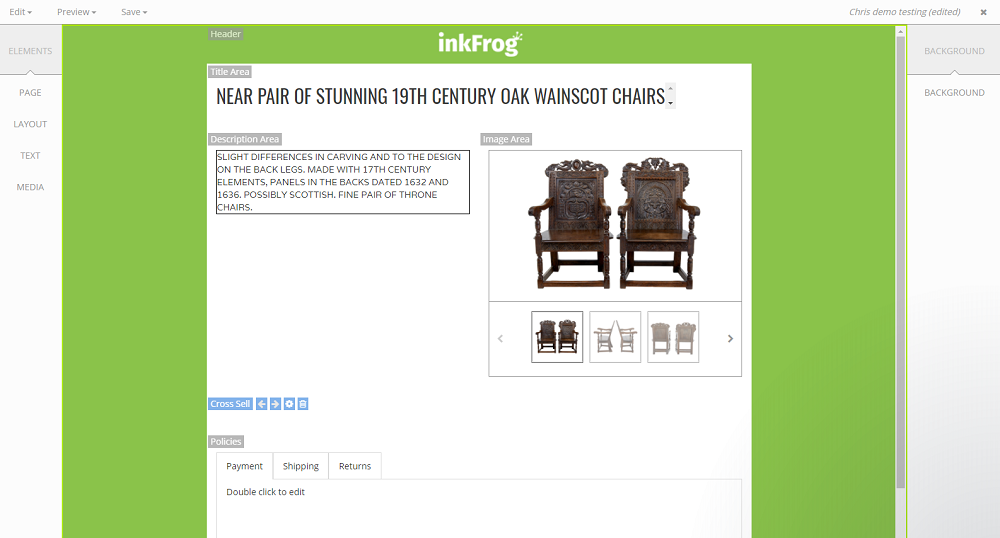
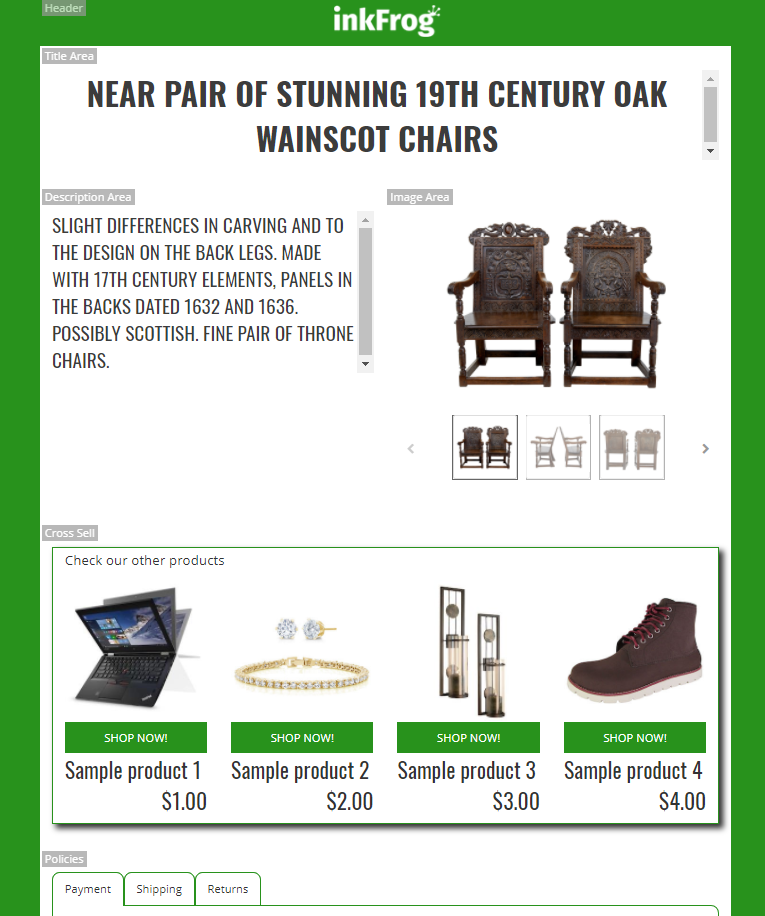
Now I feel like the listing is missing something. It’s a good starting point but it needs more polish and shine. To make it more interesting I want it to showcase my other products that I have for sale above the tabs. So I’m going to add a new row called Cross Sell and put it above the tabs but below the listing information:
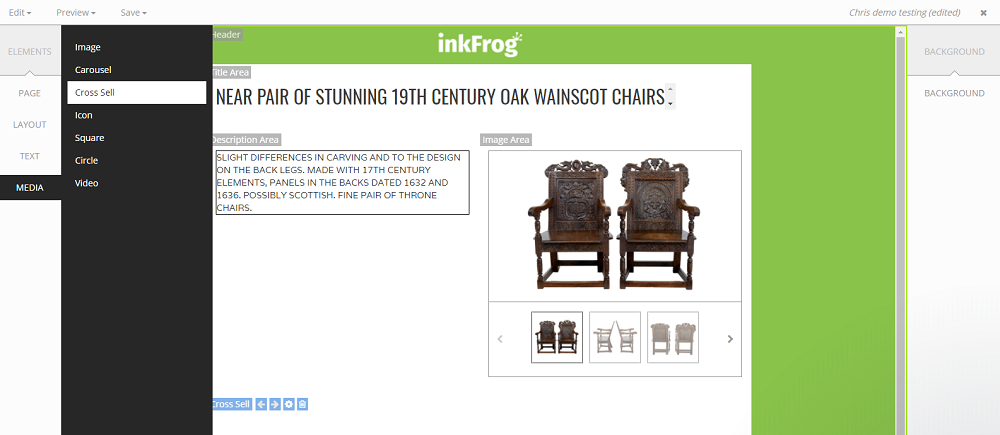
I’m going to add the new Cross Sell widget to this row by going to the left menu and selecting Media > Cross Sell:
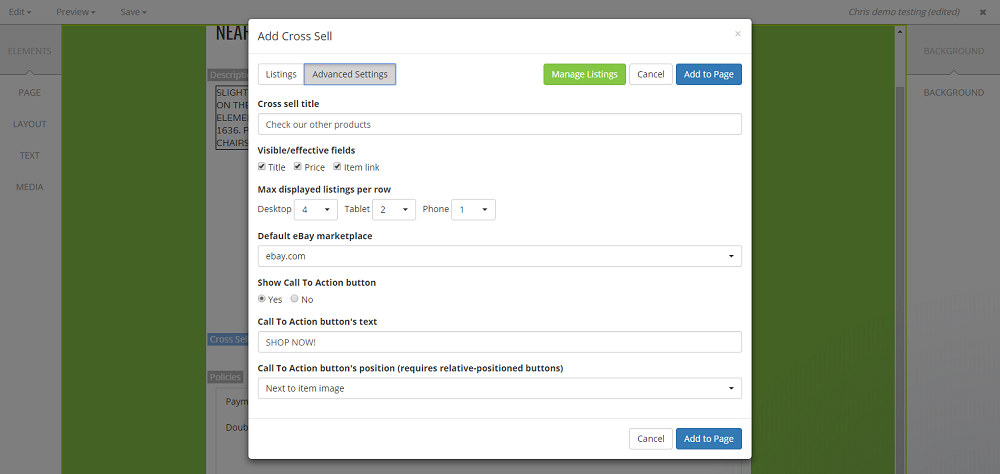
This is going to open a window to ask us to configure the Cross Sell widget. We configure it how we want, for this demo I’m using the default settings:
After we are done with the configuration it will add the Cross Sell widget to the template with some example products so you can see how it appears:
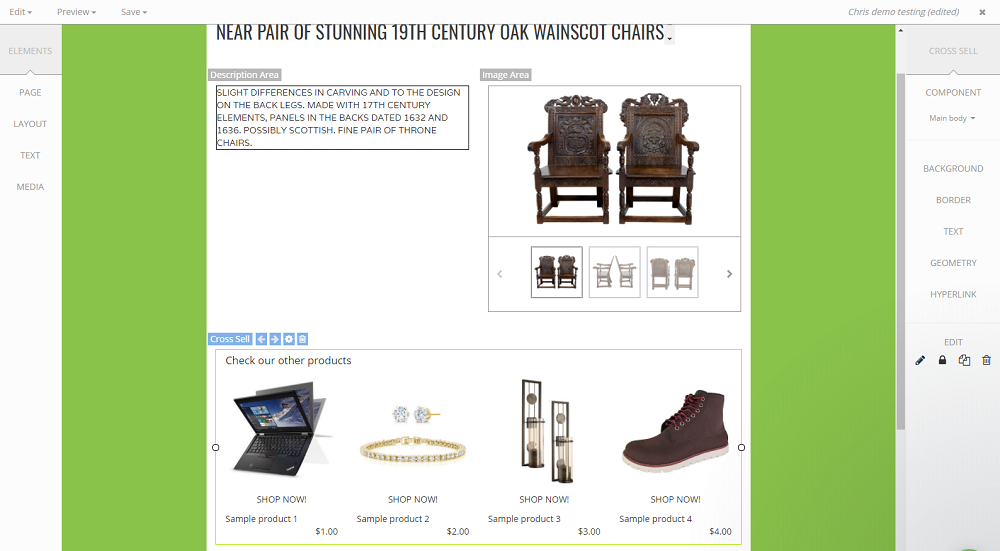
As you can see, by default it looks a little plain. So we need to modify the options a little. Let’s start with the buttons for each listing, we want to make those inkFrog green. We do this by making sure the Cross Sell widget is selected, then in the right menu we select Component > Call to Action Buttons:
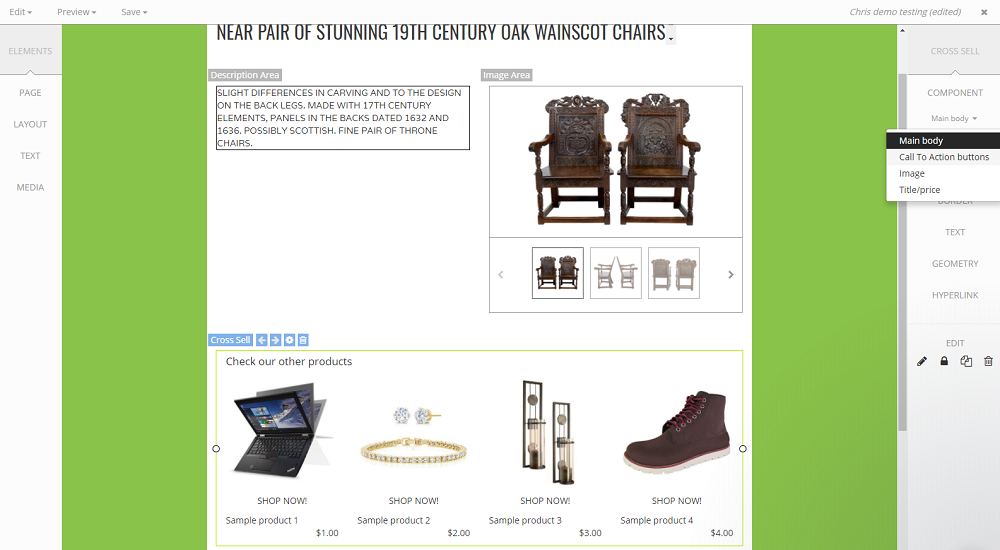
This lets us edit the design of the buttons for the cross sell products. We’re just going to change the color on them for now:

It’s amazing how simply changing the color of something minor can make a big difference isn’t it?
We’ve made a pretty good looking template here so far. There are many other ways to improve it and make it look better, but I wanted to show you the general idea of how to do things in the Designer tool without writing a novel. However in the interest in showing what else you can do with this, I did edit some of the settings to change it a little further until I had a finished template I was happy with:
Share this article:


Join the Newsletter
Get started for free today!
Try it free
Join the 200,000+
using inkFrog!