inkFrog offers you hundreds of custom eBay listing templates created by professional designers. You may be thinking, however, that you're wary of selling with a template that thousands of other sellers might use.
Not to fear. It's incredibly easy to make any of the inkFrog templates your own. Here's how.
1. Open the Templates Library and Choose a Designer Template
Evaluate the templates with an eye toward how well each layout fits with your store and product needs. Though it can be difficult to see past colors and images in the samples shown, try to think beyond these—all of the colors and images can easily be changed.
Click on the edit button (it looks like a pencil) at the bottom of a template you'd like to customize, to open it for editing. You'll find yourself in the inkFrog template editor.
2. Start Clicking on Things You Want to Change
Nearly everything in an inkFrog template can be customized.
In most cases, starting with the logo is a good idea. Click on the logo, then click on the pencil icon to edit the image used for the logo.
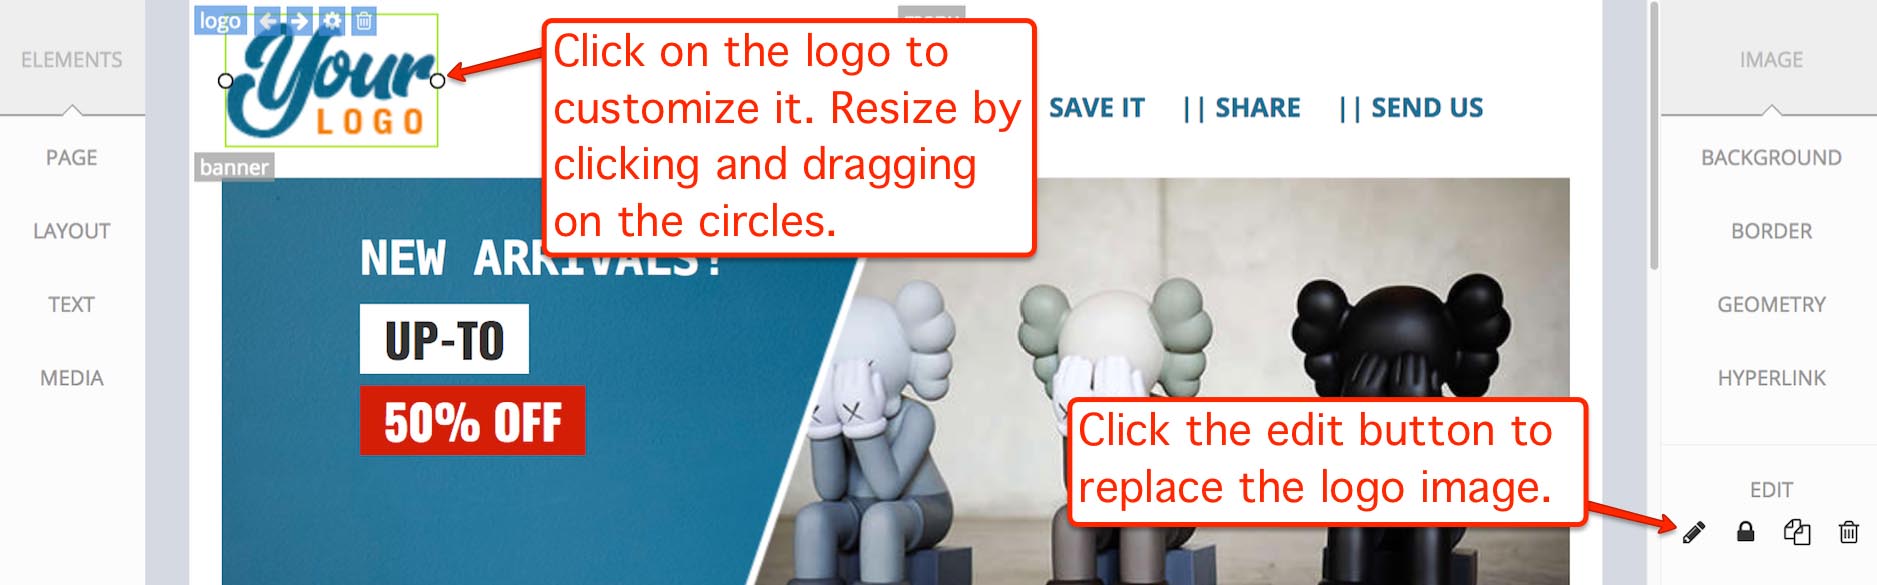
Add your own logo by clicking, then editing, the template's default logo.
Now either enter the web URL of your own logo, or click "inkFrog Library" to select an image from your inkFrog image library or upload an image to be used as your new logo.
Click "Update" once you've entered or selected an image to update the template with your new logo.
Navigate through the template and replace any other images you'd like to replace in just the same way—click, edit, then select or upload a new image.
3. Change the Layout of the Template if Needed
Our templates are built in rows (horizontal sections), and you can move each row up or down to suit change the order in which items appear in the template.
To reorder rows, either click "Layout" in the left sidebar, then hover over a row and click the up or down arrows to move it up or down, or select "Edit" → "Rows" to see a visual representation of each row that can be moved up or down.
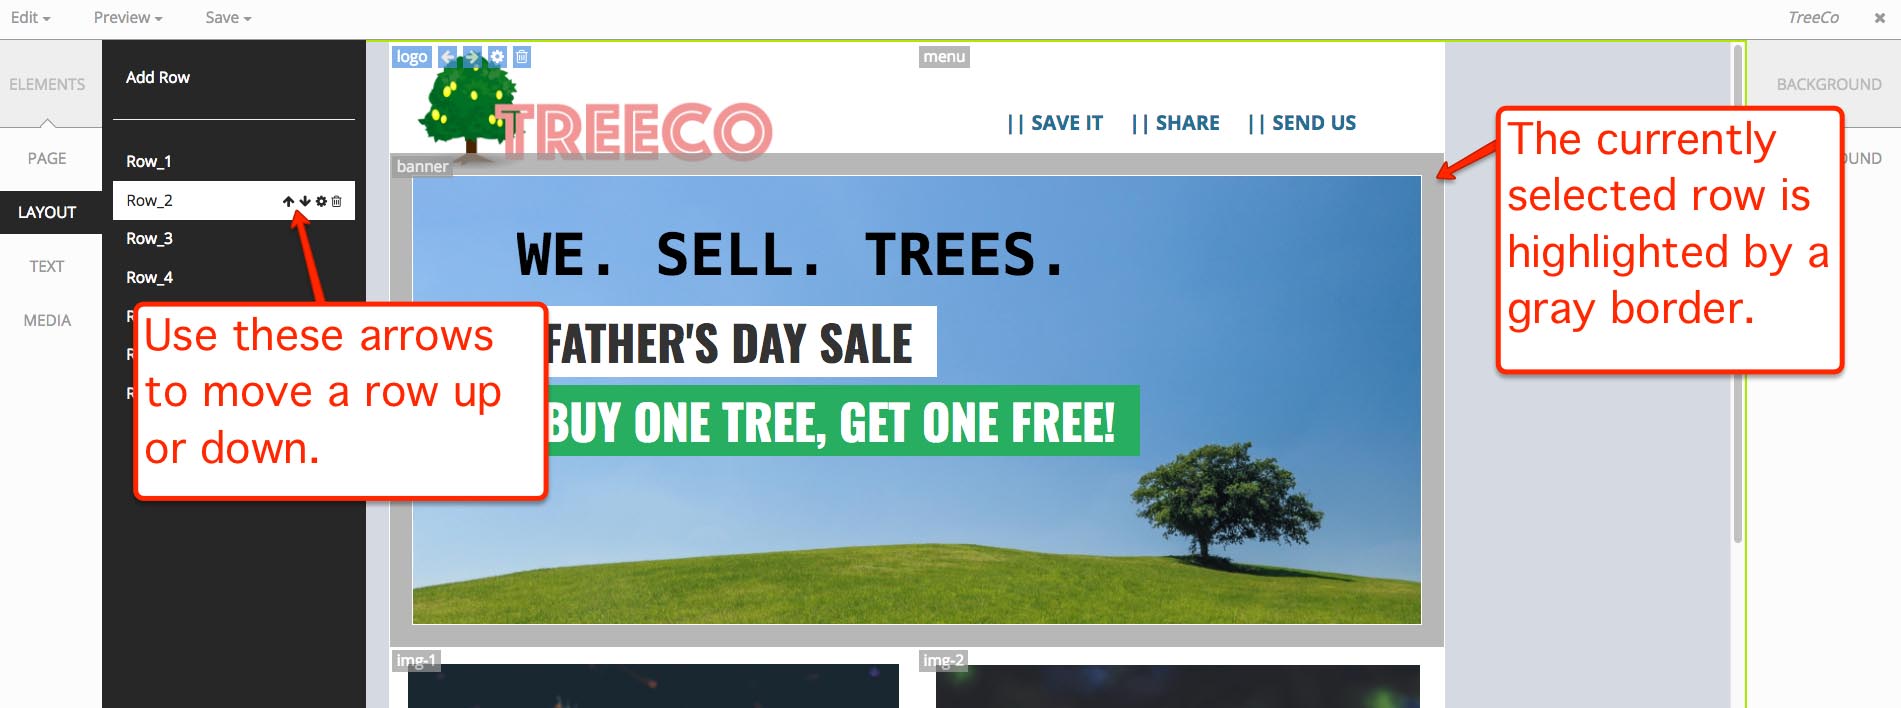
Move rows up or down to affect the overall layout of your template.
Note that if you use the second method, all of the content on the template except rows will disappear as you move them around. Select "Edit" → "Elements" and then "Page" in the left sidebar when you are done, to return to normal editing.
4. Update Text to Reflect Your Needs
Click on any text items you'd like to change, then on the edit button on the right to open an easy-to-use text editor enabling you to customize your text.
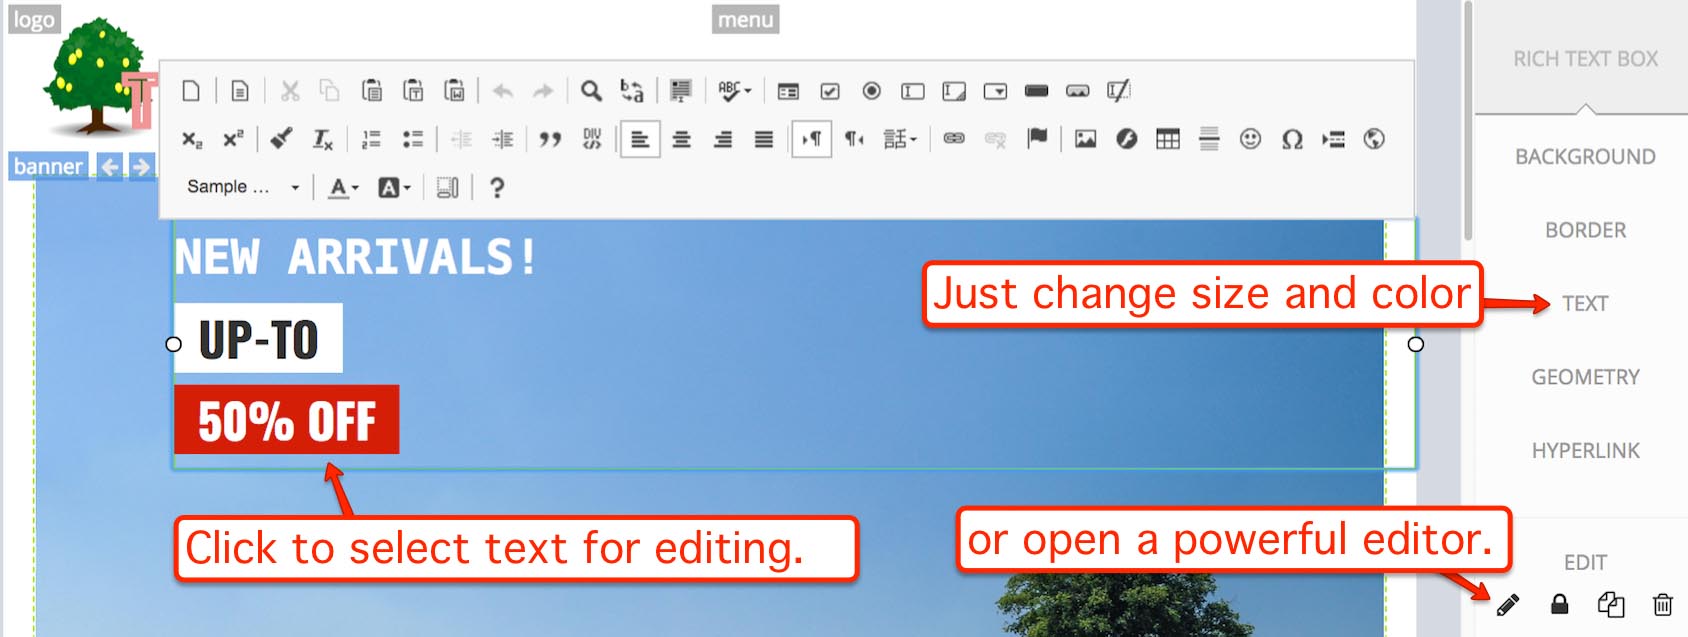
To edit text, click on it, then click either "TEXT" or the edit button.
Apart from the title and description areas of the template, text areas on the template are there for you to use to describe your own brand, promotions, and policies.
5. Customize the Look of Your Title and Description
You'll find text areas in the template that look like a product title and a product description. When you click on these, you'll see "PRODUCT TITLE" or "PRODUCT DESCRIPTION" at the upper-right of the editor.

"If you are selling on both Shopify and eBay this app is absolutely brilliant. Once you install it you will wonder how you ever got by without it."
— Cannon Sound
You can update the appearance of these text items as well. Click "TEXT" in the right sidebar to edit these, which enables you to select a color, typeface, and size for each text area.
Don't click the edit button (pencil icon) to edit title or description text areas, since they're to be replaced with the product and description fields from your actual listings. Making changes to these with the full editor will prevent this replacement from occurring.
6. Link to Your eBay Store and Other Products
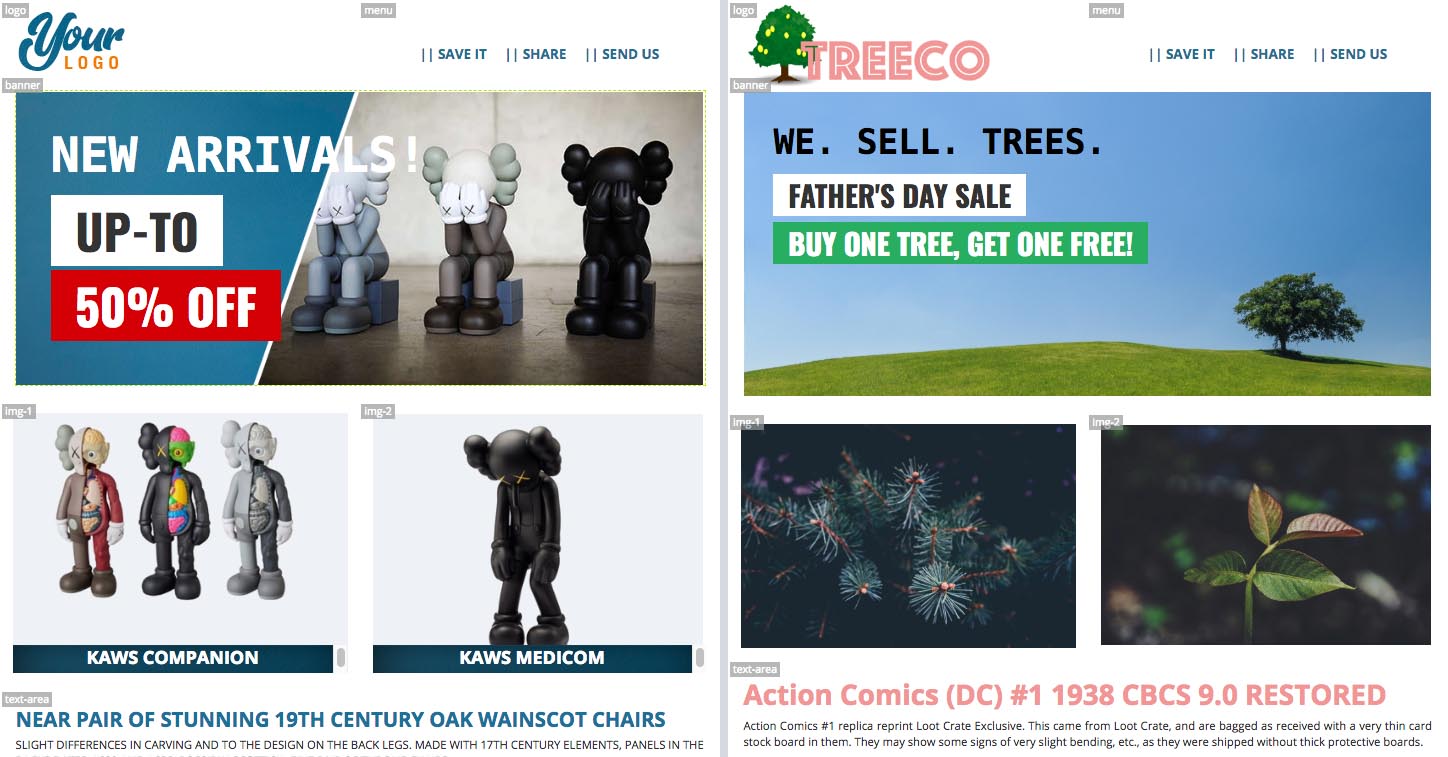
You'll notice that many images in templates have a tag over their upper-left corner showing "img-1," "img-2," or similar labels. Images with these tags are replaced when you list products with your actual images for each listing.
However, you can repurpose any of the images in the template to link to your eBay store or other eBay products instead.
Select items that should link to your eBay store or to your other eBay products. These should usually be images nearer the bottom of your template. If they are tagged with "img" and a number, click the gear icon, then remove the tag to prevent them from automatically being replaced when the template is used for a listing.
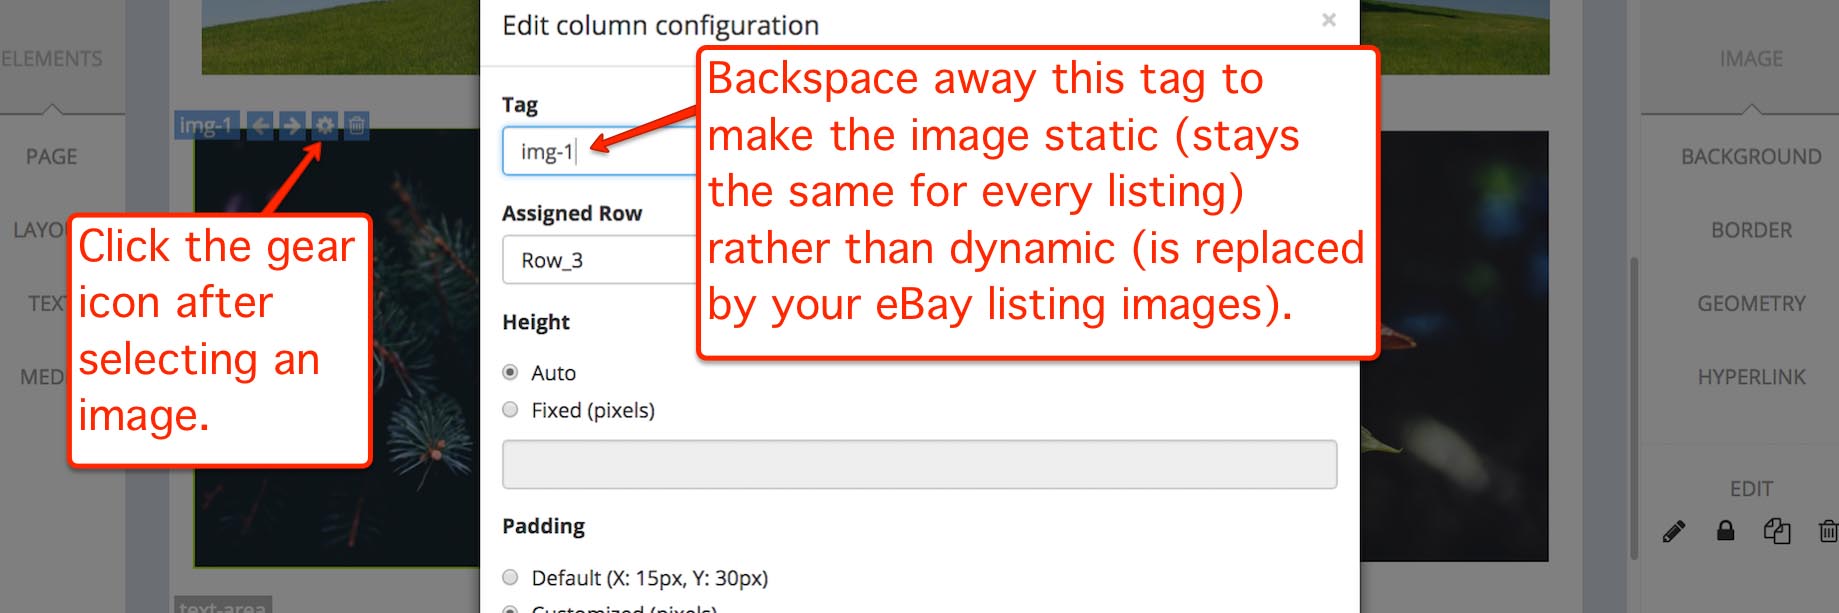
You can make images static by removing the "img" tag from them.
After applying this change, edit or replace image in the same way you modified your logo. Then, select each image again and click "HYPERLINK" in the right-hand column, entering the URLs that shoppers should see when they click on the images in question.
Most of the time, these will be links to other products that you sell or to your eBay store.
7. Hyperlink any Remaining Items and Remove Unwanted Items
Use the text editor to hyperlink any remaining items:
Click on the text you'd like to link
Click the edit button to open the text editor
Highlight text that you'd like to hyperlink
Click the link icon in the editor (looks like a link in a chain) to enter the address that shoppers should visit when they click on the text
Then, delete any remaining template elements you don't want to include in your listings:
"We have been using InkFrog for over a year now and it is the best app we could have asked for. We used to spend so much time removing stock from our eBay store that had sold on our Shopify store and vice-versa and now InkFrog does it for us."
— Gymwear
Click on the item.
Click the trash can icon just above the item to cause it to disappear completely.
With your remaining text linked and unwanted elements removed from the template, you're nearly there!
7. Save Your Custom Template
Now you have a template with your own logo, images, and links, that also automatically adapts to the eBay listings that you create. When you list an eBay item for sale using this template:
Your listing images replace the template images tagged as "img-1," "img-2," etc.
Your listing title and description replace the title and description in the template, while preserving template text style
You're all done. It's time to save your template and use it.
Click "Save" → "Save As" in the navigation bar. Give your template a name, then select the category you'll be using this template with.
Your custom version of the template, now saved, represents your own brand.
Now whenever you list an item in that category, you'll be able to choose your new template in the listing form.
Finding All of Your Customized Templates
To see all of your customized templates at once, perform these steps:
In your inkFrog account, click "Templates" → "Designer Templates" to enter the templates area.
Click "Private" at the upper-right of the templates page to see a list of your customized templates.
You can re-open any of your customized templates for editing by clicking on the edit button at its lower-left, or delete a customized template by clicking on the trash can icon at its lower right.
Custom Templates Make it Easy to Maintain Thousands of Listings
You can customize any number of our designer templates any number of times—to build a library of templates that you can use for all of your products and for every occasion.
Best of all, once you begin to use custom templates for your listings, they're dynamically linked. Uou can edit the appearance of multiple listings at once just by visiting your private library and editing the template(s) that they were listed with.
Changes that you make this way will automatically update all of your linked eBay listings, providing a way to quickly and easily tailor and maintain the appearances of all of your listings—with a minimum of work.
What are you waiting for? It's time to get busy customizing your own templates!
Share this article:


Join the Newsletter
Get started for free today!
Try it free
Join the 200,000+
using inkFrog!